auto_screenshot_translate 0.0.11  auto_screenshot_translate: ^0.0.11 copied to clipboard
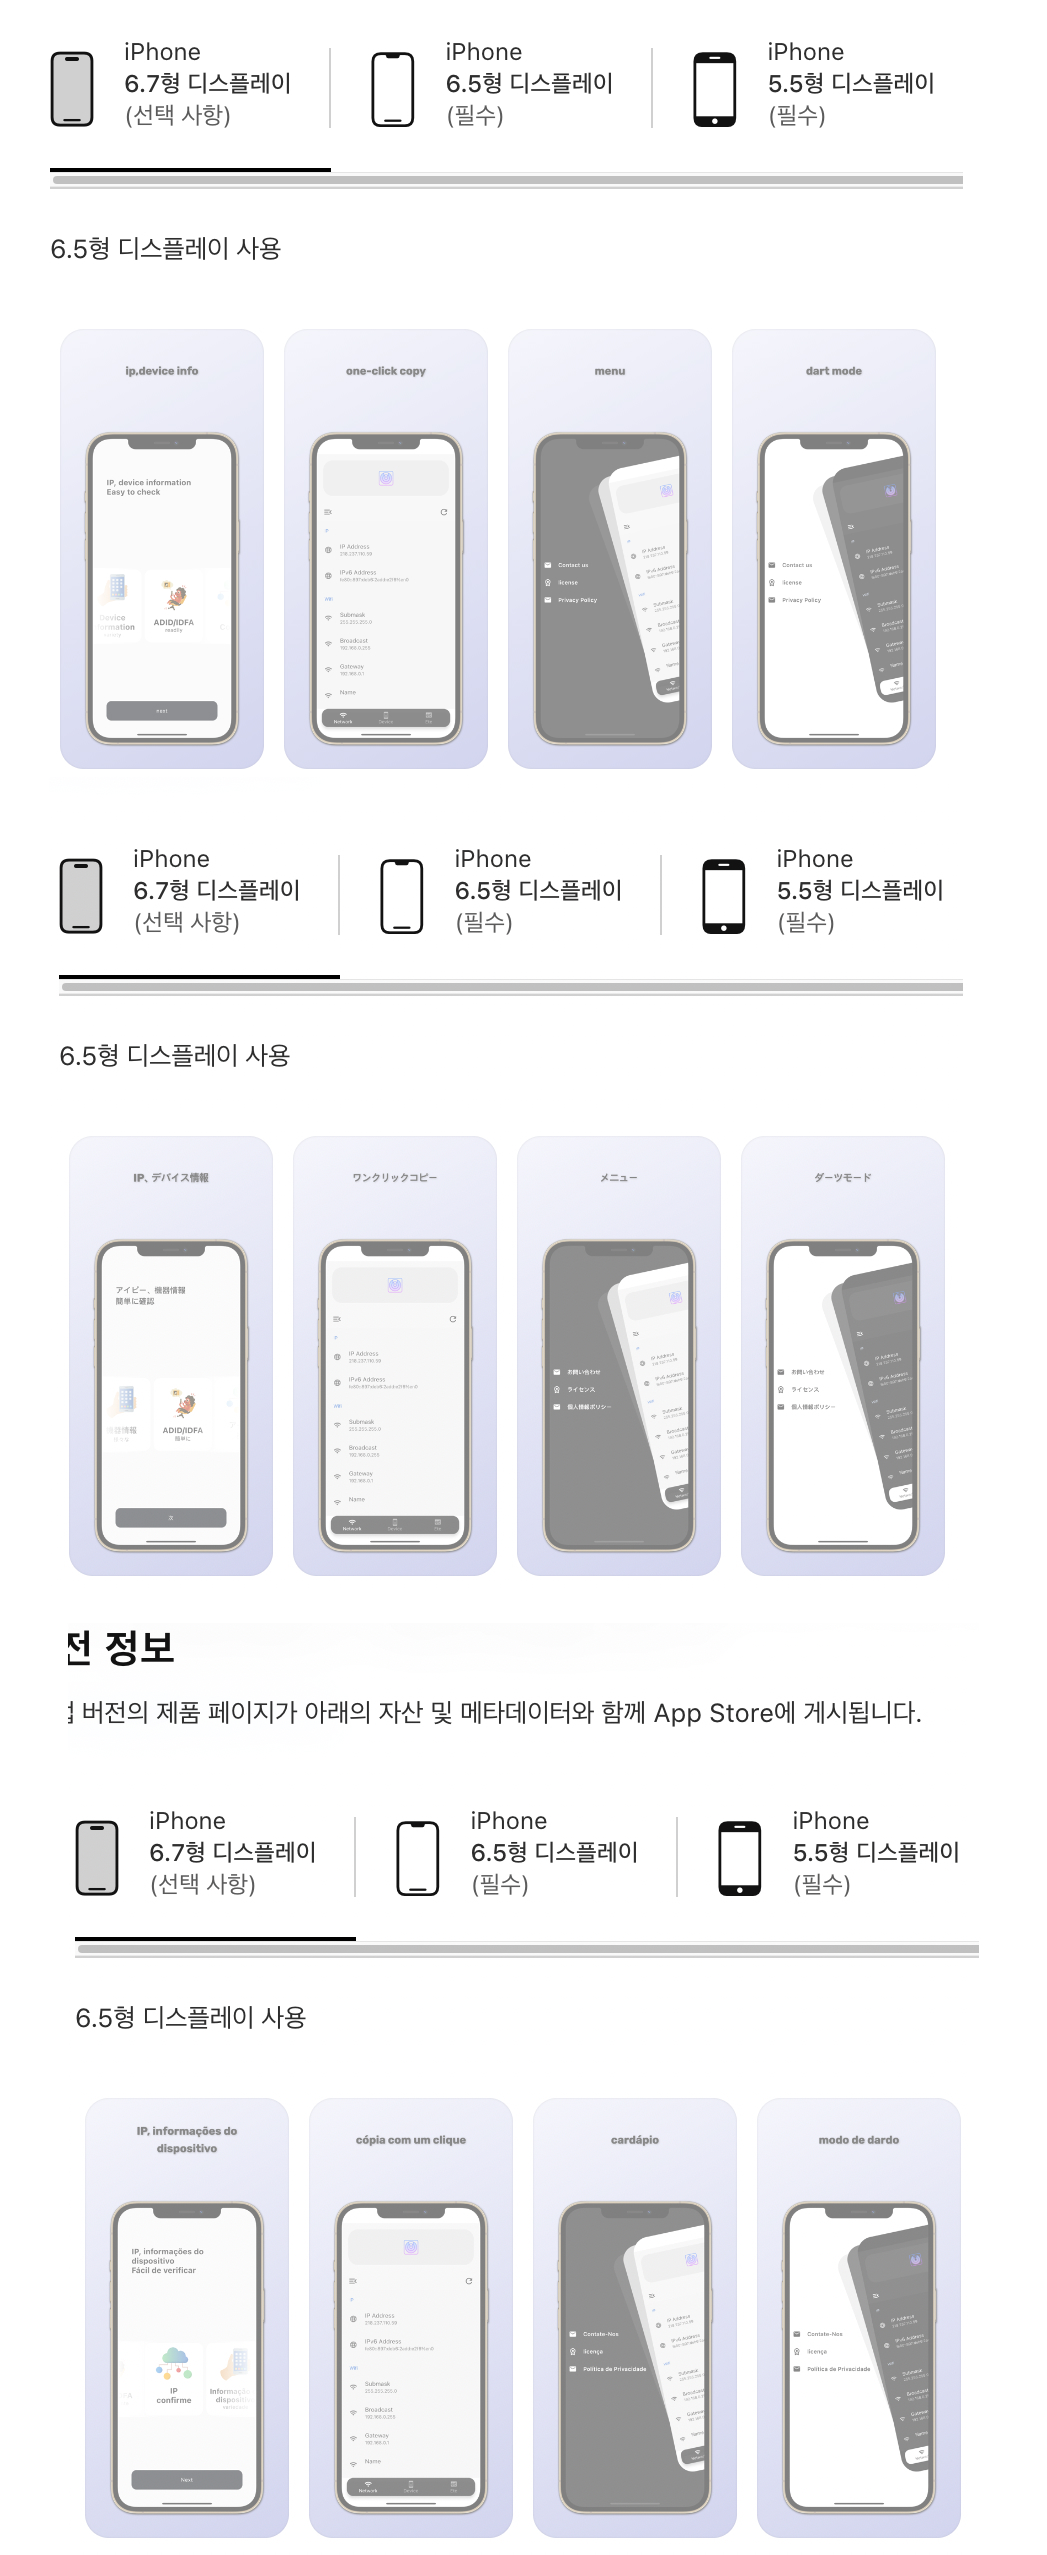
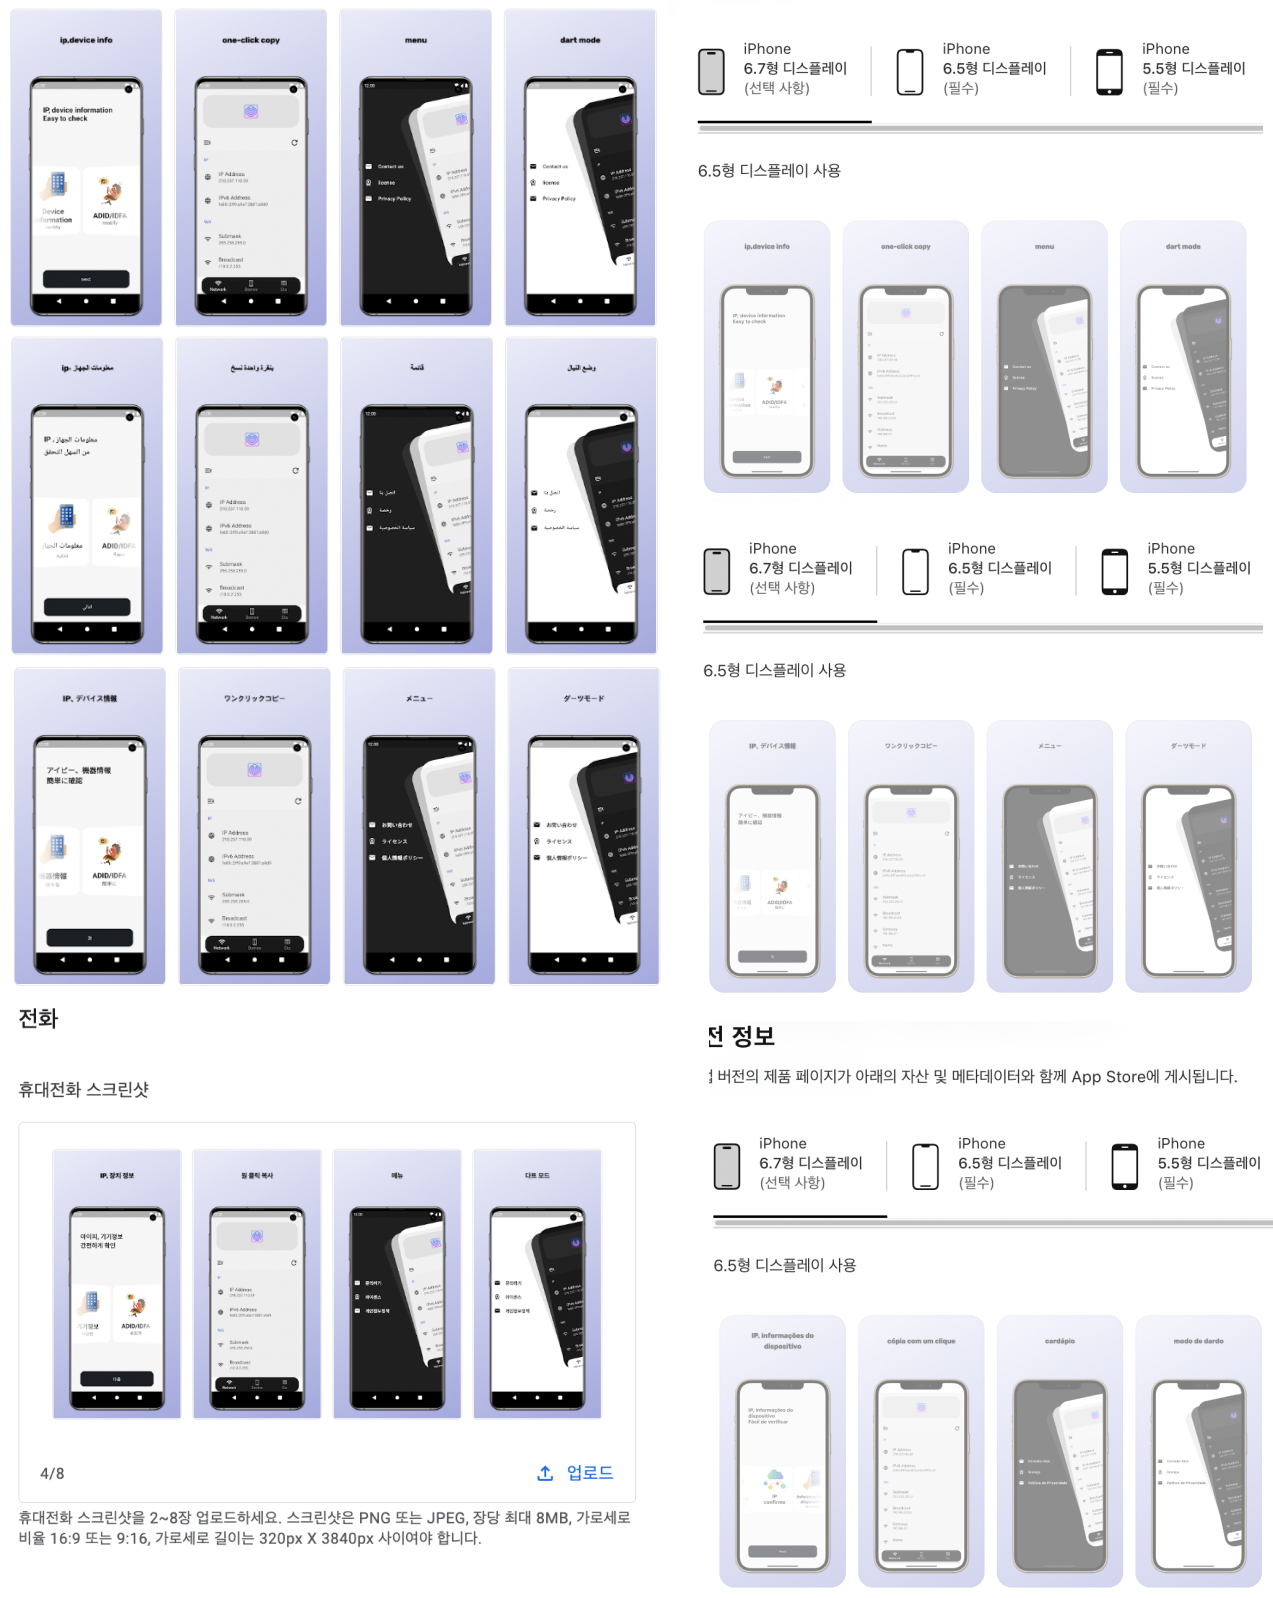
A library that screenshots by language and then creates and distributes store images by language.
Auto App Translate #
A library that screenshots by language and then creates and distributes store images by language.
How to Use? #
0. prepare #
The following libraries must be set up to apply this library
1. Setup the config file #
dev_dependencies:

   flutter_driver:
    sdk: flutter
   emulators: ^0.4.10
   auto_screenshot_translate:
   test: ^1.17.12
1. create android / ios emulator #
it should be made to fit the size of the store. please refer this link
android #
- open android studio
- tools - Device Manager - Create Device - New Hardware Profile
- Samsung Galaxy S10
- Device Name: Samsung Galaxy S10
- Screen - Resolution: 1440 x 3040
- click next until "Verify Configuration" step
- click "Show Advanced Settings"
- Emulated Performance - Boot option: Cold Boot
- Memory and Storage - Internal Storage: more then 2000MB
- nexus_9
- Device Name: nexus_9
- Screen - Resolution: 1536 x 2048
- click next until "Verify Configuration" step
- click "Show Advanced Settings"
- Emulated Performance - Boot option: Cold Boot
- Memory and Storage - Internal Storage: more then 2000MB
- Samsung Galaxy S10
ios #
- open xcode
- window in the menu bar
- click "devices and simulators"
- click "Simulator" in the top left
- click "+" in the bottom left
- add
- iPhone 8
- iPhone 8 Plus
- iPad Pro (12.9-inch) (5rd generation)
- iPhone 14 Pro Max
2. set the gitingore. #
- Because there are hundreds of images, you need to exclude those images from git.
/auto_translation/screenshots/
/auto_translation/framed/
/auto_translation/metadata/
3. Set the scene of the screenshot in the app #
- before taking a screenshot, you need to set which screen to take a screenshot.
1. download text_drive.zip file, and put it in the project root directory. #
-
Please set the part you want to screenshot and insert the screenshot code. Please refer to the official document for details.
2. create "auto_translate" directory in the project root directory.
#
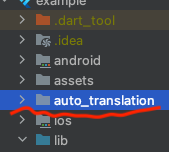
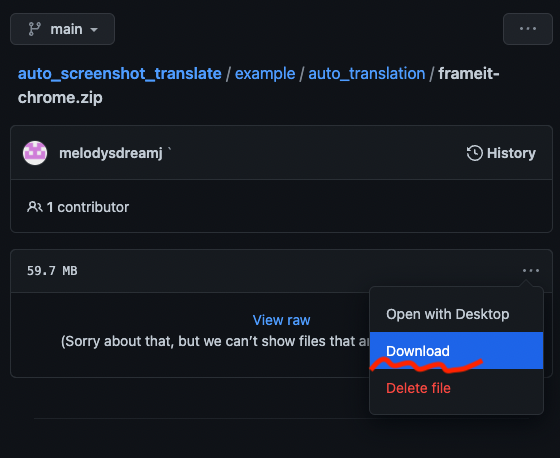
3. download frameit-chrome.zip folder, and put it in the "auto_translate" directory. #
4. create "screenshots/frameit.yaml" to auto_translate directory. #
# Optional config to further customize frameit_chrome

# Rewriting file name patterns.
rewrite:
   - pattern: 'samsung-galaxy-s10-plus'
     replace: 'samsungapps-samsung-galaxy-s10-plus'
     action: duplicate

# Customizing images.
images:
   samsungapps-samsung-galaxy-s10-plus:
      cropHeight: 2600
      device: 'samsung-galaxy-s10-plus'
      previewLabel: 'Samsung App Store'
      css: |
         .scene {
           background: rgb(34,193,195);
           background: linear-gradient(0deg, rgba(34,193,195,1) 0%, rgba(253,187,45,1) 100%);
         }
         .frame-bg-shadow {
             filter: drop-shadow(25px 25px 15px blue);
         }
5. install dart 2.12 #
1. open the terminal and enter the following.
brew install dart@2.12
brew info dart@2.12
export PATH="/opt/homebrew/opt/dart@2.12/libexec/bin:$PATH"
6. create "make_screenshots.dart" file in the "auto_translate" directory and write the following code. #
import 'dart:io';

import 'package:emulators/emulators.dart';
import 'package:auto_screenshot_translate/callable/core_my/my_language_code/entity/flutter_support_language_for_screenshot.dart';

Future<void> main() async {
   // Create the config instance
   final emu = await Emulators.build();

   // Shutdown all the running emulators
   await emu.shutdownAll();

   // For each emulator in the list, we run `flutter drive`.
   await emu.forEach([
      'nexus_9',
      'Samsung_Galaxy_S10',
      'iPhone 8 Plus',
      'iPhone 8',
      'iPad Pro (12.9-inch) (5th generation)',
      'iPhone 13 Pro Max',
   ])((device) async {
      for (final c in flutterLocalizeSupportLanguagesForScreenShot) {
         final p = await emu.drive(
            device,
            'test_driver/main.dart',
            config: c,
         );
         stderr.addStream(p.stderr);
         await stdout.addStream(p.stdout);
      }
   });
}
7. Open the terminal in the project root and enter the following to create a screenshots. #
dart auto_translation/make_screenshots.dart
8. you can see the screenshots in the "auto_translation/screenshots" directory.
#

9. remove underbar in the file name of the galaxy screenshots.
#
- create dart file name is "frame_galaxy_remove_under_bar.dart" in the "auto_translate" directory and write the following code.
import 'package:auto_screenshot_translate/auto_screenshot_translate.dart';

Future<void> main() async {
  AutoScreenshotTranslate.removeUnderBarInGalaxy();
}
- run this file in the terminal.
dart auto_translation/frame_galaxy_remove_under_bar.dart
10. prepare screenshot title for generate store images. #
- create dart file name is "frame_prepare.dart" in the "auto_translate" directory and write the following code.
import 'package:auto_screenshot_translate/auto_screenshot_translate.dart';
import 'package:auto_screenshot_translate/callable/core_my/my_screenshot_helper/entity/my_screenshot_info.dart';

Future<void> main() async {
   MyScreenshotInfo myScreenshotInfo = MyScreenshotInfo(
      // not use
      screenshotTitle01: "",
      screenshotTitle02: "",
      screenshotTitle03: "",
      screenshotTitle04: "",
      screenshotTitle05: "",

      // using (screenshot top text)
      screenshotSubTitle01: "",
      screenshotSubTitle02: "",
      screenshotSubTitle03: "",
      screenshotSubTitle04: "",
      screenshotSubTitle05: "",

      // screenshot start language for translate
      screenshotStartLanguageCode: "en",
      googleTranslateApiKey: '',
   );

   AutoScreenshotTranslate.prepareGenerateScreenshotFrame(myScreenshotInfo);
}
- Fill in the screenshotSubTitle0~ with the instructions you want to use and run the code below at the project root terminal.
dart auto_translation/frame_prepare.dart
- after translate, you can see "keyword.strings" file in the auto_translation/screenshots directory.

11. Enter the following command in the project root terminal to generate store images. #
brew install dart@2.12
brew info dart@2.12
export PATH="/opt/homebrew/opt/dart@2.12/libexec/bin:$PATH"
dart auto_translation/frameit-chrome/bin/frameit_chrome.dart
12. You can see that the store image is generated in the "auto_translation/framed" directory as follows. #

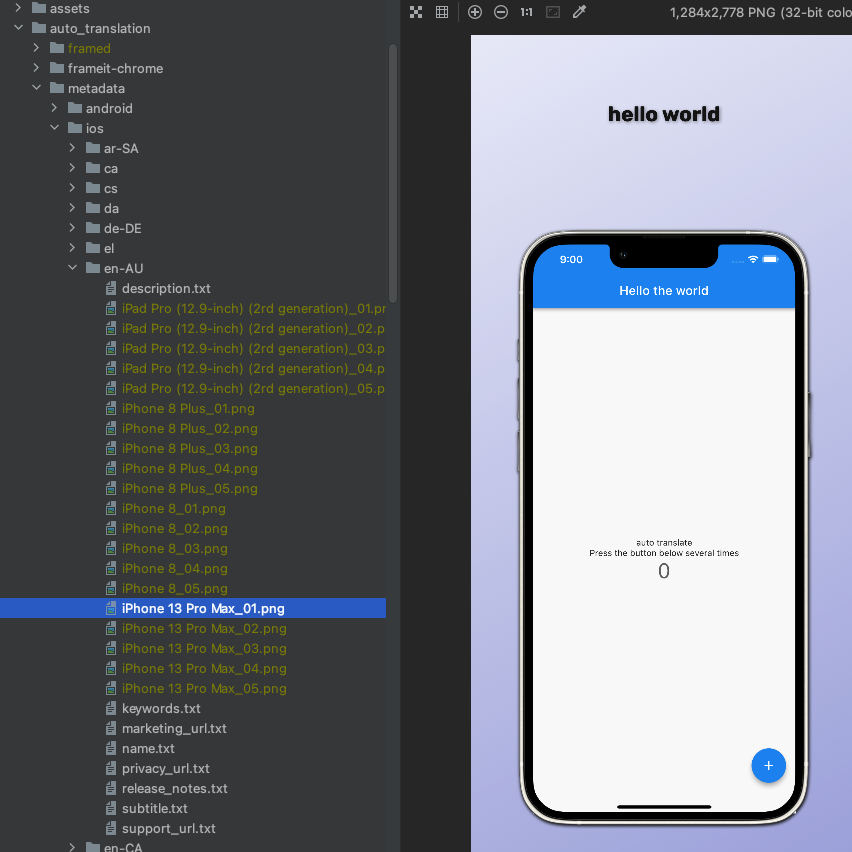
13. Move the generated file to the file structure that fastlane can understand. #
- create dart file name is "framed_distribute.dart" in the "auto_translate" directory and write the following code.
import 'package:auto_screenshot_translate/auto_screenshot_translate.dart';

Future<void> main() async {
  AutoScreenshotTranslate.distributeScreenshotFrameFile();
}
- run this file in the terminal.
dart auto_translation/framed_distribute.dart
- You can see the files that are made of structures that fastlane can understand.
14. deploy to play store and app store. #
- play store #
1. Setup the fastlane config file(android)
please refer to the official document and auto_store_translate library.
2. Add the code below under platform:android do in the android/fastlane/fastfile file.
    lane :metaWithScreenshot do
      upload_to_play_store(
          track: 'internal',
          metadata_path: '../auto_translation/metadata/android',
          skip_upload_changelogs: true,
          release_status: 'draft',
          aab: '../build/app/outputs/bundle/release/app-release.aab',
      )
    end
3. Open the terminal in the android project location and enter the following.
fastlane metaWithScreenshot
4. You will see the translated information in the play store console.

- app store #
1. Setup the fastlane config file(ios)
please refer to the official document.
2. Add the code below under platform:ios do in the ios/fastlane/fastfile file.
   lane :onlyScreenShotOverWrite do
      get_certificates           # invokes cert
      get_provisioning_profile   # invokes sigh
      deliver(
          skip_metadata: true,
          screenshots_path: '../metadata/[프로젝트명]/ios/screenshots',
          overwrite_screenshots: true,
          force: true, # Skip HTMl report verification
          # skip_screenshots: true,
          skip_binary_upload: true,
      )
   end
3. Open the terminal in the ios project location and enter the following.
fastlane onlyScreenShotOverWrite
4. You will see the translated information in the app store connect.
