integration_test_preview 0.1.3  integration_test_preview: ^0.1.3 copied to clipboard
Integration Test Preview has pre-configured methods that allow for faster test deployment for end to end (e2e) test coverage (using Android and iOS platform UIs).
Integration Test Preview has pre-configured methods that allow for faster test deployment for end to end (e2e) test coverage (using Android and iOS platform UIs). This package is based upon the Integration Test Helper and Device Preview packages, and does much more with the combination of the two of them. It also allows for specific device size preview screenshots for the app stores, generated locally in your project path.

Features #
Integration Test Preview Example #
When running a test using a IntegrationTestPreview subclass, you can assign the devices that you want to test against (and take screenshots for). The following is an example of how you can test all your features end to end on multiple screen types:
import 'package:flutter_test/flutter_test.dart';
import 'package:integration_test_preview/integration_test_binding.dart';
import 'package:device_frame/src/devices/devices.dart';
import 'package:device_frame/src/info/info.dart';

import 'package:example/main.dart' as app;
import 'app_feature_groups.dart';

void main() async {

    const minutesPerDevice = 3;
    final List<DeviceInfo> testDevices = [
        Devices.ios.iPhone12, Devices.android.samsungGalaxyNote20, Devices.ios.iPadPro11Inches,
    ];
    final totalExpectedDuration = Duration(minutes: testDevices.length * minutesPerDevice);
    final binding = IntegrationTestPreviewBinding.ensureInitialized();

    testWidgets('Testing end to end multi-screen integration', (WidgetTester tester) async {

          final main = app.setupMainWidget();

          final integrationTestGroups = ScreenIntegrationTestGroups(binding);
          await integrationTestGroups.initializeDevices(testDevices, state: ScreenshotState.RESPONSIVE);
          await integrationTestGroups.initializeTests(tester, main);

      }, timeout: Timeout(totalExpectedDuration)
    );

}
Reviewing the screenshot results #
The screenshots generated using the Screenshot State, by default are written to the screenshots directory, this is possible using the test_driver/app_features_test.dart custom integrationDriver example below. The custom integrationDriver implementation allows for the generated screenshots to be displayed in an HTML page by the name of screenshots.html in your project directory.
import 'dart:io';
import 'package:integration_test_preview/integration_test_driver.dart';

Future<void> main() => integrationDriver(
    clearScreenshots: true, onScreenshot: (String screenshotPath, List<int> screenshotBytes) async {

        final File image = File(screenshotPath);
        print(image);

        final dir = image.parent;
        if(!await dir.exists()) await dir.create(recursive: true);

        image.writeAsBytesSync(screenshotBytes);

        return true;

    }
);
After the screenshots.html file is generated, the path for your screenshots.html is displayed in the console where you can open it in a browser:
Device Previews: /Users/your/project/path/screenshots.html
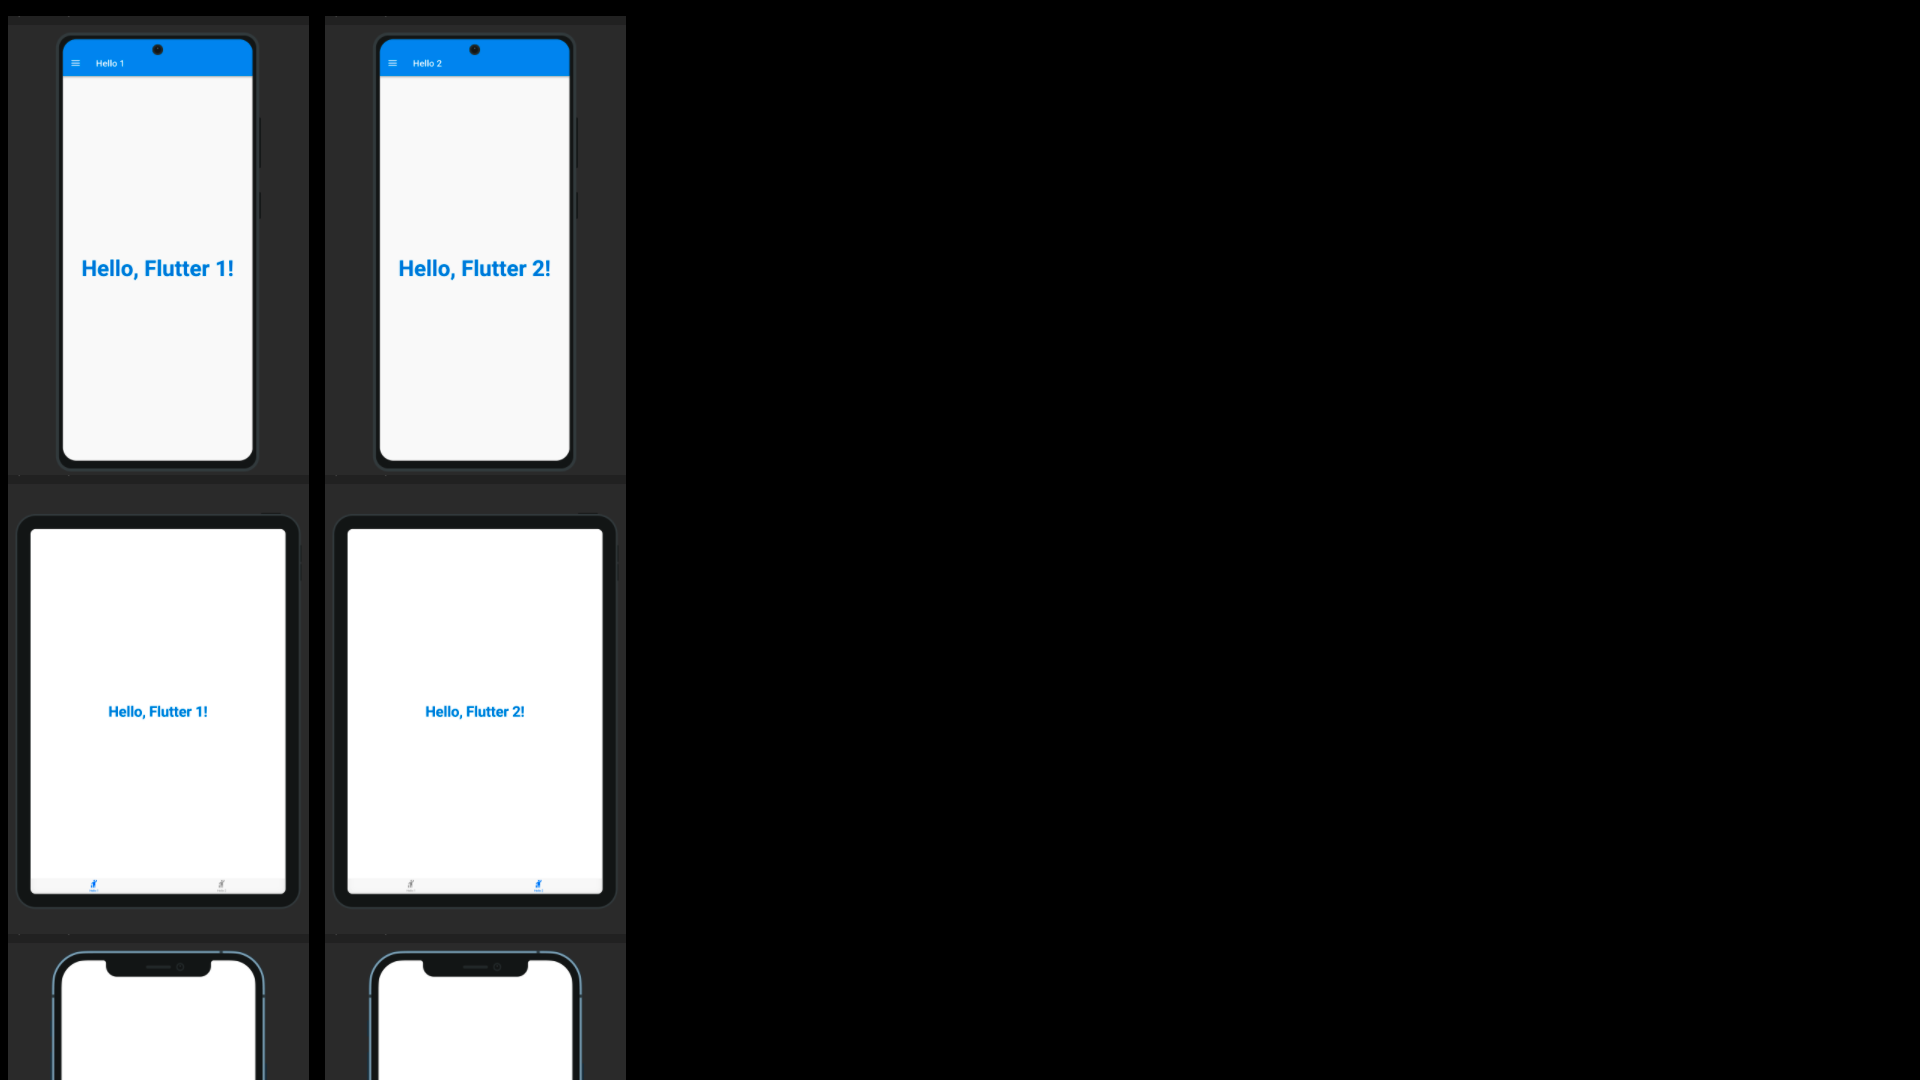
This is a preview of the screenshots gallery that is generated in screenshots.html:

Getting started #
Note: This example uses another one of our packages. It's called the drawer_manager package, and can be found here for more details on how it works.
Install Provider, Drawer Manager & Integration Test Preview #
  flutter pub get provider
  flutter pub get drawer_manager
  flutter pub get integration_test_preview
Or install Provider, Drawer Manager & Integration Test Preview (in pubspec.yaml) #
    ...

dependencies:
  flutter:
    sdk: flutter

    ...

  provider: 6.0.2
  drawer_manager: 0.0.4

dev_dependencies:

  flutter_test:
    sdk: flutter

  integration_test:
    sdk: flutter

  integration_test_preview: <latest_version>
Add Integration Test Driver file (test_driver/app_features_test.dart) #
import 'dart:io';
import 'package:integration_test_preview/integration_test_driver.dart';

Future<void> main() => integrationDriver(
    clearScreenshots: true, onScreenshot: (String screenshotPath, List<int> screenshotBytes) async {

        final File image = File(screenshotPath);
        print(image);

        final dir = image.parent;
        if(!await dir.exists()) await dir.create(recursive: true);

        image.writeAsBytesSync(screenshotBytes);

        return true;

    }
);
Usage #
The following file examples can be combined together (as a Hello World for the Integration Test Preview) to demonstrate how the package works. First you create a way to switch between platforms, a base Widget file that can switch between platforms (Android/iOS/etc.), create a driver file for saving to the screenshots directory, an IntegrationTestPreview subclass for grouping Widget tests against the grouped widgets.
Create platforms file (lib/platforms.dart) #
import 'package:flutter/cupertino.dart';
import 'package:flutter/material.dart';

class PlatformApp extends PlatformWidget {

  PlatformApp({
    Key? key,
    required MaterialApp androidApp,
    required CupertinoApp iosApp,
    required TargetPlatform defaultPlatform,
  }) : super(key: key,
      androidBuilder: (BuildContext context) => androidApp,
      iosBuilder:  (BuildContext context) => iosApp
    ) {
      PlatformWidget.setPlatform(defaultPlatform);
  }

}

class PlatformWidget extends StatefulWidget {

  static TargetPlatform? _currentPlatform;

  static get platform {
      if(_currentPlatform == null) {
        return TargetPlatform.android;
      }
      return _currentPlatform;
  }

  static get isAndroid {
      return _currentPlatform == TargetPlatform.android;
  }

  static get isIOS {
      return _currentPlatform == TargetPlatform.iOS;
  }

  static void setPlatform(TargetPlatform platform) {
      _currentPlatform = platform;
  }

  static void reassembleApplication() {
      WidgetsBinding.instance!.reassembleApplication();
  }

  const PlatformWidget({
    Key? key,
    required this.androidBuilder,
    required this.iosBuilder,
  }) : super(key: key);

  final WidgetBuilder androidBuilder;
  final WidgetBuilder iosBuilder;

  @override
  State<PlatformWidget> createState() => _PlatformWidgetState();
}

class _PlatformWidgetState extends State<PlatformWidget> {
  @override
  Widget build(context) {
    switch (PlatformWidget._currentPlatform) {
      case TargetPlatform.android:
        return widget.androidBuilder(context);
      case TargetPlatform.iOS:
        return widget.iosBuilder(context);
      default:
        assert(false, 'Unexpected platform ${PlatformWidget._currentPlatform}');
        return Container();
    }
  }
}
Create hello file (lib/hello.dart) #
import 'package:flutter/material.dart';

class HelloPage extends StatelessWidget {

  final int position;

  const HelloPage({Key? key, required this.position}) : super(key: key);

  @override
  Widget build(BuildContext context) {
    return Center(
      child: Text(
        'Hello, Flutter $position!',
        key: Key('hello-page-text-$position'),
        textAlign: TextAlign.center,
        style: const TextStyle(
            color: Color(0xff0085E0),
            fontSize: 48,
            fontWeight: FontWeight.bold
        )
      ),
    );
  }
}
Create main file (lib/main.dart) #
import 'package:flutter/cupertino.dart';
import 'package:flutter/material.dart';
import 'package:provider/provider.dart';
import 'package:drawer_manager/drawer_manager.dart';

import 'platforms.dart';
import 'hello.dart';

void main() {
  runApp(setupMainWidget());
}

Widget setupMainWidget() {
  WidgetsFlutterBinding.ensureInitialized();
  return const MyApp();
}

class MyApp extends StatelessWidget {
  const MyApp({Key? key}) : super(key: key);

  @override
  Widget build(BuildContext context) {
    return ChangeNotifierProvider<DrawerManagerProvider>(
        create: (_) => DrawerManagerProvider(),
        child: PlatformApp(
            defaultPlatform: PlatformWidget.platform,
            androidApp: const MaterialApp(home: MyHomePage()),
            iosApp: const CupertinoApp(
                theme: CupertinoThemeData(brightness: Brightness.light),
                home: MyHomePage(),
            )
        )
      );
  }
}

class MyHomePage extends StatelessWidget {

  const MyHomePage({Key? key}) : super(key: key);

  String _getTitle(int index) {
      switch (index) {
        case 0: return 'Hello 1';
        case 1: return 'Hello 2';
        default: return '';
      }
  }

  Widget _getTitleWidget() {
    return Consumer<DrawerManagerProvider>(builder: (context, dmObj, _) {
      return Text(
        _getTitle(dmObj.selection),
        key: const Key('app-bar-text')
      );
    });
  }

  Widget _buildAndroidHomePage(BuildContext context) {

    final drawerSelections = [
      const HelloPage(position: 1),
      const HelloPage(position: 2),
    ];

    final manager = Provider.of<DrawerManagerProvider>(context, listen: false);

    return Scaffold(
        appBar: AppBar(title: _getTitleWidget()),
        body: manager.body,
        drawer: DrawerManager(
          context,
          drawerElements: [
            const DrawerHeader(
              decoration: BoxDecoration(color: Colors.blue),
              child: Padding(
                padding: EdgeInsets.only(bottom: 20),
                child: Icon(
                  Icons.account_circle,
                  color: Colors.blueGrey,
                  size: 96,
                ),
              ),
            ),
            DrawerTile(
              key: const Key('drawer-hello-1'),
              context: context,
              leading: const Icon(Icons.hail_rounded),
              title: Text(_getTitle(0)),
              onTap: () async {
                // RUN A BACKEND Hello, Flutter OPERATION
              },
            ),
            DrawerTile(
              key: const Key('drawer-hello-2'),
              context: context,
              leading: const Icon(Icons.hail_rounded),
              title: Text(_getTitle(1)),
              onTap: () async {
                // RUN A BACKEND Hello, Flutter OPERATION
              },
            )
          ],
          tileSelections: drawerSelections,
        ));
    }

  Widget _buildIosHomePage(BuildContext context) {

    return CupertinoTabScaffold(
        tabBar: CupertinoTabBar(
            items: [
                BottomNavigationBarItem(
                    label: _getTitle(0),
                    icon: const Icon(Icons.hail_rounded),
                ),
                BottomNavigationBarItem(
                    label: _getTitle(1),
                    icon: const Icon(Icons.hail_rounded),
                ),
            ],
        ),
        // ignore: avoid_types_on_closure_parameters
        tabBuilder: (BuildContext context, int index) {
            switch (index) {
            case 0: return CupertinoTabView(
                    builder: (context) => const HelloPage(position: 1),
                );
            case 1: return CupertinoTabView(
                    builder: (context) => const HelloPage(position: 2),
                );
            default:
                assert(false, 'Unexpected tab');
                return Container();
            }
        },
    );
  }

  @override
  Widget build(context) {
    return PlatformWidget(
      androidBuilder: _buildAndroidHomePage,
      iosBuilder: _buildIosHomePage,
    );
  }

}
Import Flutter Test & Integration Test Preview (in integration_test/app_feature_groups.dart) #
    ...
import 'dart:io';
import 'package:flutter/cupertino.dart';
import 'package:flutter/material.dart';
import 'package:flutter_test/flutter_test.dart';
import 'package:device_frame/src/info/info.dart';
import 'package:integration_test_preview/integration_test_preview.dart';

import 'package:example/platforms.dart';
Subclass IntegrationTestPreview (in integration_test/app_feature_groups.dart) #
The Integration Test Preview supports platform specific implementations, for methods like the showHelloFlutter method. This method uses the Drawer for Android and accomodates the Android environment UI interations. And uses the Tab Bar for iOS and accomodates the iOS environment UI interations.
class ScreenIntegrationTestGroups extends IntegrationTestPreview {

    ScreenIntegrationTestGroups(binding) : super(binding);

    // ...

    @override
    Future<void> setupInitialData() async {
        // ...
    }

    @override
    Future<BuildContext> getBuildContext() async {
        if(await isPlatformAndroid()) {
          final elementType = find.byType(MaterialApp);
          return tester.element(elementType);
        } else {
          final elementType = find.byType(CupertinoApp);
          return tester.element(elementType);
        }
    }

    @override
    Future<void> toggleDeviceUI(DeviceInfo device) async {
        PlatformWidget.setPlatform(device.identifier.platform);
    }

    @override
    Future<void> testDeviceEndToEnd(DeviceInfo device) async {

        await waitForUI(durationMultiple: 2);
        await testHelloFlutterForDevice(device);

    }

    Future<void> showHelloFlutter({required int position}) async {
        print('Showing Hello, Flutter $position!');
        if(PlatformWidget.isAndroid) {
            await tapForTooltip('Open navigation menu');
            await tapForKey('drawer-hello-$position');
        } else {
            await tapWidget('Hello $position');
        }
        await waitForUI();
    }

    Future<void> setupScreenshot(String fileName, DeviceInfo device) async {
        String platformType = PlatformWidget.isAndroid ? 'android' : 'ios';
        String devicePath = device.identifier.name.replaceAll('-', '_');
        String screenshotPath = 'screenshots/$platformType/$devicePath/$fileName.png';
        print('Setting up screenshot: $screenshotPath');
        await takeScreenshot(screenshotPath);
    }

    Future<void> verifyAppBarText(String text) async {

        if(PlatformWidget.isAndroid) {
            await verifyTextForKey('app-bar-text', text);
        }

    }

    Future<void> testHelloFlutterScreenWithIndex(int index, DeviceInfo device) async {
        await showHelloFlutter(position: index);
        await verifyAppBarText('Hello $index');
        await verifyTextForKey('hello-page-text-$index', 'Hello, Flutter $index!');
        await setupScreenshot('hello_flutter_$index', device);
    }

    Future<void> testHelloFlutterForDevice(DeviceInfo device) async {
        await testHelloFlutterScreenWithIndex(1, device);
        await testHelloFlutterScreenWithIndex(2, device);
    }

    // ...

}
Setup IntegrationTestPreview Subclass (in integration_test/app_features.dart) #
import 'package:flutter_test/flutter_test.dart';
import 'package:device_frame/src/info/info.dart';
import 'package:device_frame/src/devices/devices.dart';
import 'package:integration_test_preview/integration_test_binding.dart';

import 'package:example/main.dart' as app;
import 'app_feature_groups.dart';

void main() async {

    const minutesPerDevice = 3;
    final List<DeviceInfo> testDevices = [
        Devices.ios.iPhone12, Devices.android.samsungGalaxyNote20, Devices.ios.iPadPro11Inches,
    ];
    final totalExpectedDuration = Duration(minutes: testDevices.length * minutesPerDevice);
    final binding = IntegrationTestPreviewBinding.ensureInitialized();

    testWidgets('Testing end to end multi-screen integration', (WidgetTester tester) async {

          final main = app.setupMainWidget();

          final integrationTestGroups = ScreenIntegrationTestGroups(binding);
          await integrationTestGroups.initializeDevices(testDevices, state: ScreenshotState.RESPONSIVE);
          await integrationTestGroups.initializeTests(tester, main);

      }, timeout: Timeout(totalExpectedDuration)
    );

}
Run Driver on IntegrationTestPreview Subclass (using integration_test/app_features.dart) #
flutter drive -t integration_test/app_features.dart
This is a preview of the screenshots gallery that is generated:

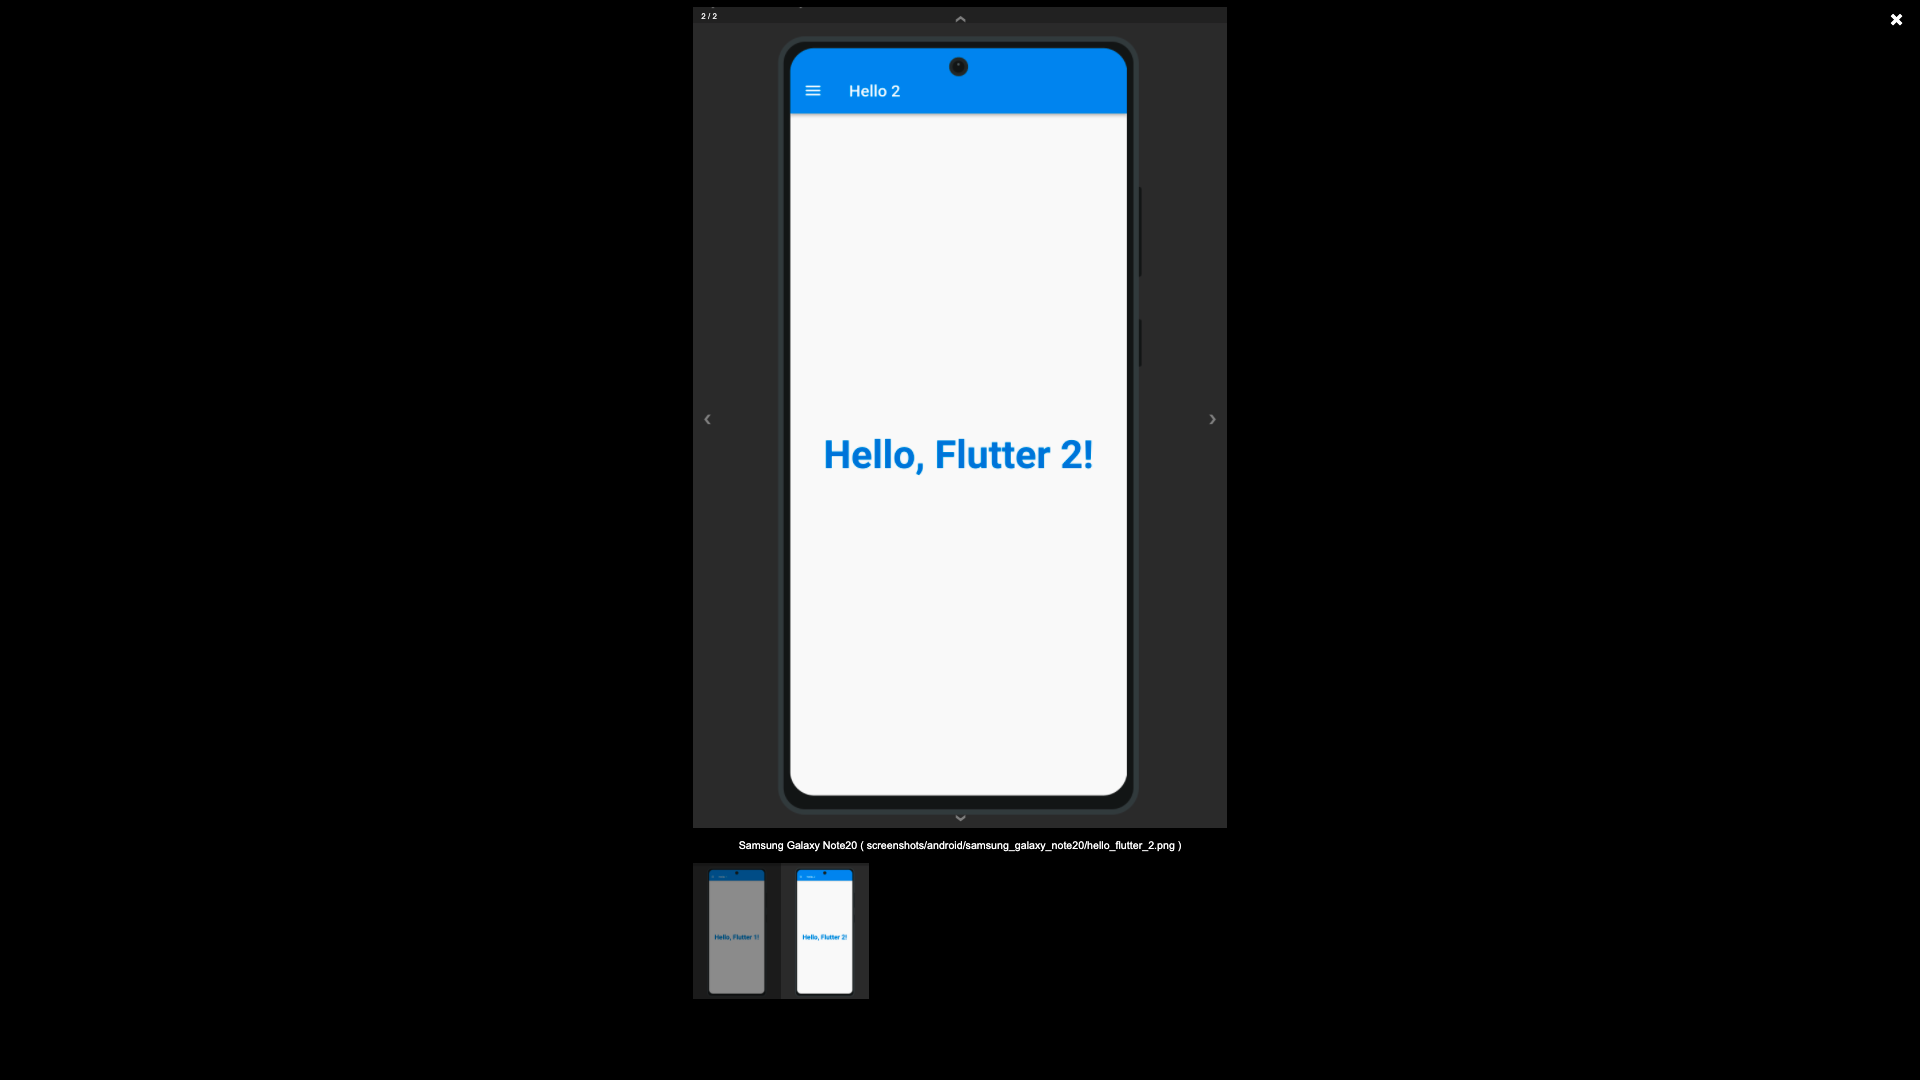
And this is a preview of the navigation slides (shown after clicking a screenshot):

There are keyboard hotkeys for the navigation slides:
- ← Moves to previous screenshot
- → Moves to next screenshot
- ↑ Moves to previous device (screenshot row)
- ↓ Moves to next device (screenshot row)
Note: The navigation slides circularly cycle, so on the first screenshot ← goes to the last screenshot.
Additional information #
Alternatively, you can run the example #
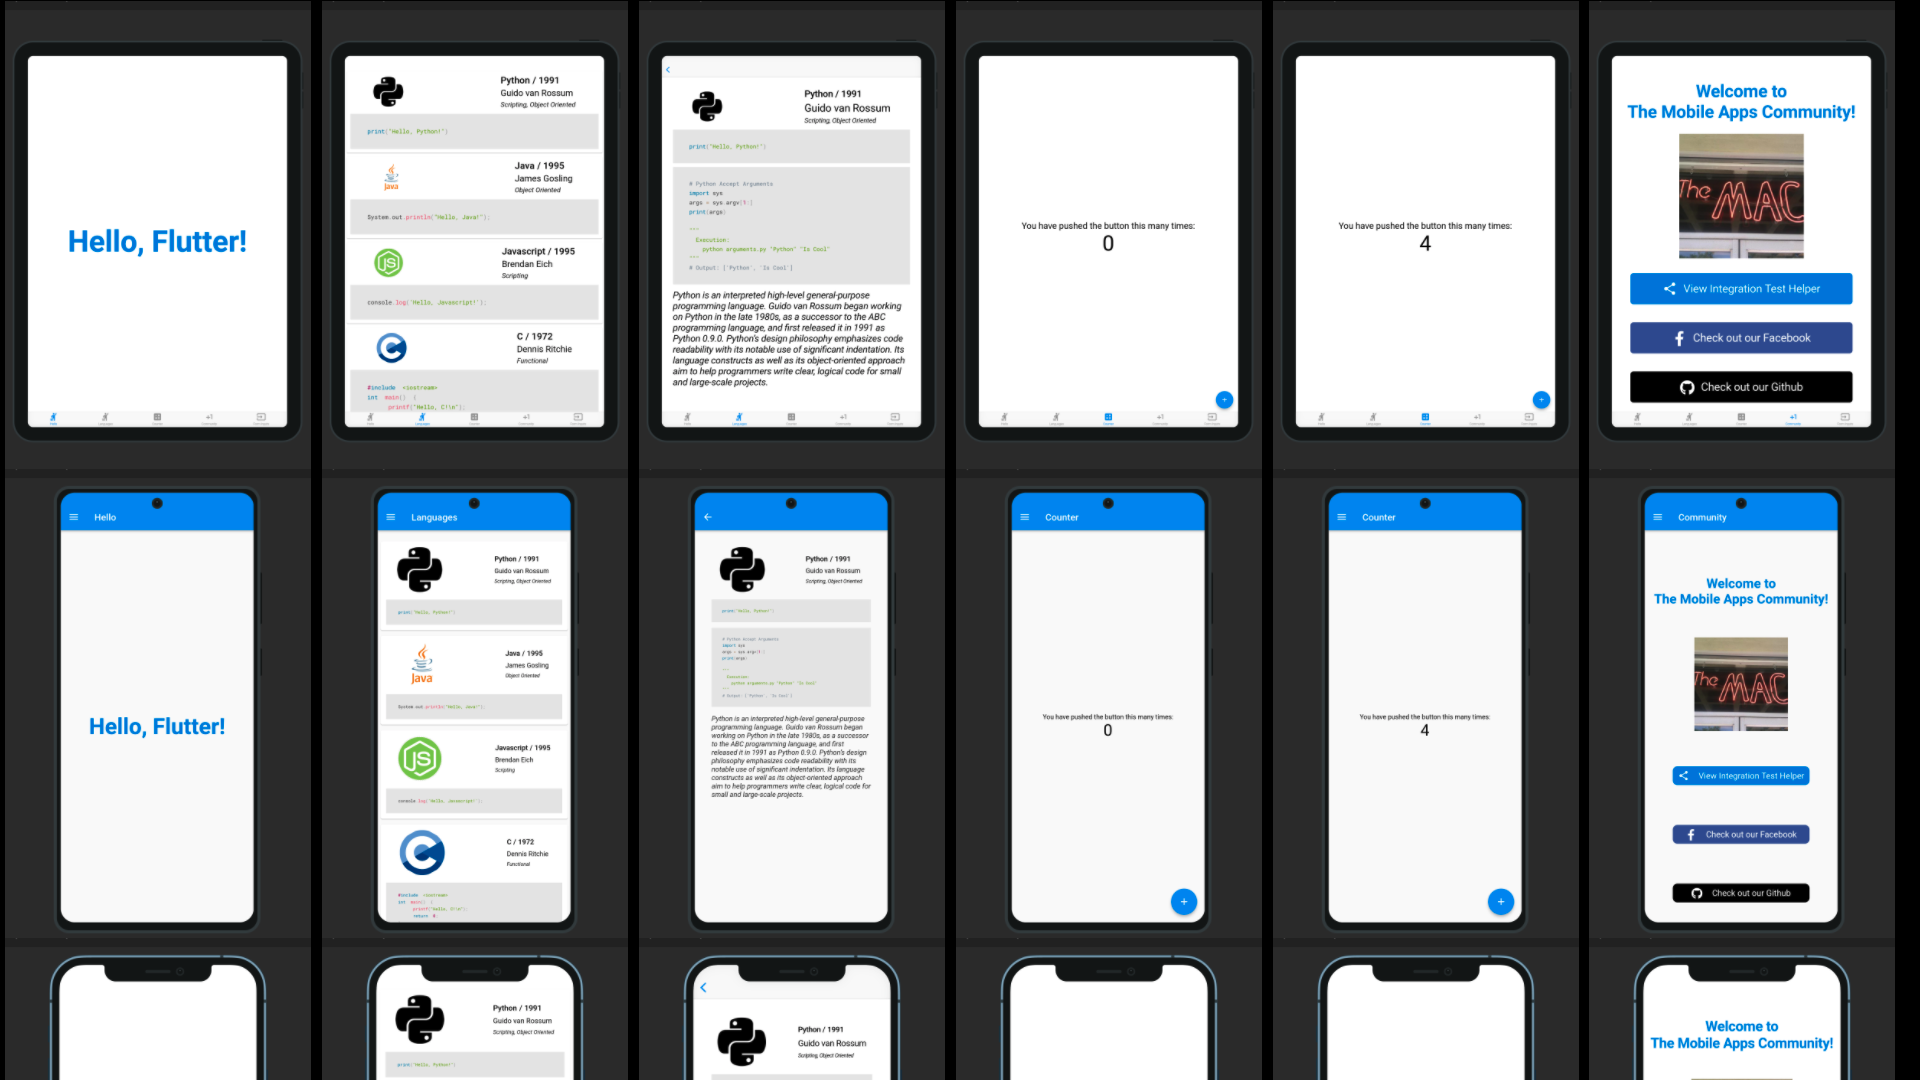
The example project has 5 screens that have grouped integration tests for each screen:
Package Support #
To contribute to this repo, take a look at the SUPPORT.md file.
Package Documentation #
To view the documentation on the package, follow this link
