flexible_mobile_scanner 1.0.0  flexible_mobile_scanner: ^1.0.0 copied to clipboard
A fork of mobile_scanner with more flexible options - scanWindowBuilder and cameraPreviewBuilder.
flexible_mobile_scanner #
A fork of mobile_scanner with more flexible options: scanWindowBuilder and cameraPreviewBuilder.
Features Supported #
See the example app for detailed implementation information.
| Features | Android | iOS | macOS | Web |
|---|---|---|---|---|
| analyzeImage (Gallery) | ✔️ | ✔️ | ❌ | ❌ |
| returnImage | ✔️ | ✔️ | ❌ | ❌ |
| scanWindow | ✔️ | ✔️ | ❌ | ❌ |
| barcodeOverlay | ✔️ | ✔️ | ❌ | ❌ |
Platform Support #
| Android | iOS | macOS | Web | Linux | Windows |
|---|---|---|---|---|---|
| ✔ | ✔ | ✔ | ✔ | ❌ | ❌ |
Platform specific setup #
Android #
This packages uses the bundled version of MLKit Barcode-scanning for Android. This version is more accurate and immediately available to devices. However, this version will increase the size of the app with approximately 3 to 10 MB. The alternative for this is to use the unbundled version of MLKit Barcode-scanning for Android. This version is older than the bundled version however this only increases the size by around 600KB.
To use this version you must alter the mobile_scanner gradle file to replace com.google.mlkit:barcode-scanning:17.0.2 with com.google.android.gms:play-services-mlkit-barcode-scanning:18.0.0. Keep in mind that if you alter the gradle files directly in your project it can be overriden when you update your pubspec.yaml. I am still searching for a way to properly replace the module in gradle but have yet to find one.
You can read more about the difference between the two versions here.
iOS #
Add the following keys to your Info.plist file, located in NSCameraUsageDescription - describe why your app needs access to the camera. This is called Privacy - Camera Usage Description in the visual editor.
If you want to use the local gallery feature from image_picker NSPhotoLibraryUsageDescription - describe why your app needs permission for the photo library. This is called Privacy - Photo Library Usage Description in the visual editor.
Example,
<key>NSCameraUsageDescription</key>
<string>This app needs camera access to scan QR codes</string>

<key>NSPhotoLibraryUsageDescription</key>
<string>This app needs photos access to get QR code from photo library</string>
macOS #
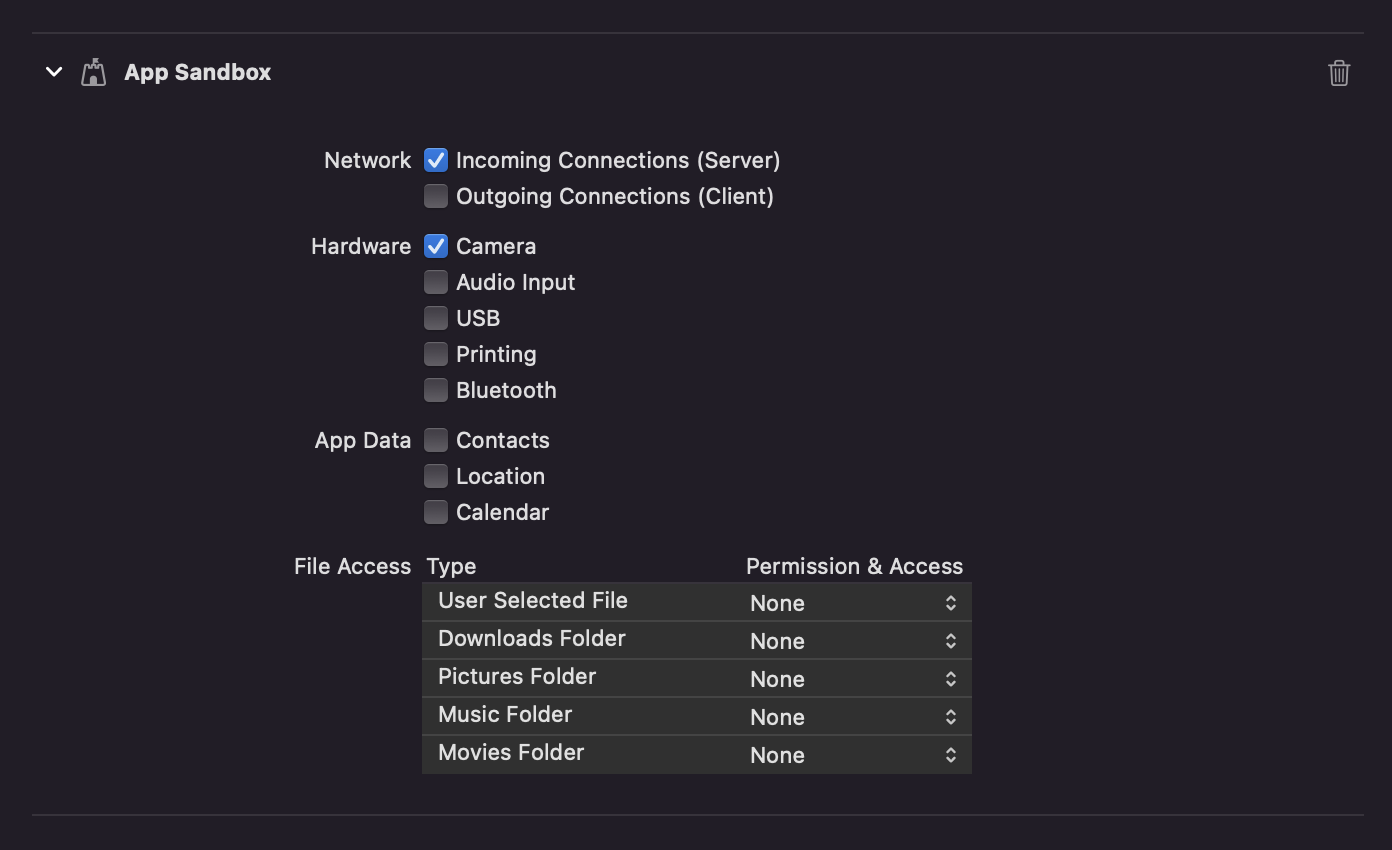
Ensure that you granted camera permission in XCode -> Signing & Capabilities:

Web #
This package uses ZXing on web to read barcodes so it needs to be included in index.html as script.
<script src="https://unpkg.com/@zxing/library@0.19.1" type="application/javascript"></script>
Usage #
Most of the functions are the same as mobile_scanner. Only the different parts are explained below.
💡 Camera Customization with cameraPreviewBuilder #
The cameraPreviewBuilder function provides you with the flexibility to customize the way the camera preview is displayed on the screen. It returns a widget that incorporates the camera view. With the parameters (BuildContext context, Widget texture, MobileScannerArguments arguments), you can manipulate the camera’s display properties as per your requirement.
Example:
cameraPreviewBuilder: (context, texture, arguments) {
  final aspectRatio = arguments.size.width / arguments.size.height;
  final screenWidth = MediaQuery.sizeOf(context).width;
  return ClipRect(
    child: Align(
      heightFactor: visibleAspectRatio,
      alignment: Alignment.topCenter,
      child: SizedBox(
        height: screenWidth / aspectRatio,
        width: screenWidth,
        child: texture,
      ),
    ),
  );
},
In the above example, texture is the widget that displays the camera preview, and by using different widgets like ClipRect, Align, and SizedBox, you can customize its size and position.
🎯 Scan Window Customization with scanWindowBuilder #
The scanWindowBuilder allows you to define a specific rectangular area within which the barcode scanner will detect and decode barcodes. This can be helpful in scenarios where you want to restrict the scanning area for better user experience or due to UI constraints.
Example:
scanWindowBuilder: (arguments) {
  final aspectRatio = arguments.size.width / arguments.size.height;
  final screenWidth = MediaQuery.sizeOf(context).width;
  final previewHeight = screenWidth / aspectRatio;
  return Rect.fromLTWH(
    0,
    0,
    arguments.size.width,
    previewHeight,
  );
},
In this example, the scan window is adjusted based on the screen's width and the preview's aspect ratio to create a scanning area that fills the width of the screen and has a height determined by the preview's aspect ratio.
BarcodeCapture #
The onDetect function returns a BarcodeCapture objects which contains the following items.
| Property name | Type | Description |
|---|---|---|
| barcodes | List | A list with scanned barcodes. |
| image | Uint8List? | If enabled, an image of the scan. |
You can use the following properties of the Barcode object.
| Property name | Type | Description |
|---|---|---|
| format | BarcodeFormat | |
| rawBytes | Uint8List? | binary scan result |
| rawValue | String? | Value if barcode is in UTF-8 format |
| displayValue | String? | |
| type | BarcodeType | |
| calendarEvent | CalendarEvent? | |
| contactInfo | ContactInfo? | |
| driverLicense | DriverLicense? | |
| Email? | ||
| geoPoint | GeoPoint? | |
| phone | Phone? | |
| sms | SMS? | |
| url | UrlBookmark? | |
| wifi | WiFi? | WiFi Access-Point details |

