dart_periphery 0.9.6  dart_periphery: ^0.9.6 copied to clipboard
dart_periphery is a Dart port of the native c-periphery library for Linux Peripheral I/O (GPIO, LED, PWM, SPI, I2C, MMIO and Serial peripheral I/O).
dart_periphery #

Important hint #
Introduction #
dart_periphery is a Dart port of the native c-periphery library for Linux Peripheral I/O (GPIO, LED, PWM, SPI, I2C, MMIO and Serial peripheral I/O). This package is designed for System on Chips (SoCs) such as Raspberry Pi, NanoPi, Banana Pi, and others.
What is c-periphery? #
Abstract from the project web site:
c-periphery is a small C library for
- GPIO,
- LED,
- PWM,
- SPI,
- I2C,
- MMIO (Memory Mapped I/O)
- Serial peripheral I/O
interface access in userspace Linux. c-periphery simplifies and consolidates the native Linux APIs to these interfaces. c-periphery is useful in embedded Linux environments (including Raspberry Pi, BeagleBone, etc. platforms) for interfacing with external peripherals. c-periphery is re-entrant, has no dependencies outside the standard C library and Linux, compiles into a static library for easy integration with other projects, and is MIT licensed
dart_periphery binds the c-periphery library with the help of the dart:ffi mechanism. Nevertheless, dart_periphery tries to be close as possible to the original library. See following documentation. Thanks to Vanya Sergeev for his great job!
Why c-periphery? #
The number of GPIO libraries/interfaces is is shrinking:
- The widely used wiringpi library is deprecated.
- GPIO sysfs is deprecated.
dart_periphery
- GPIO example / API
- I2C example / API
- SPI example / API
- Serial example / API
- PWM example / API
- Led (onboard leds) example / API
- MMIO (Memory Mapped I/O) example / API
Examples #
GPIO #

import 'package:dart_periphery/dart_periphery.dart';
import 'dart:io';

void main() {
  var config = GPIOconfig();
  config.direction = GPIOdirection.gpioDirOut;
  print('Native c-periphery Version :  ${getCperipheryVersion()}');
  print('GPIO test');
  var gpio = GPIO(18, GPIOdirection.gpioDirOut);
  var gpio2 = GPIO(16, GPIOdirection.gpioDirOut;
  var gpio3 = GPIO.advanced(5, config);

  print('GPIO info: ' + gpio.getGPIOinfo());

  print('GPIO native file handle: ${gpio.getGPIOfd()}');
  print('GPIO chip name: ${gpio.getGPIOchipName()}');
  print('GPIO chip label: ${gpio.getGPIOchipLabel()}');
  print('GPIO chip name: ${gpio.getGPIOchipName()}');
  print('CPIO chip label: ${gpio.getGPIOchipLabel()}');

  for (var i = 0; i < 10; ++i) {
    gpio.write(true);
    gpio2.write(true);
    gpio3.write(true);
    sleep(Duration(milliseconds: 200));
    gpio.write(false);
    gpio2.write(false);
    gpio3.write(false);
    sleep(Duration(milliseconds: 200));
  }

  gpio.dispose();
  gpio2.dispose();
  gpio3.dispose();
}
I2C #

import 'package:dart_periphery/dart_periphery.dart';

/// https://wiki.seeedstudio.com/Grove-Barometer_Sensor-BME280/
/// Grove - Temp&Humi&Barometer Sensor (BME280) is a breakout board for Bosch BMP280 high-precision,
/// low-power combined humidity, pressure, and temperature sensor.
void main() {
  // Select the right I2C bus number /dev/i2c-?
  // 1 for Raspbery Pi, 0 for NanoPi (Armbian), 2 Banana Pi (Armbian)
  var i2c = I2C(1);
  try {
    print('I2C info:' + i2c.getI2Cinfo());
    var bme280 = BME280(i2c);
    var r = bme280.getValues();
    print('Temperature [°] ${r.temperature.toStringAsFixed(1)}');
    print('Humidity [%] ${r.humidity.toStringAsFixed(1)}');
    print('Pressure [hPa] ${r.pressure.toStringAsFixed(1)}');
  } finally {
    i2c.dispose();
  }
}

import 'package:dart_periphery/dart_periphery.dart';

/// Grove - Temp&Humi Sensor(SHT31) is a highly reliable, accurate,
/// quick response and integrated temperature & humidity sensor.
void main() {
  // Select the right I2C bus number /dev/i2c-?
  // 1 for Raspbery Pi, 0 for NanoPi (Armbian), 2 Banana Pi (Armbian)
  var i2c = I2C(1);
  try {
    var sht31 = SHT31(i2c);
    print(sht31.getStatus());
    print('Serial number ${sht31.getSerialNumber()}');
    print('Sensor heater active: ${sht31.isHeaterOn()}');
    var r = sht31.getValues();
    print('SHT31 [t°] ${r.temperature.toStringAsFixed(2)}');
    print('SHT31 [%°] ${r.humidity.toStringAsFixed(2)}');
  } finally {
    i2c.dispose();
  }
}
SPI #
import 'package:dart_periphery/dart_periphery.dart';

void main() {
  var spi = SPI(0, 0, SPImode.mode0, 1000000);
  try {
    print('SPI info:' + spi.getSPIinfo());
    var bme280 = BME280.spi(spi);
    var r = bme280.getValues();
    print('Temperature [°] ${r.temperature.toStringAsFixed(1)}');
    print('Humidity [%] ${r.humidity.toStringAsFixed(1)}');
    print('Pressure [hPa] ${r.pressure.toStringAsFixed(1)}');
  } finally {
    spi.dispose();
  }
}
Serial #

import 'package:dart_periphery/dart_periphery.dart';
import 'dart:io';

///
/// [COZIR CO2 Sensor](https://co2meters.com/Documentation/Manuals/Manual_GC_0024_0025_0026_Revised8.pdf)
///
void main() {
  print('Serial test - COZIR CO2 Sensor');
  var s = Serial('/dev/serial0', Baudrate.b9600);
  try {
    print('Serial interface info: ' + s.getSerialInfo());

    // Return firmware version and sensor serial number - two lines
    s.writeString('Y\r\n');
    var event = s.read(256, 1000);
    print(event.toString());

    // Request temperature, humidity and CO2 level.
    s.writeString('M 4164\r\n');
    // Select polling mode
    s.writeString('K 2\r\n');
    // print any response
    event = s.read(256, 1000);
    print('Response ${event.toString()}');
    sleep(Duration(seconds: 1));
    for (var i = 0; i < 5; ++i) {
      s.writeString('Q\r\n');
      event = s.read(256, 1000);
      print(event.toString());
      sleep(Duration(seconds: 5));
    }
  } finally {
    s.dispose();
  }
}
Led #

import 'package:dart_periphery/dart_periphery.dart';
import 'dart:io';

void main() {
  /// Nano Pi power led - see 'ls /sys/class/leds/'
  var led = Led('nanopi:red:pwr');
  try {
    print('Led handle: ${led.getLedInfo()}');
    print('Led name: ${led.getLedName()}');
    print('Led brightness: ${led.getBrightness()}');
    print('Led maximum brightness: ${led.getMaxBrightness()}');
    var inverse = !led.read();
    print('Original led status: ${(!inverse)}');
    print('Toggle led');
    led.write(inverse);
    sleep(Duration(seconds: 5));
    inverse = !inverse;
    print('Toggle led');
    led.write(inverse);
    sleep(Duration(seconds: 5));
    print('Toggle led');
    inverse = !inverse;
    led.write(inverse);
    sleep(Duration(seconds: 5));
    print('Toggle led');
    led.write(!inverse);
  } finally {
    led.dispose();
  }
}
PWM #
Ensure that PWM is correct enabled. e.g. see the following documentation for the Raspberry Pi.
import 'package:dart_periphery/dart_periphery.dart';
import 'dart:io';

void main() {
  var pwm = PWM(0, 0);
  try {
    print(pwm.getPWMinfo());
    pwm.setPeriodNs(10000000);
    pwm.setDutyCycleNs(8000000);
    print(pwm.getPeriodNs());
    pwm.enable();
    print("Wait 20 seconds");
    sleep(Duration(seconds: 20));
    pwm.disable();
  } finally {
    pwm.dispose();
  }
}
MMIO #
Memory Mapped I/O: Turns on a led at pin 18 on a Raspberry Pi using MMIO. This direct register access example is derived from elinux.org.
import 'package:dart_periphery/dart_periphery.dart';
import 'dart:io';

const int bcm2708PeriBase = 0x3F000000; // Raspberry Pi 3
const int gpioBase = bcm2708PeriBase + 0x200000;
const int blockSize = 4 * 1024;

class MemMappedGPIO {
  MMIO mmio;
  MemMappedGPIO(this.mmio);

  // #define INP_GPIO(g) *(gpio+((g)/10)) &= ~(7<<(((g)%10)*3))
  void setPinInput(final int pin) {
    var offset = (pin ~/ 10) * 4;
    var value = mmio[offset];
    value &= (~(7 << (((pin) % 10) * 3)));
    mmio[offset] = value;
  }

  // #define OUT_GPIO(g) *(gpio+((g)/10)) |=  (1<<(((g)%10)*3))
  void setPinOutput(final int pin) {
    setPinInput(pin);
    var offset = (pin ~/ 10) * 4;
    var value = mmio[offset];
    value |= (1 << (((pin) % 10) * 3));
    mmio[offset] = value;
  }

  // #define GPIO_SET *(gpio+7) - sets   bits which are 1 ignores bits which are 0
  void setPinHigh(int pin) {
    mmio[7 * 4] = 1 << pin;
  }

  // #define GPIO_CLR *(gpio+10) - clears bits which are 1 ignores bits which are 0
  void setPinLow(int pin) {
    mmio[10 * 4] = 1 << pin;
  }

  // #define GET_GPIO(g) (*(gpio+13)&(1<<g)) - 0 if LOW, (1<<g) if HIGH
  int getPin(int pin) {
    return mmio[13 * 4] & (1 << pin);
  }
}

void main() {
  // Needs root rights and the gpioBase must be correct!
  // var mmio = MMIO(gpioBase, blockSize);
  var mmio = MMIO.advanced(0, blockSize, '/dev/gpiomem');
  var gpio = MemMappedGPIO(mmio);
  try {
    print(mmio.getMMIOinfo());
    var pin = 18;
    print('Led (pin=18) on');
    gpio.setPinOutput(pin);
    gpio.setPinHigh(pin);
    sleep(Duration(seconds: 10));
    gpio.setPinLow(pin);
    print('Led (pin=18) off');
  } finally {
    mmio.dispose();
  }
}
Install Dart on Raspian and Armbian #
1.) Navigate to the home directory:
cd ~
2.) Download the last stable Dart SDK form archive for your CPU architecture/OS and unzip it.
ARMv7 #
wget https://storage.googleapis.com/dart-archive/channels/stable/release/3.4.4/sdk/dartsdk-linux-arm-release.zip
unzip dartsdk-linux-arm-release.zip
ARMv8 #
wget https://storage.googleapis.com/dart-archive/channels/stable/release/3.4.4/sdk/dartsdk-linux-arm64-release.zip
unzip dartsdk-linux-arm64-release.zip
x86 #
https://storage.googleapis.com/dart-archive/channels/stable/release/3.4.4/sdk/dartsdk-linux-ia32-release.zip
unzip dartsdk-linux-ia32-release.zip
x86_64 #
https://storage.googleapis.com/dart-archive/channels/stable/release/3.4.4/sdk/dartsdk-linux-x64-release.zip
unzip dartsdk-linux-x64-release.zip
3.) Move and grant the appropriate permissions to the SDK:
sudo mv dart-sdk /opt/
sudo chmod -R +rx /opt/dart-sdk
4.) Add Dart SDK to the path by editing ~/.profile and then apply the changes:
nano ~/.profile
following command
export PATH=$PATH:/opt/dart-sdk/bin
at the end of the file and call
source ~/.profile
after editing to apply the changes.
Test the installation
dart --version
Dart SDK version: 3.4.4 (stable) (Wed Jun 12 15:54:31 2024 +0000) on "linux_arm64"
Native libraries #
dart_periphery includes prebuilt native c-periphery libraries for
- ARMv7 - libperiphery_arm.so
- ARMv8 - libperiphery_arm64.so
- X86 - libperiphery_x86.so
- X86_64 - libperiphery_x86_64.so
Following methods can be used to control the tmp directory handling.
/// Sets the tmp directory for the extraction of the libperiphery.so file.
void setTempDirectory(String tmpDir)

/// Allows to load an existing libperiphery.so file from tmp directory.
void reuseTmpFileLibrary(bool reuse)
dart_periphery calls uname() function to detect the CPU architecture for loading the appropriate library. This auto detection mechanism can fail. Internally the logic tries to match the uname -m value to predefined string values.
Following methods can be used to overwrite the auto loading of the prebuilt library. But be aware, any of these methods to disable the auto detection must be called before any dart_periphery interface is used!
// enum CpuArchitecture { x86, x86_64, arm, arm64 }
void setCPUarchitecture(CpuArchitecture arch)
sets explicit the CPU architecture, which loads a library according following mapping
- CpuArchitecture.ARM → libperiphery_arm.so
- CpuArchitecture.ARM64 → libperiphery_arm64.so
- CpuArchitecture.X86 → libperiphery_x86.so
- CpuArchitecture.X86_64 → libperiphery_x86_64.so
useSharedLibray();
If this method is called, dart_periphery loads the shared library. For this case c-periphery must be installed as a shared library. See for section Shared Library for details.
To load a custom library call following method
void setCustomLibrary(String absolutePath)
This method can also be helpful for a currently not supported platform.
If you want to load the library from the current directory call
// optional parameter enum CpuArchitecture { x86, x86_64, arm, arm64 }
// to skip auto detection
void useLocalLibrary([CpuArchitecture arch])
The appropriate library can be found here .
flutter-pi #
dart_periphery works with flutter-pi, a light-weight Flutter Engine Embedder for Raspberry Pi. Following method loads
flutter-pi-tester #
// Loads the libraray form the flutter-pi asset directory.
void loadLibFromFlutterAssetDir(bool load)
the appropriate library from the flutter asset directory. This overwrites the library self-extraction mechanism.
- In most cases the ARMv7 library: libperiphery_arm.so for Raspberry Pi OS 32-bit
- ARMv8 libperiphery_aarch64.so for Raspberry Pi OS 64-bit
The appropriate library is loaded by auto detection of the CPU architecture. If this way fails, the auto detection can be overruled by following two methods:
// enum CpuArchitecture { x86, x86_64, arm, arm64 }
void setCPUarchitecture(CpuArchitecture arch)
void setCustomLibrary(String absolutePath)
These methods must be called before any dart_periphery interface is used! See last section, native libraries for details.
For flutter-pi the method
List<String> getFlutterPiArgs();
returns the command line parameter list of the flutter-pi command. The last parameter contains the asset directory.
flutter-pi-sensor-tester #

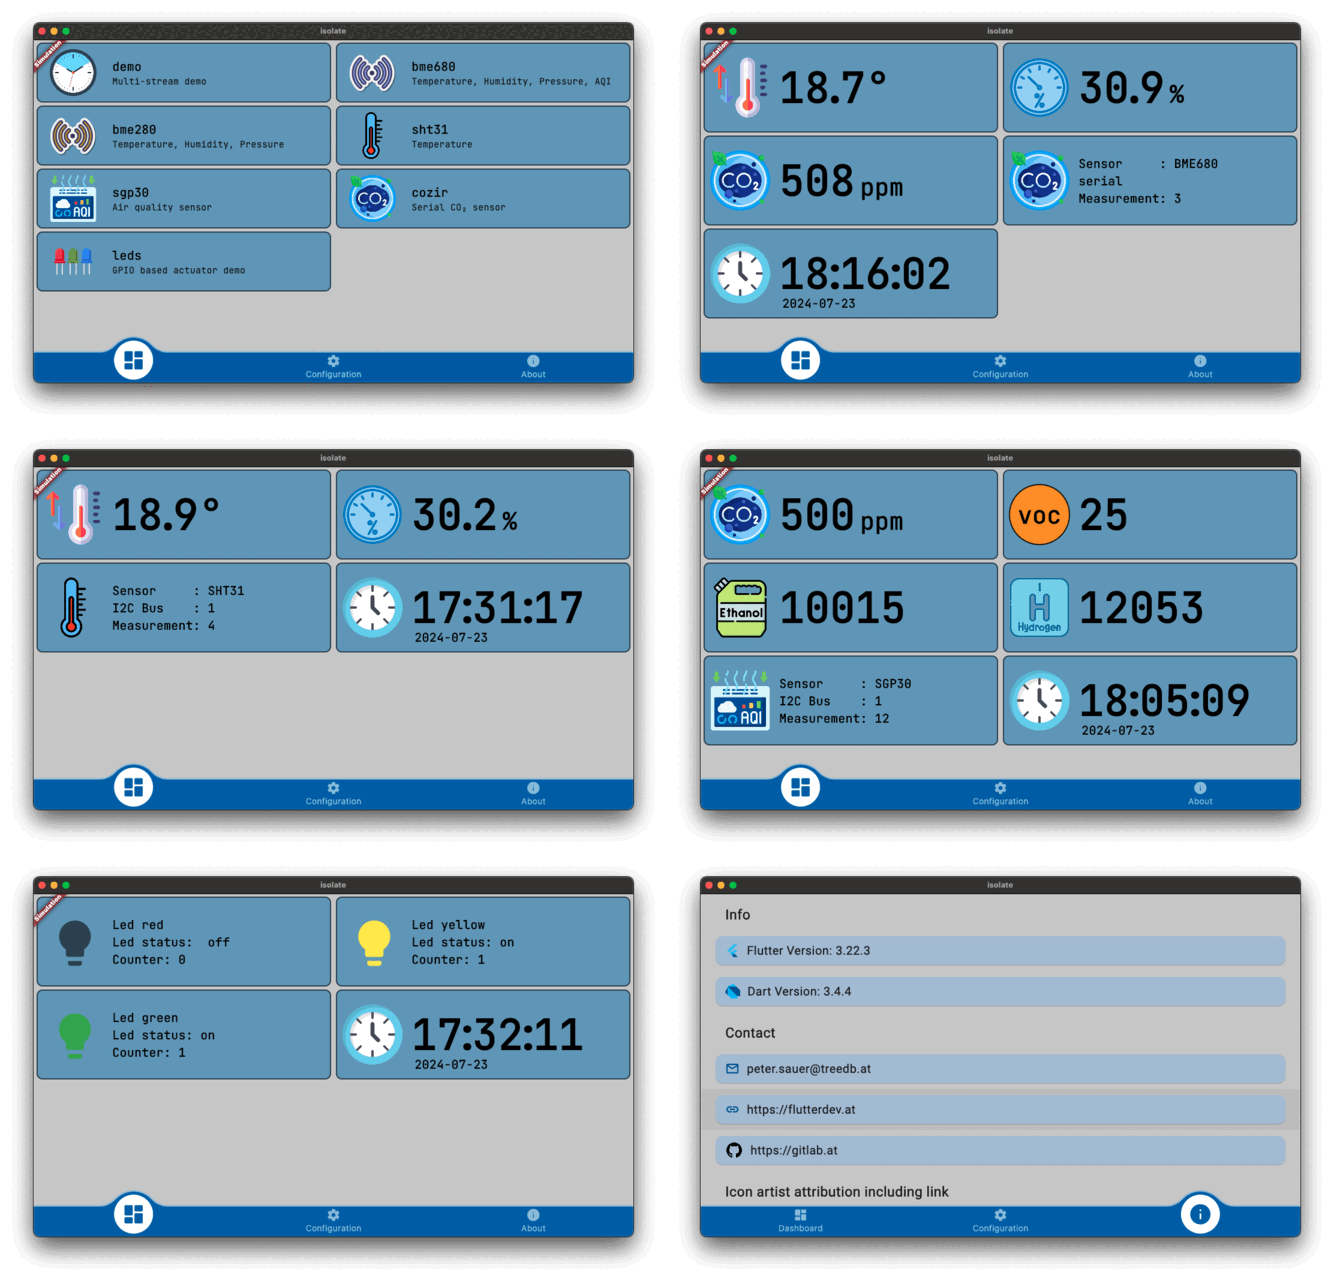
This subproject bases on flutter-pi and implements a simple isolate/stream architecture designed to transfer sensor data from an isolate to the Flutter UI:
Isolate Interface: This consists of the steps InitTask, MainTask, and ExitTask, along with a limited back channel for controlling the isolate. This setup is typically used for sensor measurements:
InitTask: Initializes the sensor.MainTask: Collects sensor data and passes it to a stream.ExitTask: Disposes of the sensor.
Listening Mode: Supports user-defined handling for isolate events. This variant remains on standby for data; once data is processed, the result is passed to the stream and subsequently to the Flutter UI. This model is used for actuator control, such as operating an LED.
Support for Multiple Streams: Enables handling of multiple data streams simultaneously.
The project is currently still beta and development is ongoing.
Tested SoC hardware #
- Raspberry Pi 3 Model B, OS: Raspberry Pi OS
- Raspberry Pi 3 Zero 2 W, OS: Raspberry Pi OS (32/64)
- NanoPi with a Allwinner H3, Quad-core 32-bit CPU, OS: Armbian
- NanoPi M1 with a Allwinner H3, Quad-core 32-bit CPU: OS Armbian
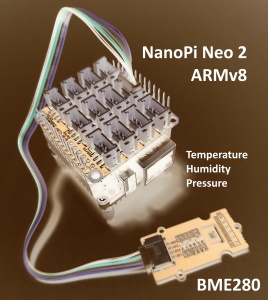
- NanoPi Neo2 with a Allwinner H5, Quad-core 64-bit CPU, OS: Armbian
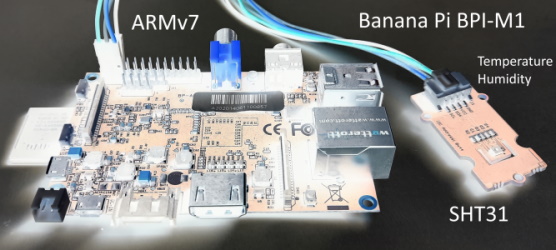
- Banana Pi BPI-M1 with a Allwinner A20 Dual-core, OS: Armbian
Supported devices (sensors, actuators, expansion hats and displays) #
- SGP30: tVOC and eCO2 Gas Sensor
- BME280: Temperature, humidity and pressure sensor.
- BME680: Temperature, humidity pressure and gas (Indoor Airy Quality) sensor.
- SHT31: Temperature and humidity sensor.
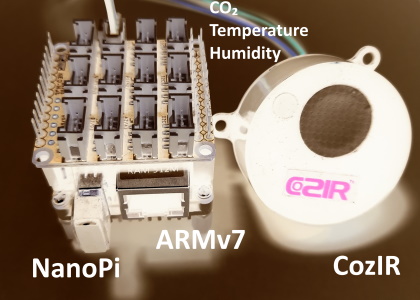
- CozIR: CO₂, temperature and humidity sensor.
- Grove Gesture can recognize 9 basic gestures.
- MPU-6050 Six-Axis (Gyro + Accelerometer) sensor.
- FriendlyARM BakeBit Set
- Grove Base Hat/GrovePi Plus
- PN532 NFC Reader Module, Thanks to UliPrantz!
- SSD1306 OLED (in progress)
Next steps #
- Add GPIO documentation for different SoCs.
- Port hardware devices from the mattjlewis / diozero Java Project to dart_periphery
Test matrix #
| Architecture | GPIO | GPIOsysfs | I2C | SPI | Serial | MMIO¹ | PWM | LED |
|---|---|---|---|---|---|---|---|---|
| ARM ² | ✅ | ✅ | ✅ | ✅ | ✅ | ☐ | ✅ | ✅ |
| AARCH64 ³ | ❌⁴ | ✅ | ✅ | ✅ | ✅ | ☐ | ✅ | ✅ |
| X86 ⁵ | ☐ | ☐ | ☐ | ☐ | ☐ | ☐ | ☐ | ☐ |
| X86_64 ⁵ | ☐ | ☐ | ☐ | ☐ | ☐ | ☐ | ☐ | ☐ |
☐ missing test | ✅ test passed | ❌ test failed
¹ Delayed until FFI inline @Array() support in Dart Version >=2.13 is available
³ NanoPi Neo2 with a Allwinner H5, Quad-core 64-bit CPU
⁴ Fails for NanoPi, NanoPi Neo2 and Banana Pi on Armbian- same behavior like the original c-periphery test program. This is a point of deeper investigations
⁵ no X86/X86_64 SoC for testing available
Help wanted #
- Testing dart_periphery on different SoC platforms
- Documentation review - I am not a native speaker.
- Code review - this is my first public Dart project. I am a Java developer and probably I tend to solve problems rather in the Java than in the Dart way.
