zegoliveroom_plugin 1.2.15  zegoliveroom_plugin: ^1.2.15 copied to clipboard
A flutter plugin that can provide real-time communication and live video broadcast.
zegoliveroom_plugin  #
#
Zego's audio and video Flutter SDK provides live video and real-time audio and video services.
Learn more about the solution: https://www.zego.im
1️⃣ Download and Install Flutter #
Flutter Get Started #
2️⃣ Configuration development environment #
-
Android Studio:
Preferences->Plugins, search for theFlutterplugin to download, configure the first step to download the Flutter SDK path in the plugin. -
VS Code: Search for the
Flutterextension in the app store and download
After configuring the flutter environment in any of the above development environments, execute the flutter doctor on the command line and complete the related undownloaded dependencies according to the prompts.
3️⃣ Apply for ZEGO AppID #
Log in to ZEGO Official Website to register an account, select a scenario according to your actual business needs, and obtain AppID and App Sign for initializing the SDK.
4️⃣ Import zegoliveroom_plugin #
Open the pubspec.yaml in the project and add the zegoliveroom_plugin dependency:
-
Depends on
pub(recommended) #
dependencies:
  flutter:
    sdk: flutter

  zegoliveroom_plugin: ^1.2.12
-
Depends on git #
dependencies:
  flutter:
    sdk: flutter

  zegoliveroom_plugin:
    git:
      url: git://github.com/zegoim/zego-flutter-sdk.git
      ref: master
After saving the file, execute flutter pub get
5️⃣ Add device permissions #
Android #
Open the file app/src/main/AndroidManifest.xml, and add the following contents:
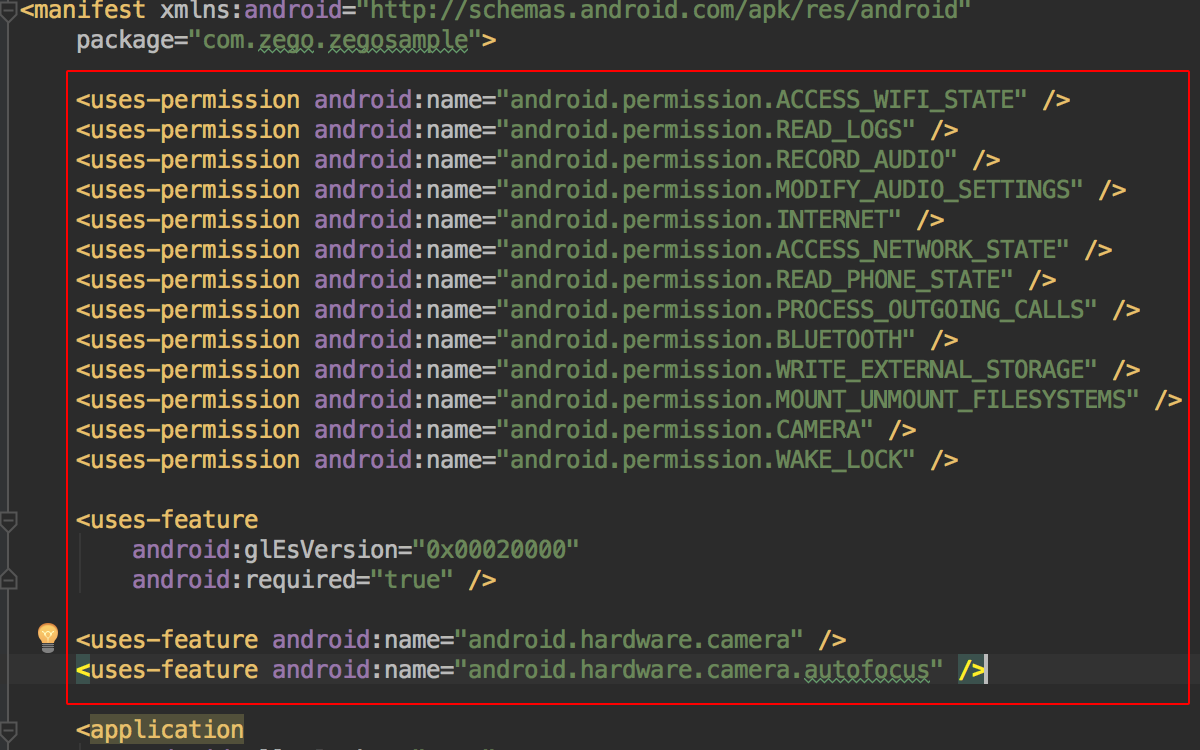
    <!-- Permissions required by the SDK -->
    <uses-permission android:name="android.permission.ACCESS_WIFI_STATE" />
    <uses-permission android:name="android.permission.RECORD_AUDIO" />
    <uses-permission android:name="android.permission.INTERNET" />
    <uses-permission android:name="android.permission.ACCESS_NETWORK_STATE" />
    <uses-permission android:name="android.permission.CAMERA" />
    <uses-permission android:name="android.permission.BLUETOOTH" />
    <uses-permission android:name="android.permission.MODIFY_AUDIO_SETTINGS" />
    <uses-permission android:name="android.permission.WRITE_EXTERNAL_STORAGE" />
    <!-- Permissions required by the App -->
    <uses-permission android:name="android.permission.READ_PHONE_STATE" />
    <uses-permission android:name="android.permission.WAKE_LOCK" />

    <uses-feature
        android:glEsVersion="0x00020000"
        android:required="true" />

    <uses-feature android:name="android.hardware.camera" />
    <uses-feature android:name="android.hardware.camera.autofocus" />
Note: Because Android 6.0 requires dynamic permissions for some of the more important permissions, you cannot apply for static permissions only through the
AndroidMainfest.xmlfile. Therefore, you need to refer to the following code (requestPermissions is the Activity method)
String[] permissionNeeded = {
        "android.permission.CAMERA",
        "android.permission.RECORD_AUDIO"};

if (Build.VERSION.SDK_INT >= Build.VERSION_CODES.M) {
    if (ContextCompat.checkSelfPermission(this, "android.permission.CAMERA") != PackageManager.PERMISSION_GRANTED ||
        ContextCompat.checkSelfPermission(this, "android.permission.RECORD_AUDIO") != PackageManager.PERMISSION_GRANTED) {
        requestPermissions(permissionNeeded, 101);
    }
}
iOS #
Choose the option TARGETS -> Info -> Custom iOS Target Properties
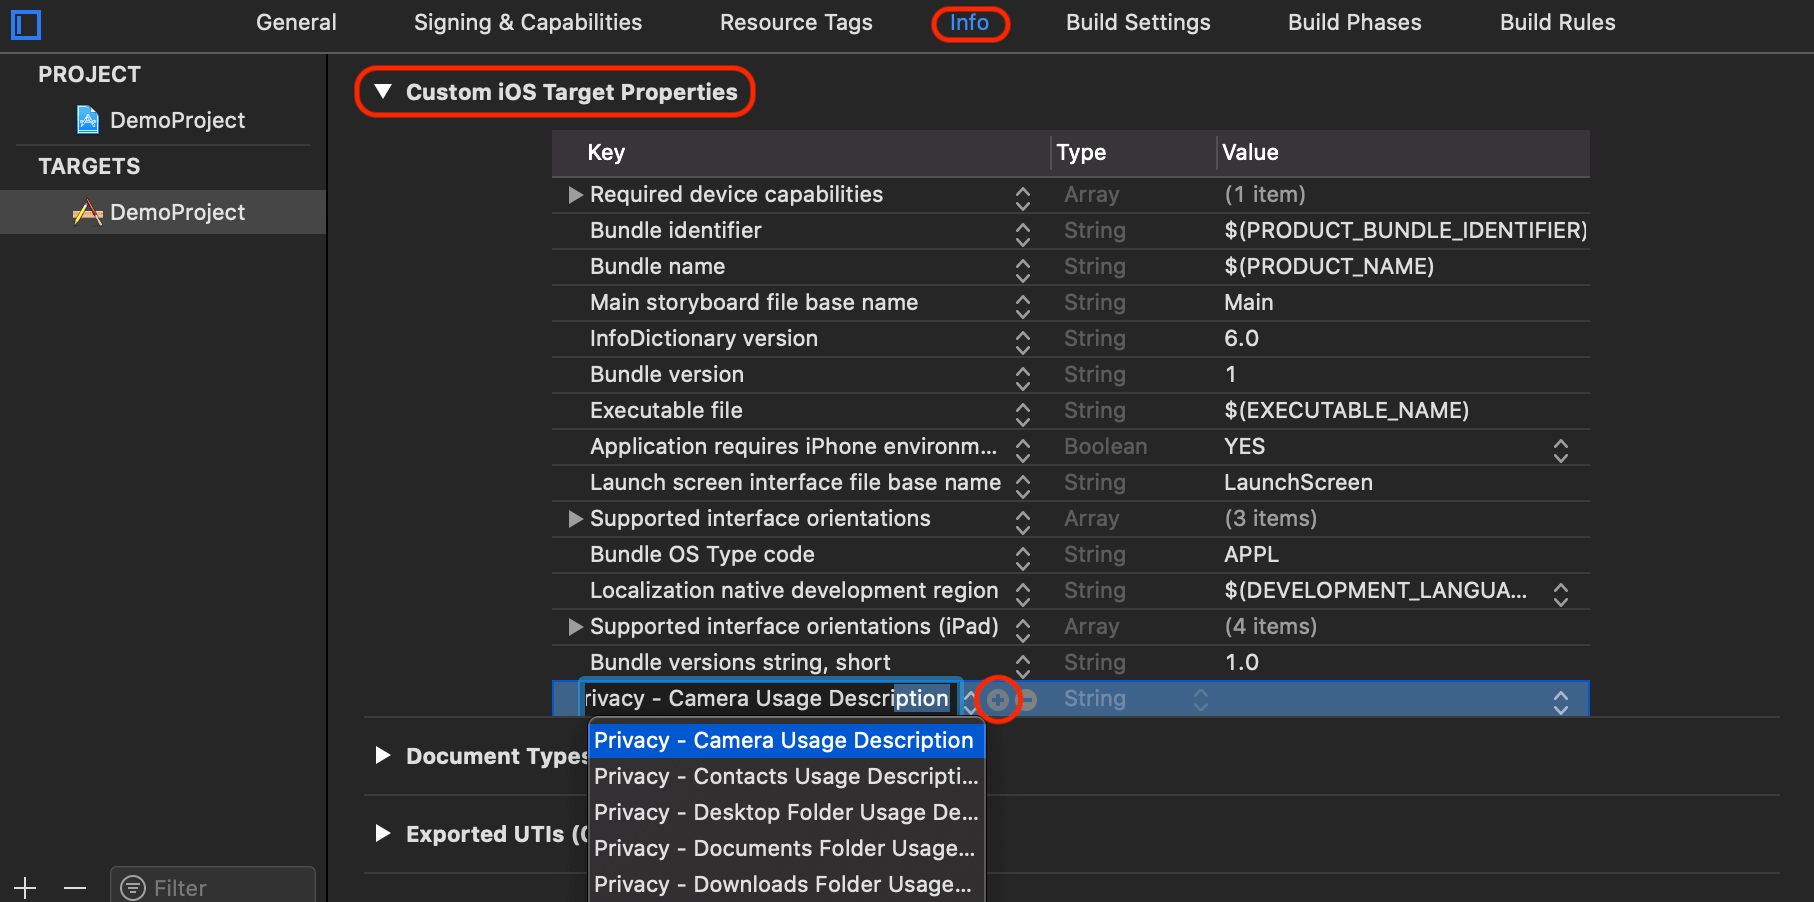
Click the + Add button to add camera and microphone permissions.
-
Privacy - Camera Usage Description -
Privacy - Microphone Usage Description
After adding permissions, it will be as shown:

If you use Platform View, you need to add an additional description for iOS, refer to FAQ-3
6️⃣ Init SDK #
import 'package:flutter/material.dart';
import 'package:zegoliveroom_plugin/zegoliveroom_plugin.dart';

void main() => runApp(new MyApp());

class MyApp extends StatefulWidget {
  @override
  _MyAppState createState() => new _MyAppState();
}

class _MyAppState extends State<MyApp> {

  // Fill in the AppID actually obtained from the official website
  final int appID = 00000000;
  // Fill in the AppSign actually obtained from the official website
  final String appSign = '0x00,0x00,0x00,0x00,0x00,0x00,0x00,0x00,'
                         '0x00,0x00,0x00,0x00,0x00,0x00,0x00,0x00,'
                         '0x00,0x00,0x00,0x00,0x00,0x00,0x00,0x00,'
                         '0x00,0x00,0x00,0x00,0x00,0x00,0x00,0x00';

  String version = '';

  @override
  void initState() {
    super.initState();

    // get SDK version
    ZegoLiveRoomPlugin.getSdkVersion().then((ver) {

      setState({
        version = ver;
      });

    });

    // init SDK
    ZegoLiveRoomPlugin.initSDK(appID, appSign);
  }

  @override
  Widget build(BuildContext context) {
    return MaterialApp(
      home: Scaffold(
        appBar: AppBar(
          title: const Text('Zego Plugin example app'),
        ),
        body: Center(
          child: Text('Version: $version'),
        ),
      ),
    );
  }
}
Please refer to the API usage for more features.
7️⃣ API documentation #
ZegoLiveRoomPlugin API Reference
8️⃣ FAQ #
1. Solve the problem of compiling errors of ZegoLiveRoomApi-AudioIO and audio_in_output modules on iOS platform #
Open the iOS project file Runner. xcworkspace -> Build Settings, change Compile Sources As to Objective-C++, recompile.
2. iOS compiler error: ld: symbol(s) not found for architecture x86_64 #
Compilation with the simulator is not supported, please use real device debugging for best results.
3. iOS uses Platform View error: [VERBOSE-2:platform_view_layer.cc(28)] Trying to embed a platform view but the PaintContext does not support embedding #
Open the iOS project that requires Platform View and add the field io.flutter.embedded_views_preview to Info.plist with a value of YES.
4. fatal error: lipo: -extract armv7 specified but fat file: [...] does not contain that architecture #
Usually occurs when switching iOS devices, which can be resolved by deleting the "flutter-project-path/build/" and "flutter-project-path/ios/DerivedData/" directories.
5. Android building release crashes with NoClassDefFoundError when flutter is upgraded to 1.10 or above #
Flutter is enabled obfuscation by default in version 1.10 or above. Please add the following line in app/proguard-rules.pro to prevent the Zego SDK obfuscation.
-keep class com.zego.**{*;}
9️⃣ Contributing #
We welcome contributions, everyone is welcome to contribute code via pull requests, to help people asking for help, to add to our documentation, or to help out in any other way.
Metadata
Publisher
Metadata
A flutter plugin that can provide real-time communication and live video broadcast.
License
![]() unknown (LICENSE)
unknown (LICENSE)