zego_uikit_prebuilt_call 1.4.0  zego_uikit_prebuilt_call: ^1.4.0 copied to clipboard
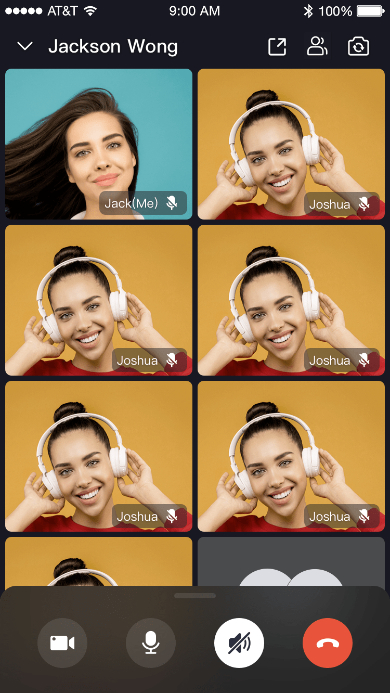
PrebuiltCall is a full-featured call kit that provides a ready-made call invitation, voice/video chat, device detection, etc. Add a voice/video call to your app in minutes.
Overview #
Call Kit is a prebuilt feature-rich call component, which enables you to build one-on-one and group voice/video calls into your app with only a few lines of code.
And it includes the business logic with the UI, you can add or remove features accordingly by customizing UI components.
| One-on-one call | Group call |
|---|---|
 |
 |
When do you need the Call Kit #
-
Build apps faster and easier
When you want to prototype 1-on-1 or group voice/video calls ASAP
Consider speed or efficiency as the first priority
Call Kit allows you to integrate in minutes
-
Customize UI and features as needed
When you want to customize in-call features based on actual business needs
Less time wasted developing basic features
Call Kit includes the business logic along with the UI, allows you to customize features accordingly
To finest-grained build a call app, you may try our Video Call SDK to make full customization.
Embedded features #
- Ready-to-use 1-on-1/group calls
- Customizable UI styles
- Real-time sound waves display
- Device management
- Switch views during a 1-on-1 call
- Extendable menu bar
- Participant list
- Call invitation
- Custom call ringtones
Recommended resources #
- I want to get started to implement a basic call swiftly
- I want to get the Sample Code
- I want to get started to implement a call with call invitation
- To configure prebuilt UI for a custom experience
Quick start #
Integrate the SDK #
Add ZegoUIKitPrebuiltCall as dependencies #
Run the following code in your project root directory:
flutter pub add zego_uikit_prebuilt_call
Import the SDK #
Now in your Dart code, import the prebuilt Call Kit SDK.
import 'package:zego_uikit_prebuilt_call/zego_uikit_prebuilt_call.dart';
Using the ZegoUIKitPrebuiltCall in your project #
- Go to ZEGOCLOUD Admin Console, get the
appIDandappSignof your project. - Specify the
userIDanduserNamefor connecting the Call Kit service. - Create a
callIDthat represents the call you want to make.
userIDandcallIDcan only contain numbers, letters, and underlines (_).- Users that join the call with the same
callIDcan talk to each other.
class CallPage extends StatelessWidget {
  const CallPage({Key? key, required this.callID}) : super(key: key);
  final String callID;

  @override
  Widget build(BuildContext context) {
    return ZegoUIKitPrebuiltCall(
      appID: yourAppID, // Fill in the appID that you get from ZEGOCLOUD Admin Console.
      appSign: yourAppSign, // Fill in the appSign that you get from ZEGOCLOUD Admin Console.
      userID: 'user_id',
      userName: 'user_name',
      callID: callID,
      // You can also use groupVideo/groupVoice/oneOnOneVoice to make more types of calls.
      config: ZegoUIKitPrebuiltCallConfig.oneOnOneVideoCall()
        ..onOnlySelfInRoom = () => Navigator.of(context).pop(),
    );
  }
}
Now, you can make a new call by navigating to this CallPage.
Configure your project #
- Android:
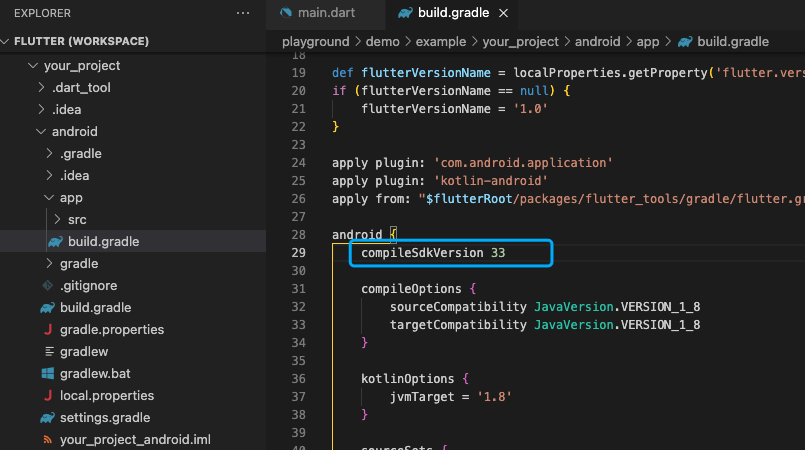
- If your project is created with Flutter 2.x.x, you will need to open the
your_project/android/app/build.gradlefile, and modify thecompileSdkVersionto 33.
-
Add app permissions. Open the file
your_project/app/src/main/AndroidManifest.xml, and add the following code:<uses-permission android:name="android.permission.ACCESS_WIFI_STATE" /> <uses-permission android:name="android.permission.RECORD_AUDIO" /> <uses-permission android:name="android.permission.INTERNET" /> <uses-permission android:name="android.permission.ACCESS_NETWORK_STATE" /> <uses-permission android:name="android.permission.CAMERA" /> <uses-permission android:name="android.permission.BLUETOOTH" /> <uses-permission android:name="android.permission.MODIFY_AUDIO_SETTINGS" /> <uses-permission android:name="android.permission.WRITE_EXTERNAL_STORAGE" /> <uses-permission android:name="android.permission.READ_PHONE_STATE" /> <uses-permission android:name="android.permission.WAKE_LOCK" />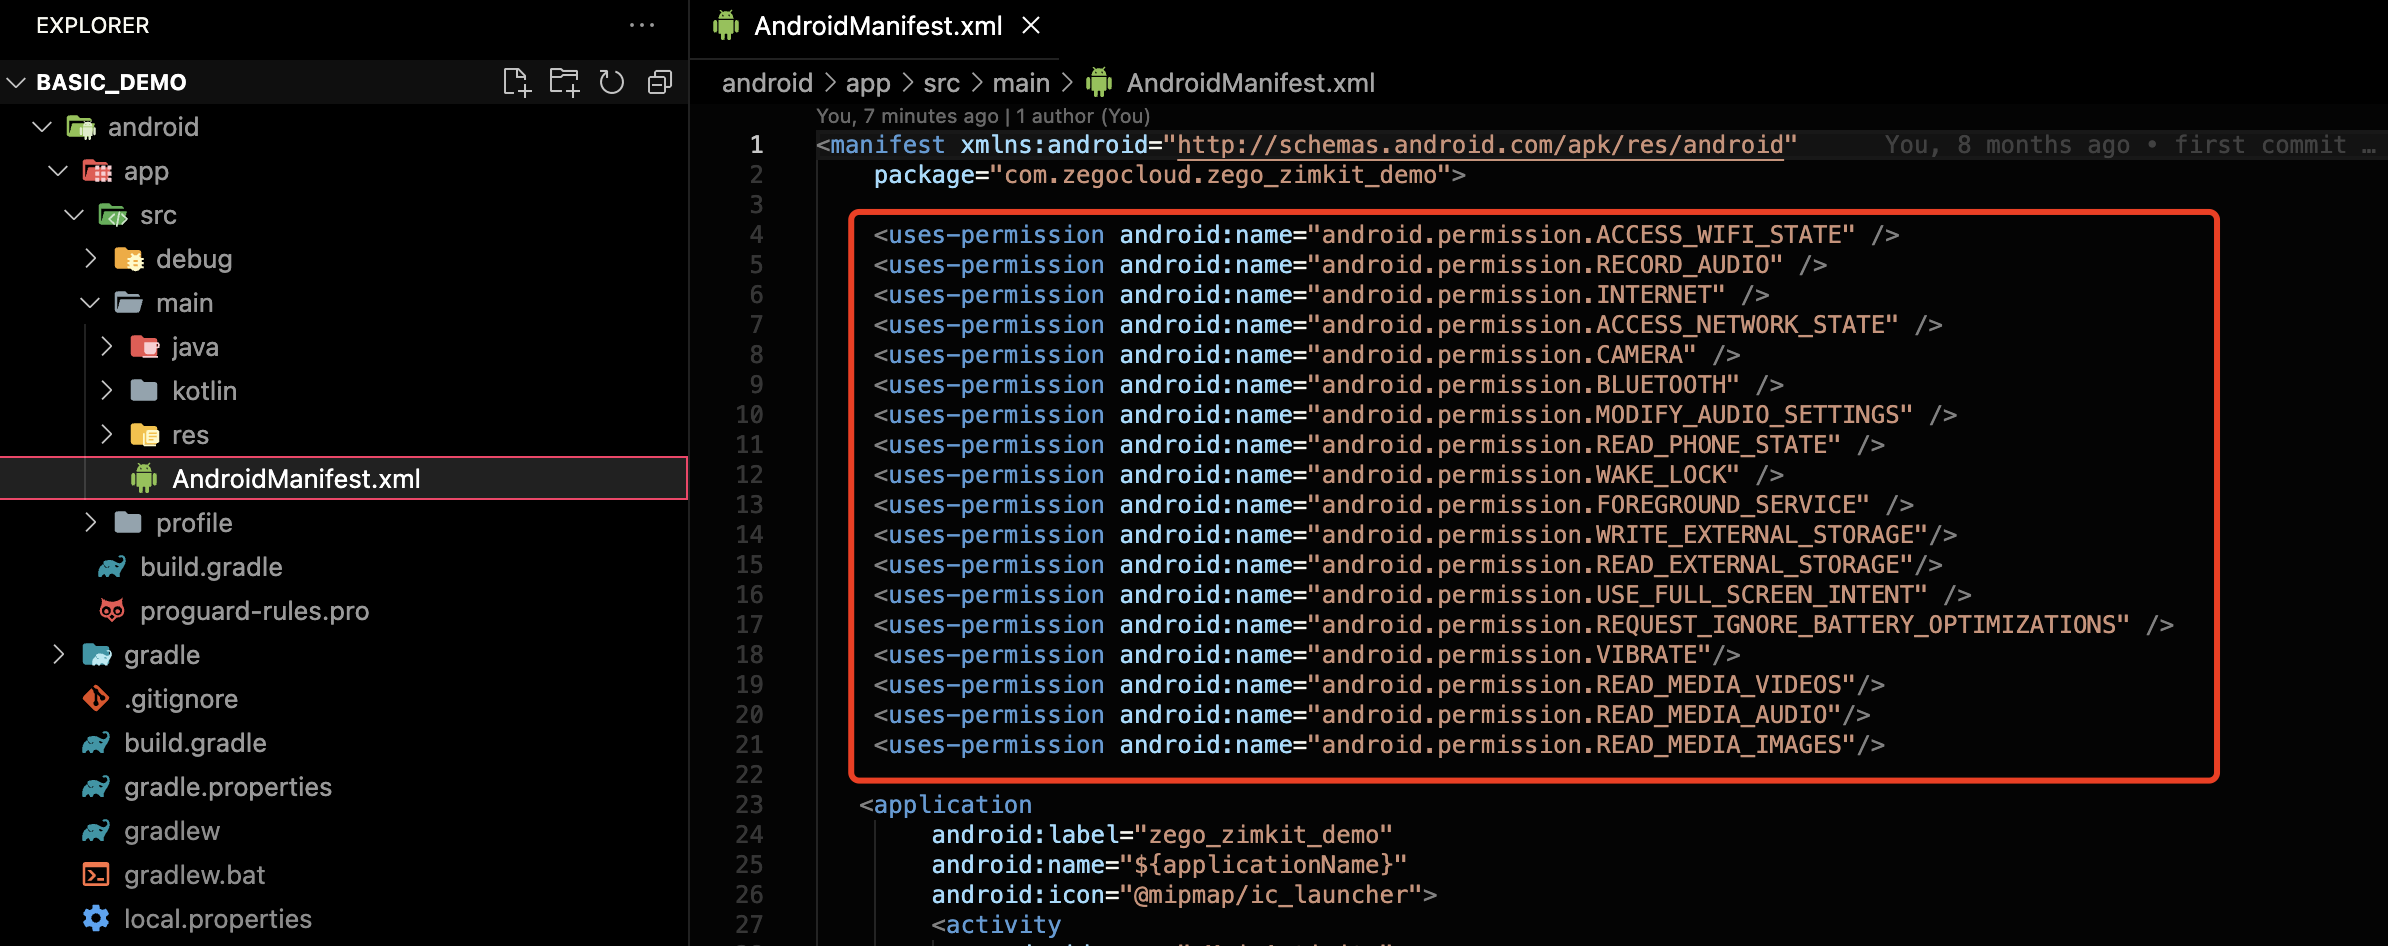
-
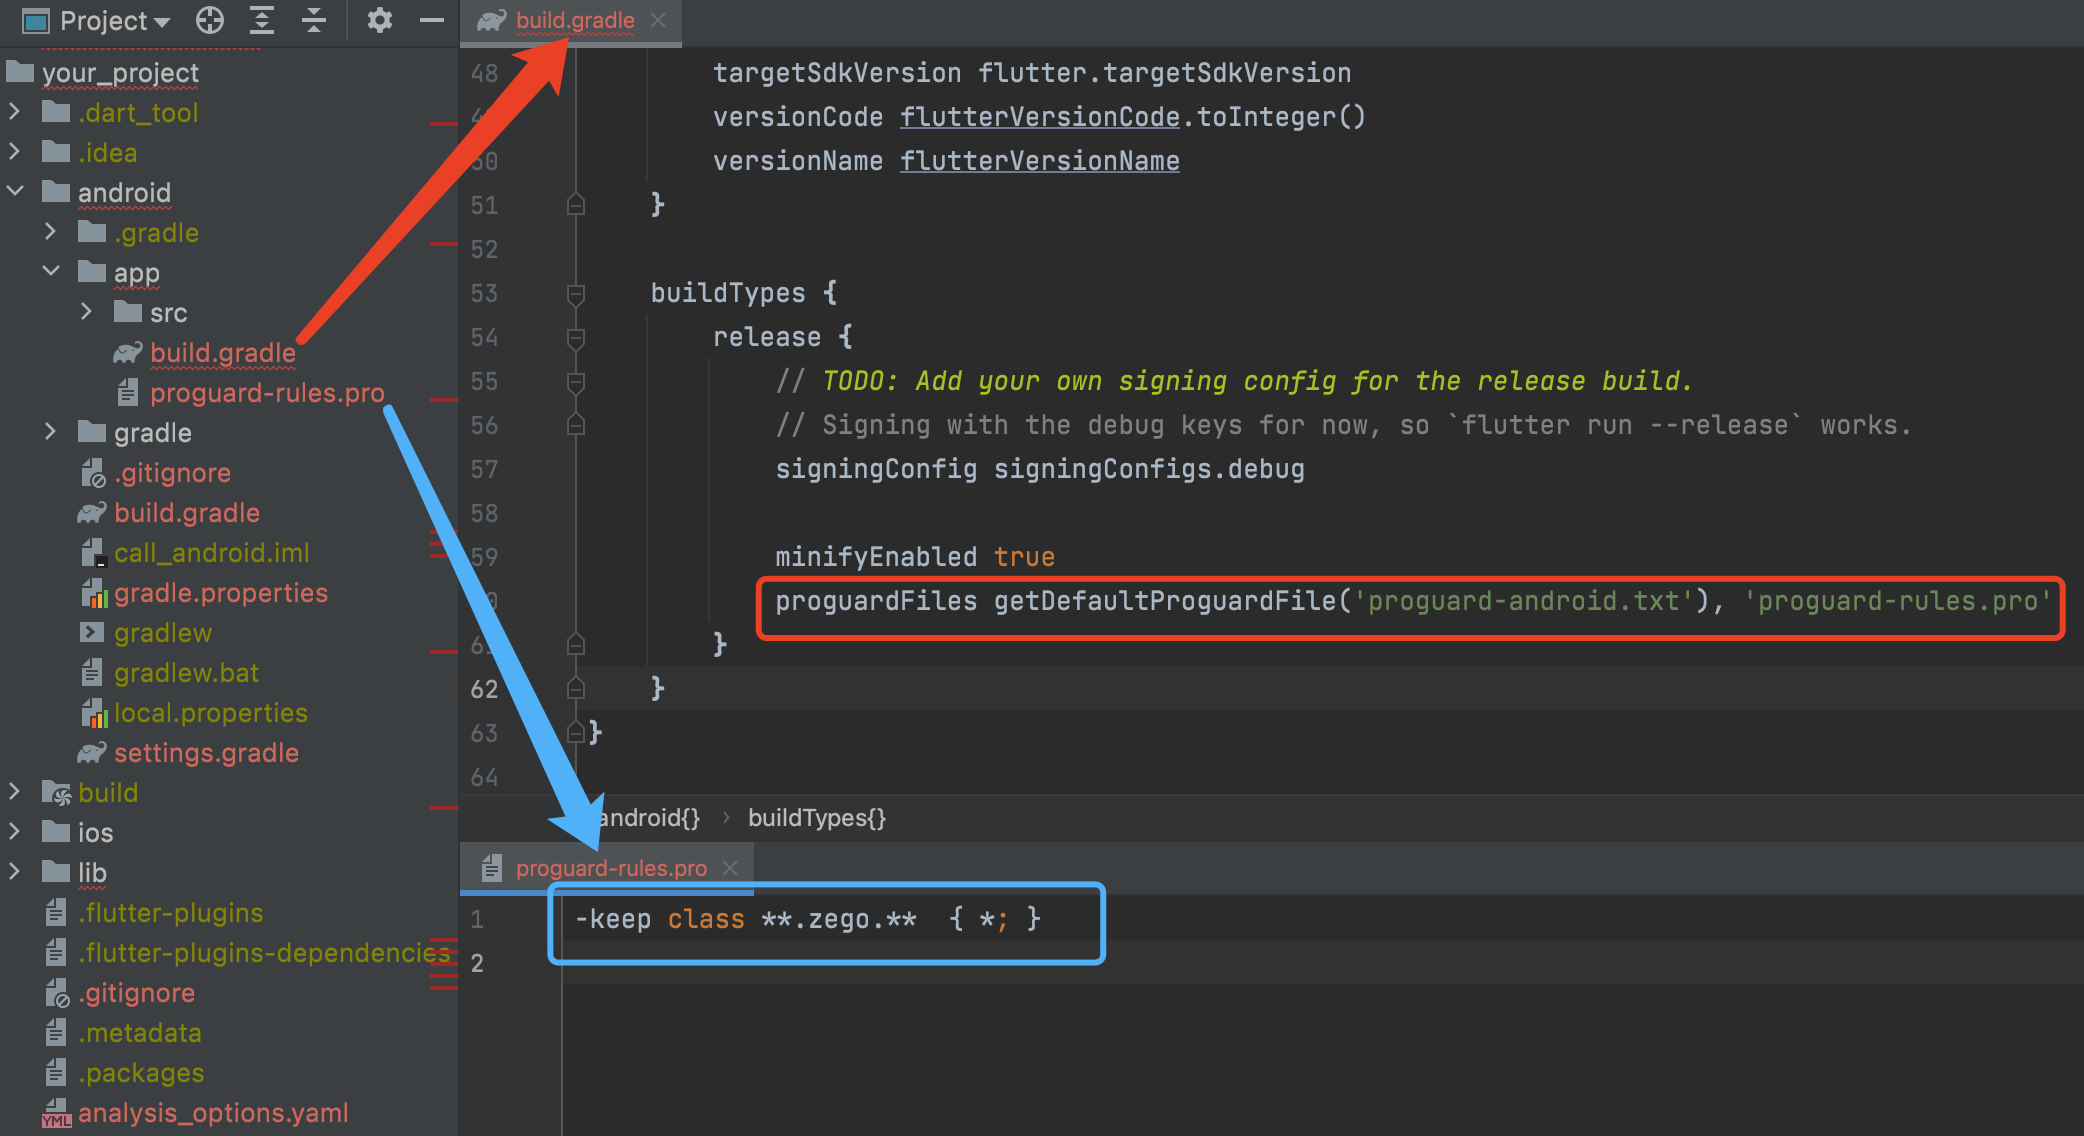
Prevent code obfuscation.
To prevent obfuscation of the SDK public class names, do the following:
a. In your project's your_project > android > app folder, create a proguard-rules.pro file with the following content as shown below:
-keep class **.zego.** { *; }
b. Add the following config code to the release part of the your_project/android/app/build.gradle file.
proguardFiles getDefaultProguardFile('proguard-android.txt'), 'proguard-rules.pro'
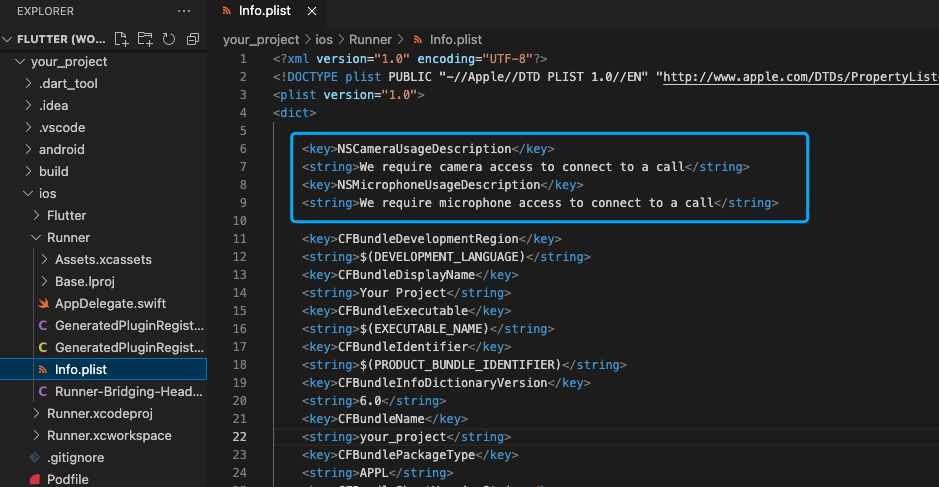
- iOS:
To add permissions, open your_project/ios/Runner/Info.plist, and add the following code to the dict part:
<key>NSCameraUsageDescription</key>
<string>We require camera access to connect to a call</string>
<key>NSMicrophoneUsageDescription</key>
<string>We require microphone access to connect to a call</string>
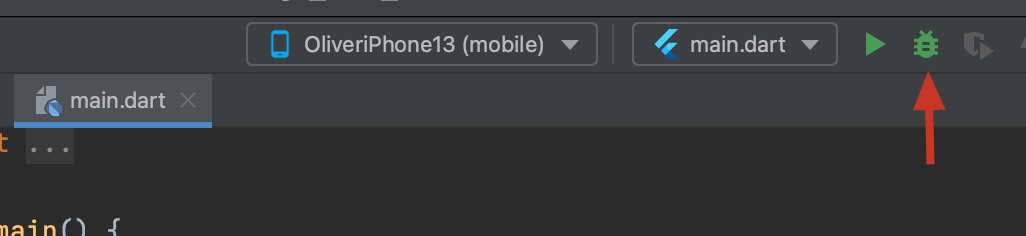
Run & Test #
Now you have finished all the steps!
You can simply click the Run or Debug to run and test your App on your device.
Related guide #
Resources #
Click to get the complete sample code.
Quick start (with call invitation) #
Integrate the SDK #
Prerequisites #
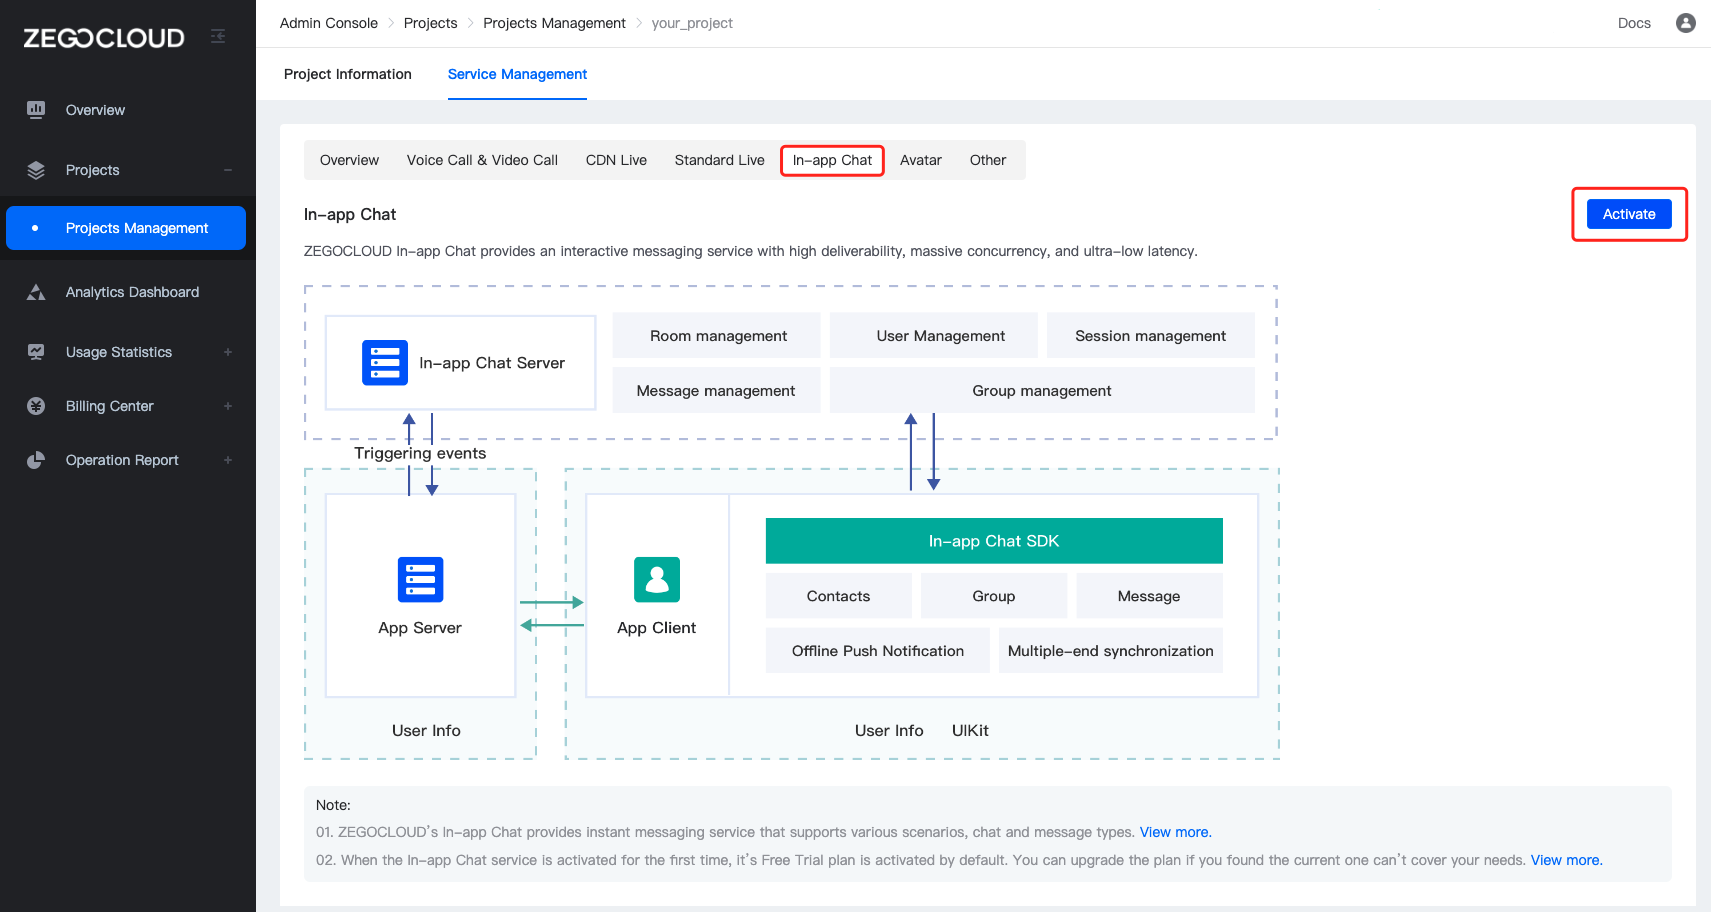
- Go to ZEGOCLOUD Admin Console, and do the following:
- Create a project, get the AppID and AppSign.
- Activate the In-app Chat service (as shown in the following figure).
Add ZegoUIKitPrebuiltCallWithInvitation as dependencies #
- Edit your project's
pubspec.yamlfile to add local project dependencies.
dependencies:
flutter:
sdk: flutter
zego_uikit_prebuilt_call: ^1.4.0 # Add this line
zego_uikit_signaling_plugin: ^1.4.0 # Add this line
- Run the following code in your project root directory to install all dependencies.
flutter pub get
Import the SDK #
Now in your Dart code, import the prebuilt Call Kit SDK.
import 'package:zego_uikit_prebuilt_call/zego_uikit_prebuilt_call.dart';
import 'package:zego_uikit_signaling_plugin/zego_uikit_signaling_plugin.dart';
Integrate the SDK with the call invitation feature #
- Wrap your widget with ZegoUIKitPrebuiltCallWithInvitation, and specify the
userIDanduserNamefor connecting the Call Kit service.
userIDcan only contain numbers, letters, and underlines (_).
@override
Widget build(BuildContext context) {
return ZegoUIKitPrebuiltCallWithInvitation(
appID: yourAppID,
serverSecret: yourServerSecret,
appSign: yourAppSign,
userID: userID,
userName: userName,
plugins: [ZegoUIKitSignalingPlugin()],
child: YourWidget(),
);
}
- Add the button for making call invitations, and pass in the ID of the user you want to call.
ZegoSendCallInvitationButton(
isVideoCall: true,
invitees: [
ZegoUIKitUser(
id: targetUserID,
name: targetUserName,
),
...
ZegoUIKitUser(
id: targetUserID,
name: targetUserName,
)
],
)
Now, you can make call invitations by simply clicking on this button.
Configure your project #
- Android
-
If your project is created with Flutter 2.x.x, you will need to open the
your_project/android/app/build.gradlefile, and modify thecompileSdkVersionto 33.
-
Add app permissions.
Open the file your_project/app/src/main/AndroidManifest.xml, and add the following code:
<uses-permission android:name="android.permission.ACCESS_WIFI_STATE" />
<uses-permission android:name="android.permission.RECORD_AUDIO" />
<uses-permission android:name="android.permission.INTERNET" />
<uses-permission android:name="android.permission.ACCESS_NETWORK_STATE" />
<uses-permission android:name="android.permission.CAMERA" />
<uses-permission android:name="android.permission.BLUETOOTH" />
<uses-permission android:name="android.permission.MODIFY_AUDIO_SETTINGS" />
<uses-permission android:name="android.permission.WRITE_EXTERNAL_STORAGE" />
<uses-permission android:name="android.permission.READ_PHONE_STATE" />
<uses-permission android:name="android.permission.WAKE_LOCK" />
<uses-permission android:name="android.permission.VIBRATE"/>

- Prevent code obfuscation.
To prevent obfuscation of the SDK public class names, do the following:
a. In your project's your_project > android > app folder, create a proguard-rules.pro file with the following content as shown below:
-keep class **.zego.** { *; }
b. Add the following config code to the release part of the your_project/android/app/build.gradle file.
proguardFiles getDefaultProguardFile('proguard-android.txt'), 'proguard-rules.pro'
-
iOS
To add permissions, open
your_project/ios/Runner/Info.plist, and add the following code to thedictpart:<key>NSCameraUsageDescription</key> <string>We require camera access to connect to a call</string> <key>NSMicrophoneUsageDescription</key> <string>We require microphone access to connect to a call</string>
Run & Test #
Now you have finished all the steps!
You can simply click the Run or Debug to run and test your App on your device.
Related guide #
Resources #
Click to get the complete sample code.
Metadata
Publisher
Metadata
PrebuiltCall is a full-featured call kit that provides a ready-made call invitation, voice/video chat, device detection, etc. Add a voice/video call to your app in minutes.
Homepage
Repository (GitHub)
View/report issues
License
![]() unknown (LICENSE)
unknown (LICENSE)
Dependencies
audioplayers, awesome_notifications, flutter, flutter_screenutil, flutter_vibrate, http, statemachine, zego_uikit