xeno_flutter 2.0.1  xeno_flutter: ^2.0.1 copied to clipboard
Flutter Plugin for Xeno Ecosystem
xeno_flutter #
Flutter Plugin for Xeno Ecosystem
How to use #
- Add this in your
pubspec.yml
xeno_flutter: $latest_version
Platform wise configuration #
Android #
1- Configure Xeno in application class
- If you don't have Application class , create one
YourAwesomeApp : Application()- Add below line in onCreate method
import android.app.Application

import com.getxeno.xeno_flutter_android.XenoFlutterInitializer
import com.getxeno.xeno_flutter_android.model.XenoConfigFlutter

 class XenoExampleApp : Application() {
    override fun onCreate() {
        super.onCreate()

      // Configure Xeno SDK here
      XenoFlutterInitializer.configure(
           application = this,
           config = XenoConfigFlutter(
                apiKey = "your_api_key",
                isDebug = true,
                notificationSmallIcon = R.drawable.ic_notification_icon_small
           )
        )
      }
 }
2- Configure application's manifest.xml
- Add Notification Permission
<uses-permission android:name="android.permission.POST_NOTIFICATIONS" />
- Then Add this
XenoExampleAppapplication class
<application
	android:name=".XenoExampleApp"
	android:icon="@mipmap/ic_launcher"
	android:label="Xeno Example">
	<activity android:name=".MainActivity"/>

    <!-- FCM default icon -->
    <meta-data
        android:name="com.google.firebase.messaging.default_notification_icon"
        android:resource="@drawable/ic_notification_icon_small" />

    <!-- Optional: default color (used for icon badge background) -->
    <meta-data
        android:name="com.google.firebase.messaging.default_notification_color"
        android:resource="@color/primary_color" />
</application>
#
IOS #
1- Configure Xeno in AppDelegate
- Sample code for xeno configuration
import Flutter
import UIKit
import xeno_flutter_ios


 @main @objc class AppDelegate: FlutterAppDelegate {
  override func application(
    _ application: UIApplication,
    didFinishLaunchingWithOptions launchOptions: [UIApplication.LaunchOptionsKey: Any]?
  ) -> Bool {
      GeneratedPluginRegistrant.register(with: self)

      // Configure Xeno SDK here
      let config = XenoConfigFlutter(apiKey: "your_api_key",isDebug: true)
      XenoFlutterInitializer.configure(config: config, launchOptions: launchOptions)

  return super.application(application, didFinishLaunchingWithOptions: launchOptions)
  }
}
2- Enable Push Notification
- Open Project is xcode
- Select
Runnerfrom left tile - Then select
Signing & Capabilitiestab - Then click on
+ Capabilities - Then search for
Push Notificationsand click on thePush Notificationsfrom search to add.
- Select
Note : This (step 1) can be skipped in case already completed
3- Add this in application's info.plist
<key>UIBackgroundModes</key>

<array>
	<string>fetch</string>
	<string>remote-notification</string>
</array>
Note : This (step2) can be skipped in case already completed
4- Enable IOS to receive Image in Notifications
-
Visit here for more details - Add a notification service extension
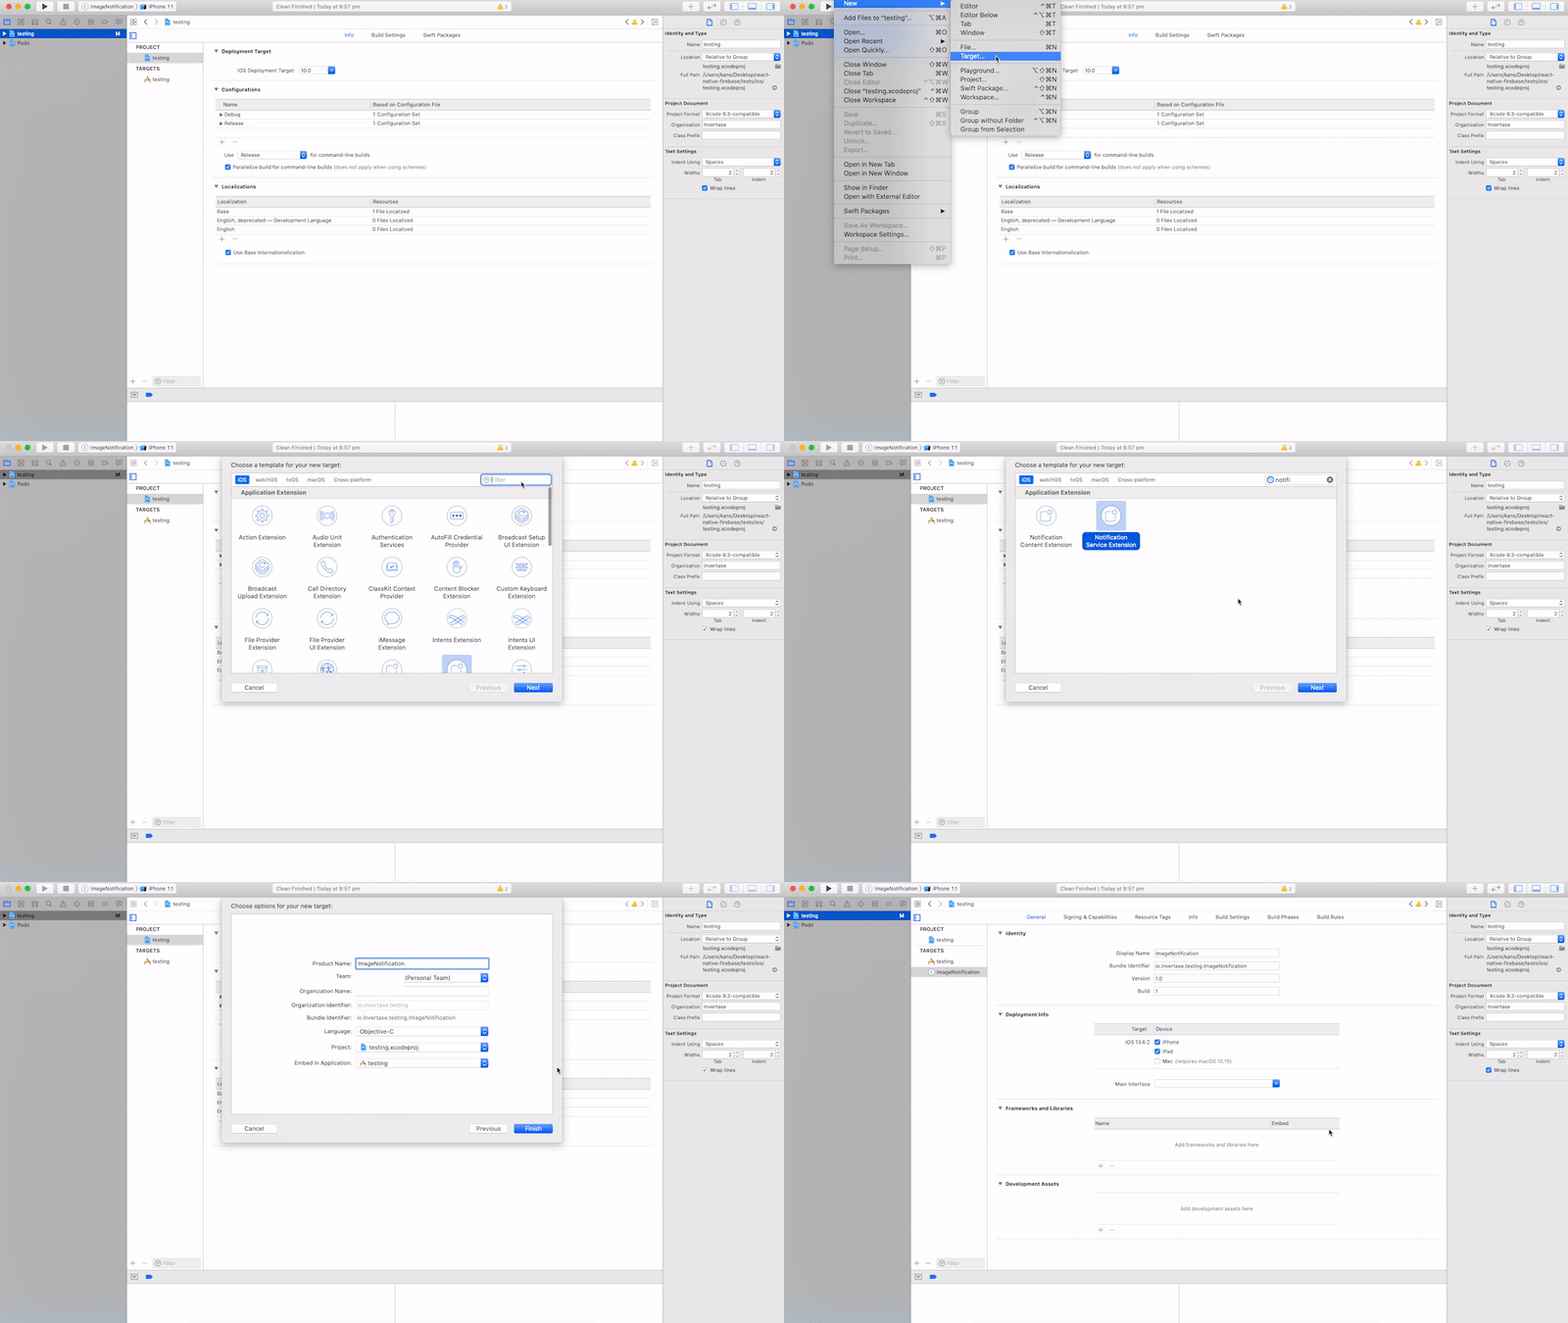
- From Xcode top menu go to: File > New > Target...
- A modal will present a list of possible targets, scroll down or use the filter to select
Notification Service Extension. Press Next. - Add a product name (use
ImageNotificationto follow along) and click Finish - Enable the scheme by clicking Activate

-
Add target to the Podfile
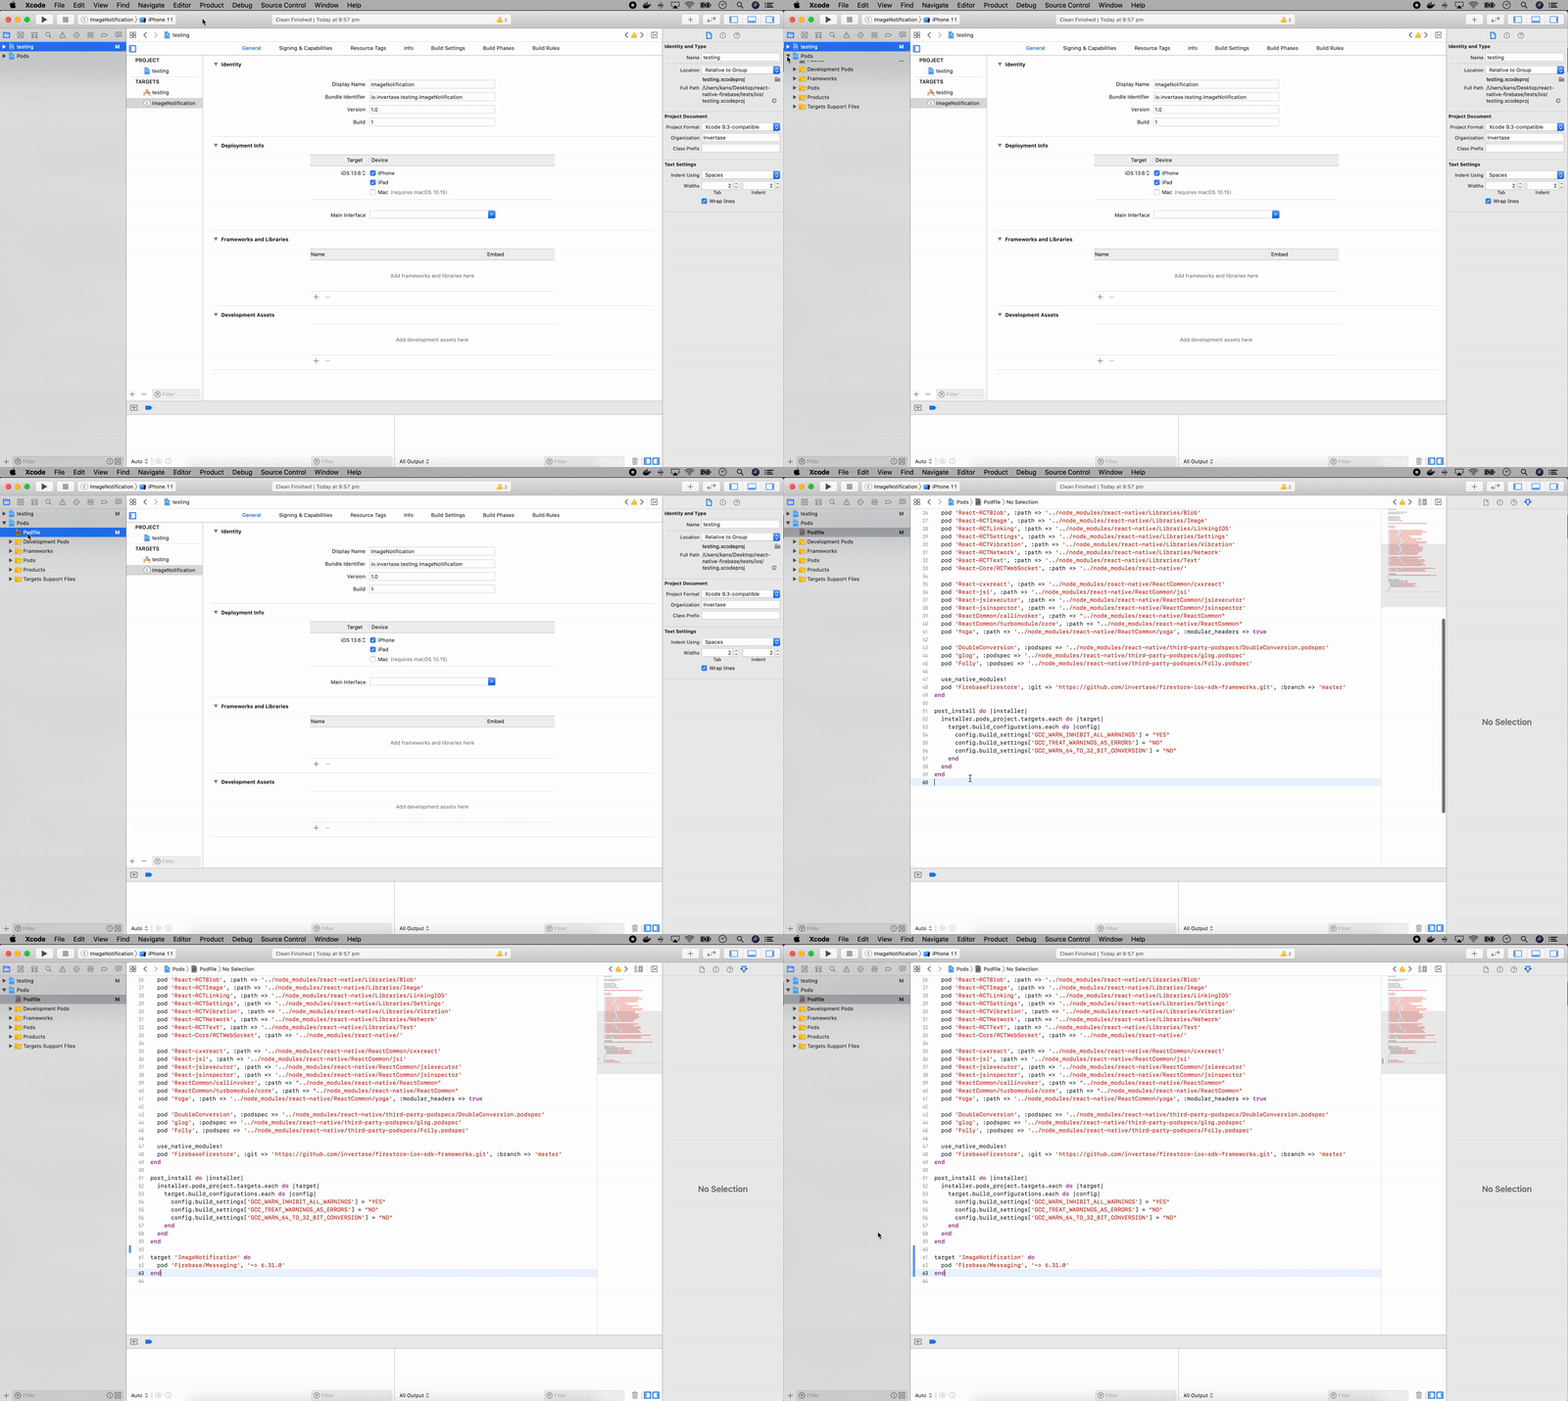
Ensure that your new extension has access to Firebase/Messaging pod by adding it in the Podfile:- From the Navigator open the Podfile: Pods > Podfile
- Scroll down to the bottom of the file and add
target 'ImageNotification' do use_frameworks! :linkage => :static pod 'Firebase/Messaging' end - Install or update your pods using
pod installfrom theiosfolder

- Use the extension helper (Objective-C)
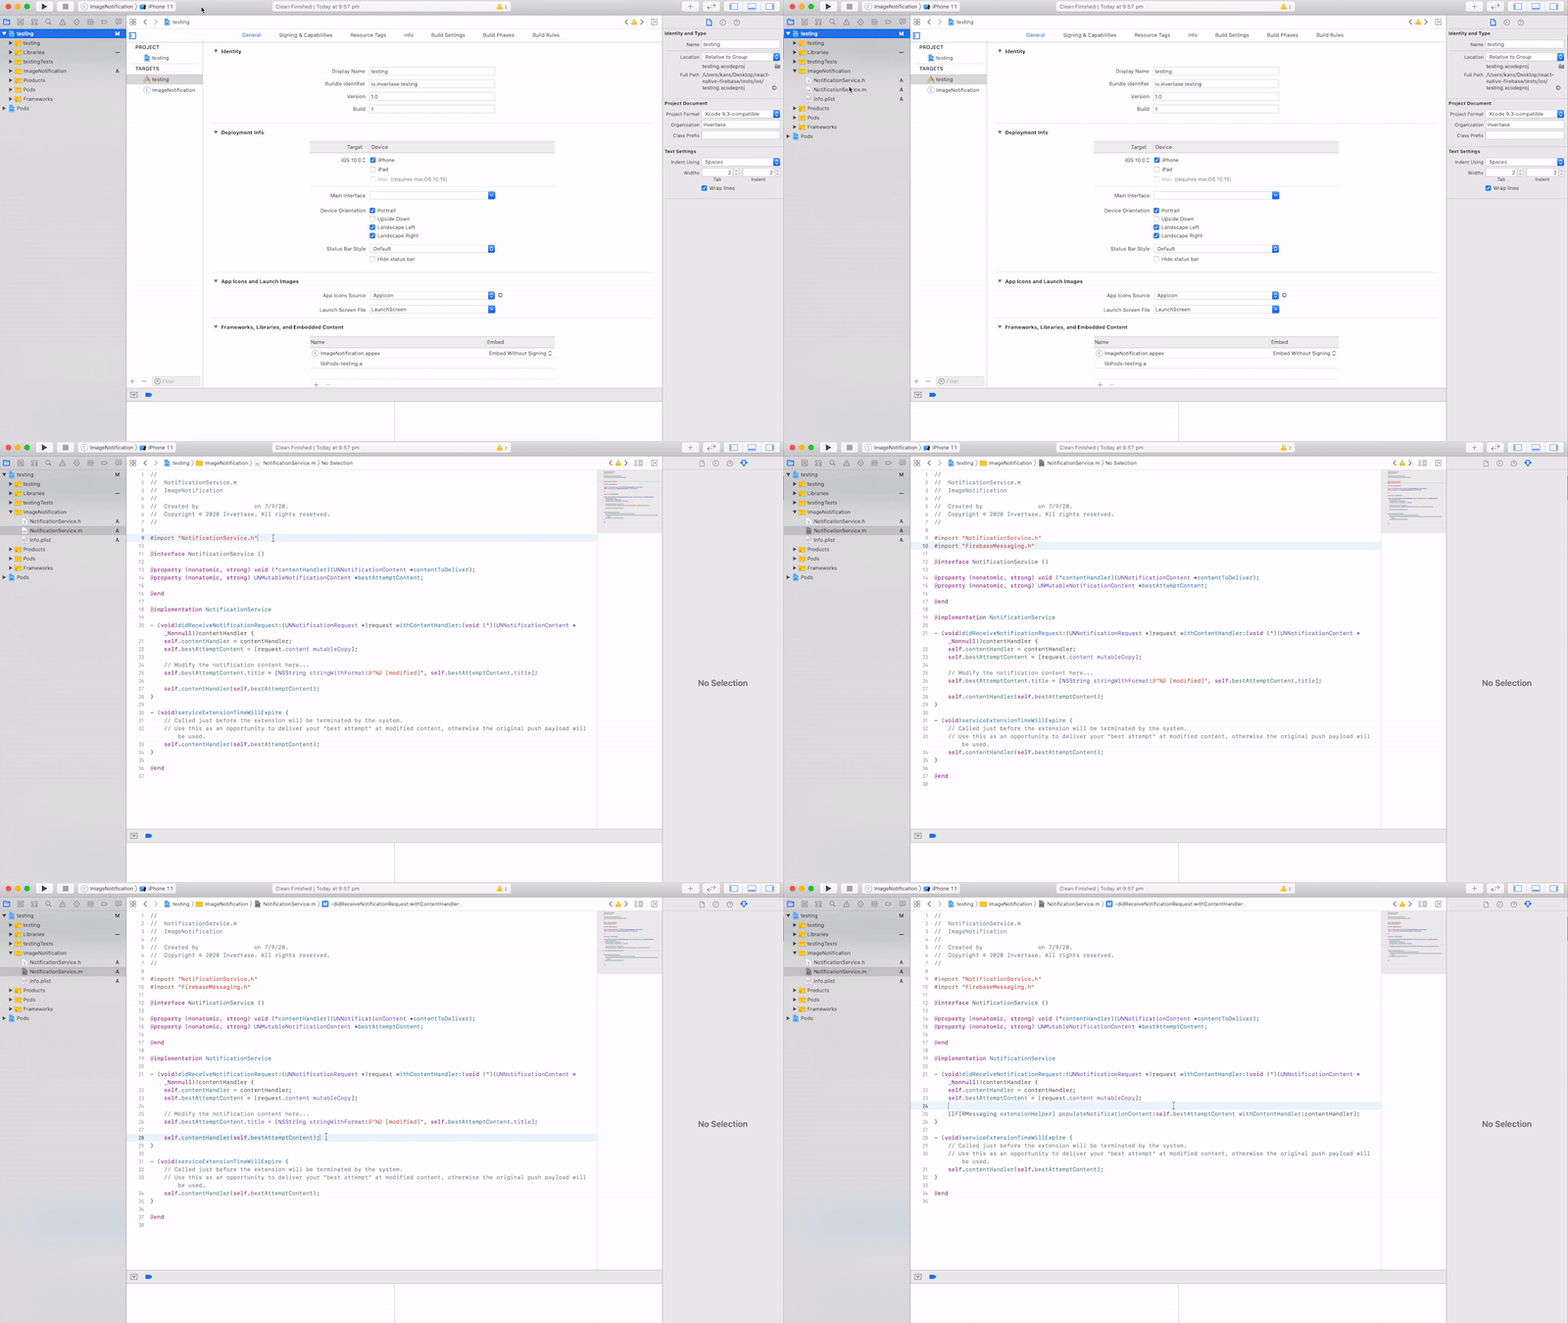
At this point everything should still be running normally. This is the final step which is invoking the extension helper. - From the navigator select your
ImageNotificationextension - Open the
NotificationService.mfile - At the top of the file import
FirebaseMessaging.hright after theNotificationService.has shown below
#import "NotificationService.h"
#import "FirebaseMessaging.h"
- Then replace everything from line 25 to 28 with the extension helper
// Modify the notification content here...

- self.bestAttemptContent.title = [NSString stringWithFormat:@"%@ [modified]", self.bestAttemptContent.title]; - self.contentHandler(self.bestAttemptContent);

+ [[FIRMessaging extensionHelper] populateNotificationContent:self.bestAttemptContent withContentHandler:contentHandler];

Note : This (step 3) can be skipped in case already completed
#
Initialize the SDK: Sample code for initializing the SDK #
import 'package:flutter/material.dart';
import 'package:xeno_flutter/xeno_flutter.dart';
import 'package:firebase_core/firebase_core.dart';
import 'package:firebase_messaging/firebase_messaging.dart';


void main() {
   runApp(const YourApp());
   initFirebaseAndXeno();
}

Future<void> initFirebaseAndXeno() async {
    // Initialize Firebase
    await Firebase.initializeApp();
     // Setting user in Xeno-SDK
     // This will set the user and allow notifications to be sent.
     // All fields are optional and can be updated later.
     // Make sure to call setUser before calling other SDK methods like:
     // `onTokenReceived`, `onMessageReceived`, or `requestNotificationPermission`.
     await XenoFlutter().setUser(
                    countryCode: "user_country_code",
                    phone: "user_phone",
                    email: "user_email",
                    name: "user_name",
      );
     // Get FCM device token String fcmToken = await FirebaseMessaging.instance.getToken() ?? "";
     // Send FCM token to Xeno if available
     if (fcmToken.isNotEmpty) {
        await XenoFlutter().onTokenReceived(fcmToken);
     }

     // Listen to foreground push messages
     FirebaseMessaging.onMessage.listen((RemoteMessage remoteMessage) {
         XenoFlutter().onMessageReceived(remoteMessage, true);

     });
}
Requesting Notification Permission on your application's main screen. #
- This will show a popup to the user asking for permission to send notifications.
- This will handle the user's response and update the user's notification permission status in Xeno-Communication.
- If you will not pass
contextandconfigthen it will show the default popup and will handle the user's response and update the user's notification permission status in Xeno-Communication.
@override
void initState() {
  super.initState();

  WidgetsBinding.instance.addPostFrameCallback((_) async {
    XenoFlutter().requestNotificationPermission(
      config: PopupConfig(
        title: 'Stay in the know!',
        body: 'Enable push notifications and never miss a thing.',
        primaryButtonText: 'Enable Notifications',
        primaryButtonRadius: 6,
        secondaryButtonText: 'Not Now',
        decoration: PopupDecoration(
          radius: 12,
          backgroundColor: Colors.white,
          primaryColor: Colors.blue,
          secondaryColor: Colors.grey,
        ),
      ),
    );
  });
}
Handling Deep Links #
 @override
void initState() {
  super.initState();

    // Handle case when app is launched by tapping on a notification
    XenoFlutter().getInitialDeeplink().then((deeplink) {
        // TODO: Redirect to some screen based on deeplink
    });

    // Handle case when app is in foreground and a notification is tapped
    XenoFlutter().listenDeeplink().listen((deeplink) {
        // TODO: Redirect to some screen based on deeplink
    });

}
Capturing Events #
 @override
void initState() {
  super.initState();

  XenoFlutter().captureEvent(
    eventName: "Product Viewed",
    eventData: {
      "product_id": "SKU123",
      "product_name": "Red T-shirt",
      "category": "Apparel",
      "price": 799,
    },
  );

}