screenshot_modes 0.0.5  screenshot_modes: ^0.0.5 copied to clipboard
easy automatics way for take screenshot for your app , screenshot mode work as plugin for device_preview package
screenshot_modes #
easy screenshot take for your app
screenshot_modes is a flutter package that work as a plugin for device preview package, take automatics screenshots for pages app
setup this plugin #
- 0- you will need to setup device preview package first before using this plugin. it is just a few step.
simple mode : #
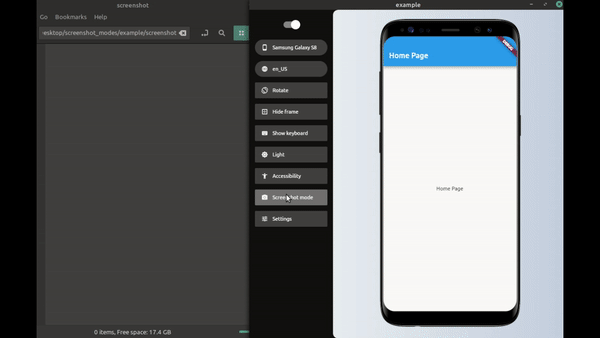
- simple mode you will just select device frame you want and function navigate to page and the plugin will make it work , will take screenshot for all your page in all frames in dark and light mode.
setup simple mode : #
- 1- first define the plugin:
final simpleScreenShotModesPlugin = SimpleScreenShot(
  processor: saveScreenShot,
  pages: listPush,
  devices: [
    Devices.android.samsungNote10Plus.identifier,
    Devices.ios.iPhone11ProMax.identifier,
    Devices.ios.iPadMini.identifier,
    Devices.android.samsungS20.identifier,
  ],
  useToggleDarkMode: true,
);

final listPush = [
  ItemScreenMode(function: pushHome, label: 'home'),
  ItemScreenMode(function: pushFirst, label: 'first'),
  ItemScreenMode(function: pushSecond, label: 'second'),
];
- 2- then pass it to device preview
  runApp(DevicePreview(
    builder: (_) => MyApp(),
    plugins: [
      simpleScreenShotModesPlugin
    ],
  ));
- 3- also define your push function ( pushHome,pushFirst,pushSecond) define for your page
Future pushHome(BuildContext context) async {
  Navigator.of(navigatorKey.currentContext)
      .push(DirectPageRouteBuilder(builder: (_) => HomePage()));
}

Future pushFirst(BuildContext context) async {
  Navigator.of(navigatorKey.currentContext)
      .push(DirectPageRouteBuilder(builder: (_) => FirstPage()));
}

Future pushSecond(BuildContext context) async {
  // we could get data from server;
  final data = await ApiService.getData();
  Navigator.of(navigatorKey.currentContext).push(DirectPageRouteBuilder(
      builder: (_) => SecondPage(
            nums: data,
          )));
}
it could be just Navigator or maybe call some api get data before Navigate like in pushSecond
- 4- define saveScreenShot function this response for saving the image or upload it to some server or that ever you want to do with the image example to save the image in desktop folder
Future<String> saveScreenShot(DeviceScreenshotWithLabel screen) async {
  String name = screen.label.join('/');
  final path = join(Directory.current.path, 'screenshot', '$name.png');
  final imageFile = File(path);
  await imageFile.create(recursive: true);
  await imageFile.writeAsBytes(screen.deviceScreenshot.bytes);
  return '$path saved'; // message printed to device preview plugins windows;
}
- 5- click the new button(screenshot mode) in device preview tabs and that it.
advanced way ( simple way actually depend on it ) #
#1- define ScreenShotModesPlugin
final screenShotModesPlugin = ScreenShotModesPlugin(processor: saveScreenShot, modes: _modes );
#2- pass screenShotModesPlugin to DevicePreview
void main() {
  runApp(DevicePreview(
    builder: (_) => MyApp(),
    plugins: [
      screenShotModesPlugin,
    ],
  ));
}
#3- define saveScreenShot function this response for saving the image or upload it to some server or that ever you want to do with the image example to save the image in desktop
Future<String> saveScreenShot(DeviceScreenshotWithLabel screen) async {
  String name = screen.label.join('/');
  final path = join(Directory.current.path, 'screenshot', '$name.png');
  final imageFile = File(path);
  await imageFile.create(recursive: true);
  await imageFile.writeAsBytes(screen.deviceScreenshot.bytes);
  return '$path saved'; // message printed to device preview plugins windows;
}
- 4- add item to _modes list
- simple way
final _modes_ = [
 ItemScreenMode(function: pushHome, label: 'home'),
 ItemScreenMode(function: pushFirst, label: 'first'),
 ItemScreenMode(function: pushSecond, label: 'second'),
];
- with theme mode change
final listPush = [
  ItemScreenMode(function: pushHome, label: 'home'),
  ItemScreenMode(function: pushFirst, label: 'first'),
  ItemScreenMode(function: pushSecond, label: 'second'),
];

final _modes = [
  ItemScreenMode(
      function: (context) async {
        await setModeTo(context, ThemeMode.light);
      },
      label: "light",
      modes: listPush),
  ItemScreenMode(
      function: (context) async {
        await setModeTo(context, ThemeMode.dark);
      },
      label: "dark",
      modes: listPush),
];
- with theme mode and device frame change
final _mode = [
  ItemScreenMode(
    function: setDeviceToIphone,
    label: "iphone",
    modes: listLightDark,
  ),
  ItemScreenMode(
      function: setDeviceToNote, label: "note", modes: listLightDark),
];
final listLightDark = [
  ItemScreenMode(
      function: (context) async {
        await setModeTo(context, ThemeMode.light);
      },
      label: "light",
      modes: listPush),
  ItemScreenMode(
      function: (context) async {
        await setModeTo(context, ThemeMode.dark);
      },
      label: "dark",
      modes: listPush),
];
final listPush = [
  ItemScreenMode(function: pushHome, label: 'home'),
  ItemScreenMode(function: pushFirst, label: 'first'),
  ItemScreenMode(function: pushSecond, label: 'second'),
];
- 5- click the new button(screenshot mode) in device preview tabs
what is ItemScreenMode : #
it is represents every screenshot we will take
function parameter is a function that called before take screen we must navigate to the page you want take screenshot for it maybe also get some data from database or api before navigate
label parameter is string helps for naming the image inside processor (saveScreenShot)
modes parameter is another list of ItemScreenMode used if we have nested mode like light/dark for all pages and change frame for all pages like in above example
could i set function parameter for ItemScreenMode to null ? #
yes when you don't need to do any things before first shot taken maybe when you already inside home page (defalut page) and in right themes mode tips : don't do that if you have multi nested page
why we must use DirectPageRouteBuilder for navigation #
you must use DirectPageRouteBuilder for navigation like this
Future pushFirst() async {
  Navigator.of(navigatorKey.currentContext)
      .push(DirectPageRouteBuilder(builder: (_) => FirstPage()));

}
because the MaterialPageRoute have 500ms Duration for animations this will cause as a problem with screenshot so we must either use DirectPageRouteBuilder or await 500ms Duration after Navigation inside ItemScreenMode function
#
we prefers to use this plugin on desktop #
TODO : #
- resizing the image for every mode ( so we could resized to the size required by google play or app store) ( now could done in saveScreenShot function )
- improve the way for naming image .
Metadata
Publisher
Metadata
easy automatics way for take screenshot for your app , screenshot mode work as plugin for device_preview package
Repository (GitHub)
View/report issues
License
![]() unknown (LICENSE)
unknown (LICENSE)
Dependencies
device_preview, flutter, provider