flourish_flutter_sdk 1.0.11  flourish_flutter_sdk: ^1.0.11 copied to clipboard
Flourish SDK for partners integrate.
![]()
Flourish SDK Flutter #
This flutter plugin will allow the communication between the visual implementation of Flourish functionality.
Table of contents #
Getting Started #
Adding Flourish to your project #
In your project's pubspec.yaml file, add the last version of Flourish Flutter SDK to your dependencies.
# pubspec.yaml

dependencies:
  flourish_flutter_sdk: ^<latest version>
SDK internal requirements #
To use this SDK, you will need these elements:
- access_token: a string that represents a token that you will retrieve from our API
- costumer_code: a string that represents an identifier of yourself
This plugin can be run in two different environments:
- staging: In this environment, you can test the functionality without impacting any real data
- production: this environment is for running the app with the real data
About the SDK #
The integration with us works as follows, the client authenticates himself in our backend and we return an access token that allows him to load our webview, given that, the sdk serves to encapsulate and help in loading this webview.
Using the SDK #
After adding our module, it is necessary to retrieve an access token from our API, and we strongly recommend that it be done through a backend because the request needs your credentials and it's good to avoid the harmful environment of the web.
Initialize the SDK providing the variables: token, env and language.
    Flourish flourish = Flourish.initialize(
      token: 'HERE_YOU_WILL_USE_THE_RETRIEVED_API_TOKEN',
      env: Environment.staging,
      language: Language.english,
    );
Then, with the SDK instance initialized, it is time to perform the authentication in our backend,
being only necessary to pass your costumer_code
    flourish.authenticate(customerCode: 'HERE_YOU_WILL_USE_YOUR_CUSTOMER_CODE').then((accessToken) {
      // apply your logic here
    }).catchError((er) {
      debugPrint(er);
    });
Finally we must call the home() method, but remember
that all our functionalities are displayed through a webview and,
bearing in mind that authentication is an asynchronous request,
it's only possible to call the home() method when getting a response from the request,
in other words if you are developing with Future strategy for example you will put it inside the then() method.
flourish.home();
Below is an example of an extremely basic widget on how to implement all these steps reported above
import 'package:flourish_flutter_sdk/config/environment_enum.dart';
import 'package:flourish_flutter_sdk/config/language.dart';
import 'package:flourish_flutter_sdk/flourish.dart';
import 'package:flourish_flutter_sdk/web_view/webview_container.dart';
import 'package:flutter/material.dart';

class ExamplePage extends StatefulWidget {
  const ExamplePage({super.key});

  @override
  State<StatefulWidget> createState() => _ExamplePageState();
}

class _ExamplePageState extends State<ExamplePage> {
  WebviewContainer? flourishHome;

  @override
  void initState() {
    super.initState();
    Flourish flourish = Flourish.initialize(
      partnerId: 'HERE_YOU_WILL_USE_YOUR_PARTNER_ID',
      secret: 'HERE_YOU_WILL_USE_YOUR_SECRET',
      env: Environment.staging,
      language: Language.english,
    );

    flourish.authenticate(customerCode: 'HERE_YOU_WILL_USE_YOUR_CUSTOMER_CODE').then((accessToken) {
      setState(() {
        flourishHome = flourish.home();
      });
    }).catchError((er) {
      debugPrint(er);
    });
  }

  // THIS IS JUST ANOTHER SUGGESTION OF IMPLEMENTATION USING ASYNC/AWAIT
  // @override
  // void initState() {
  //   super.initState();
  //   Flourish flourish = Flourish.initialize(
  //     partnerId: 'HERE_YOU_WILL_USE_YOUR_PARTNER_ID',
  //     secret: 'HERE_YOU_WILL_USE_YOUR_SECRET',
  //     env: Environment.staging,
  //     language: Language.english,
  //   );
  //
  //   Future(() async {
  //     String accessToken = await flourish.authenticate(customerCode: 'HERE_YOU_WILL_USE_YOUR_CUSTOMER_CODE');
  //
  //     setState(() {
  //       flourishHome = flourish.home();
  //     });
  //   });
  // }

  @override
  Widget build(BuildContext context) {
    return flourishHome ?? const Text('Loading');
  }
}
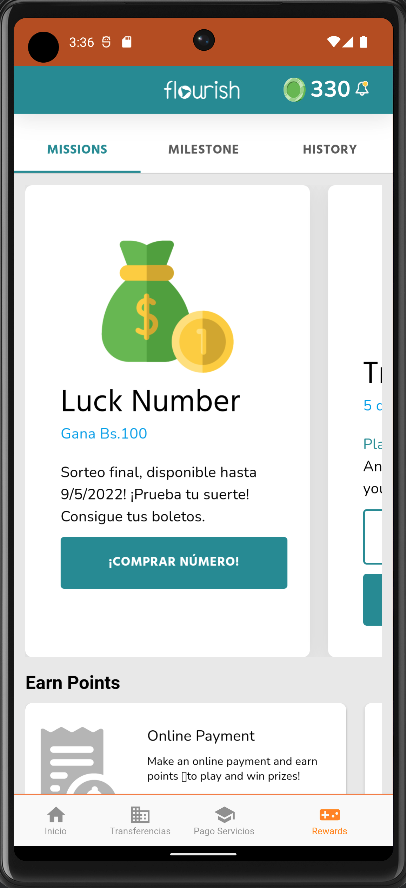
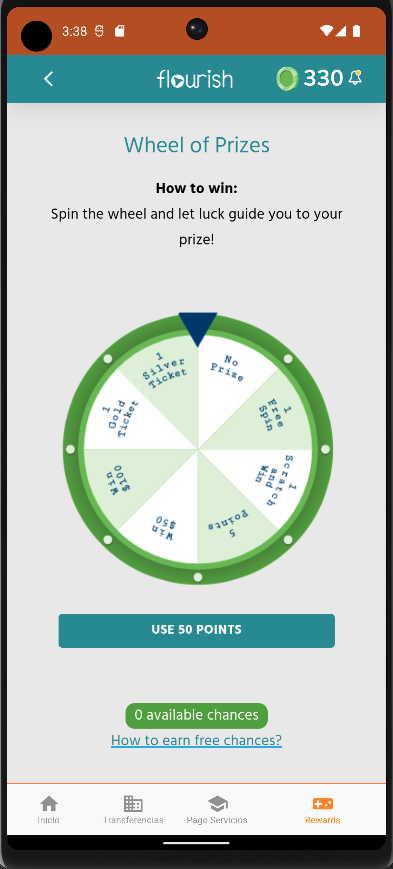
After a successful rendering, you should see something like this.
There is a more elaborate example inside the sdk repository, you can access it by clicking here.
EVENTS #
You can also register for some events to know when something happens within our platform.
You can listen to a specific already mapped event, an unmapped event, or all events if you prefer.
Listen our mapped events #
We have some events already mapped that you can listen to separately
For example, if you need know when ou Trivia feature finished, you can listen to the "TriviaFinishedEvent"
flourish.onTriviaFinishedEvent((TriviaFinishedEvent response) {
  print("Event name: ${response.name}");
  print("Event data: ${jsonEncode(response.data.toJson())}");
});
you can find our all mapped events here: https://github.com/Flourish-savings/flourish-sdk-flutter/tree/main/lib/events/types
Listen our unmapped events #
Even if our platform starts sending new unmapped events, it will not be necessary to update the SDK version to consume them.
Just start listening to the generic events
flourish.onGenericEvent((GenericEvent response) {
  print("Event name: ${response.name}");
  print("Event data: ${jsonEncode(response.data.toJson())}");
});
Listen all events #
But if you want to listen all the events, we also have that for you.
flourish.onAllEvent((Event response) {
  print("Event name: ${response.name}");
});
Examples #
Inside this repository, you have an example app to show how to integrate with us:
https://github.com/Flourish-savings/flourish-sdk-flutter/tree/main/
This will simulate your Flutter App calling our application inside a Flutter web-view component
Metadata
Publisher
unverified uploader
Weekly Downloads
Metadata
Flourish SDK for partners integrate.
Repository (GitHub)
View/report issues
License
![]() unknown (license)
unknown (license)
Dependencies
dio, flutter, flutter_spinkit, provider, url_launcher, webview_flutter
More
Packages that depend on flourish_flutter_sdk
Packages that implement flourish_flutter_sdk