awesome_notifications 0.0.1+2  awesome_notifications: ^0.0.1+2 copied to clipboard
A complete solution to create Local Notifications and Push Notifications, throught Firebase or another services, using Flutter.
Awesome Notifications - Flutter #

Features #
- Create Local Notifications on Android, iOS and Web using Flutter.
- Create Push notifications using services as Firebase or any another one, simultaneously;
- Easy to use and highly customizable.
- Add images, sounds, buttons and different layouts on your notifications.
- Notifications could be created at any moment (on Foreground, Background or even when the application is killed).
- High trustble on receive notifications in any Application lifecycle.
- High quality data analytics about when the notification was created, where it came from and when the user taps on it. A perfect solution to apply AB tests aproachings, etc, increasing the users engadgement.
- Notifications are received on Flutter level code when they are created, displayed or even tapped by the user.
- Notifications could be scheduled repeatly using Cron rules, such linux does, including seconds precision.
Notification Types Available #
- Basic notification
- Big picture notification
- Media notification
- Big Text notification
- Inbox notification
- Notifications with action buttons
- Grouped notifications
- Progress bar notifications
All notifications could be created localy or via Firebase services, with all the features.
 Some examples of notifications produced using awesome notifications
ATENTION #

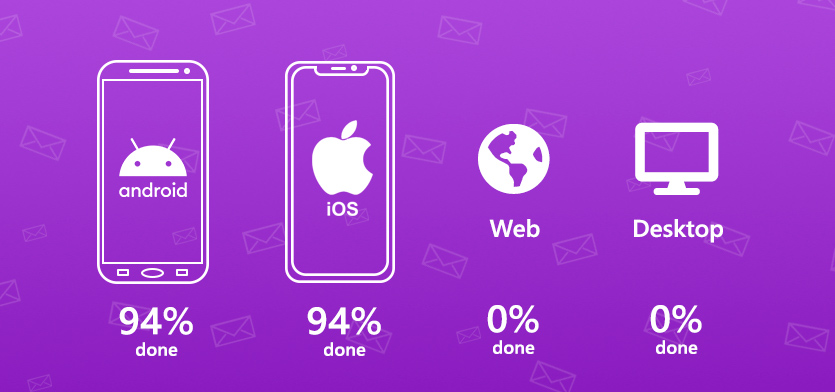
 Working progress percentages of awesome notifications plugin
Main Philosophy #
Considering all the many different devices available, with different hardware and software resources, this plugin ALWAYS shows the notification, trying to use the maximum resources available. If the resource is not available, the notification ignores that specifc resource, but it shows anyway.
Example: If the device has LED colored lights, use it. Otherwise, ignore the lights, but shows the notification with all another resources available. In last case, shows at least the most basic notification.
Also, the Noification Channels follows the same rule. If there is no channel segregation of notifications, use the channel configuration as only defaults configuration. If the device has channels, use it as expected to be.
And all notifications sent while the app was killed are registered and delivered as soon as possible to the Application, after the plugin initialziation, respecting the delivery order.
This way, your Application will receive all notifications at Flutter level code.
A very simple example #
-
Add awesome_notifications as a dependency in your pubspec.yaml file.
awesome_notifications: any -
import the plugin package to your dart code
import 'package:awesome_notifications/awesome_notifications.dart'; -
Initialize the plugin on main.dart, with at least one native icon and one channel
AwesomeNotifications().initialize( 'resource://drawable/app_icon', [ NotificationChannel( channelKey: 'basic_channel', channelName: 'Basic notifications', channelDescription: 'Notification channel for basic tests', defaultColor: Color(0xFF9D50DD), ledColor: Colors.white ) ] ); -
On your main page, starts to listen the notification actions (to detect tap)
AwesomeNotifications().actionNotificationStream.listen( (receivedNotification){ Navigator.of(context).pushName(context, '/NotificationPage', arguments: { id: receivedNotification.id } // your page params. I recomend to you to pass all *receivedNotification* object ); } ); -
In any place of your app, create a new notification
   AwesomeNotifications().createNotification(
 	  content: NotificationContent(
 		  id: 10,
 		  channelKey: 'basic_channel',
 		  title: 'Simple Notification',
 		  body: 'Simple body'
 	  )
   );
THATS IT! CONGRATZ!!!
Using Firebase Services (Optional) #
To activate the Firebase Cloud Messaging service, please follow these steps:
Android #
Go to the [[Firebase Console]][firebase_link] and create a new project.
After, go to Cloud Messaging and add an Android app, put the packge name of your project to generate the file google-services.json. Download the file and place it inside your android/app folder.
Add the classpath to the [project]/android/build.gradle file.
dependencies {
	classpath 'com.android.tools.build:gradle:3.5.0'
	// Add the google services classpath
	classpath 'com.google.gms:google-services:4.3.3'
}
Add the apply plugin to the [project]/android/app/build.gradle file.
// ADD THIS AT THE BOTTOM
apply plugin: 'com.google.gms.google-services'
iOS #
In construction... sorry for the inconveniency
Notification Life Cycle #
Notifications are received by local code or FCM using native code, so the messages will appears immediately or at schedule time, independent of your application state.

Flutter Streams #
The Flutter code will be called as soon as possible using [[Streams]][stream_dart].
createdNotificationStream: Fires when a notification is created displayedNotificationStream: Fires when a notification is displayed on system status bar actionNotificationStream: Fires when a notification is tapped by the user
| App in Foreground | App in Background | App Terminated (Killed) | |
|---|---|---|---|
| Android | Fires all streams imeadtly after occours | Fires all streams imeadtly after occours | Fires created and displayed after the plugin initializes, but fires action imeadtly after occours |
| iOS | Fires all streams imeadtly after occours | Fires all streams imeadtly after occours | Fires created and displayed after the plugin initializes, but fires action imeadtly after occours |
Read me construction in progress... please be patient [firebase_link]: https://console.firebase.google.com/ "Firebase Console" [stream_dart]: https://dart.dev/tutorials/language/streams "Streams"