BITalino

Open source Flutter plugin that integrates the communication with BITalino devices. Made by Afonso Raposo.
See the an example app here.
Tested with BITalino Core BT (MCU+BT+PWR) and BITalino Core BLE/BT.

Currently supporting:
This plugin uses the available native APIs available at https://bitalino.com/en/development/apis.
| Plaftorm | Supported | Native Repository | Date |
|---|---|---|---|
| Android | ✅ | revolution-android-api | Jul 16, 2020 |
| IOS | ✅ | BITalinoBLE-iOS | Jun 22, 2016 |
Installation
Add this plugin to the pubspec.yaml file:
dependencies:
  flutter:
    sdk: flutter
  bitalino: ^1.1.1 // add bitalino plugin
Android
On Android, you must set the minSdkVersion to 18 (or higher) in your android/app/build.gradle file.
minSdkVersion 18
IOS
On IOS, you have to add the following lines to the bottom of the /ios/Runner/Info.plist file:
<key>NSBluetoothAlwaysUsageDescription</key>
<string>This application needs access to bluetooth to communicate with BITalino device</string>

<key>NSBluetoothPeripheralUsageDescription</key>
<string>This application needs access to BLE to communicate with BITalino device</string>
Examples
Initialize controller
Android
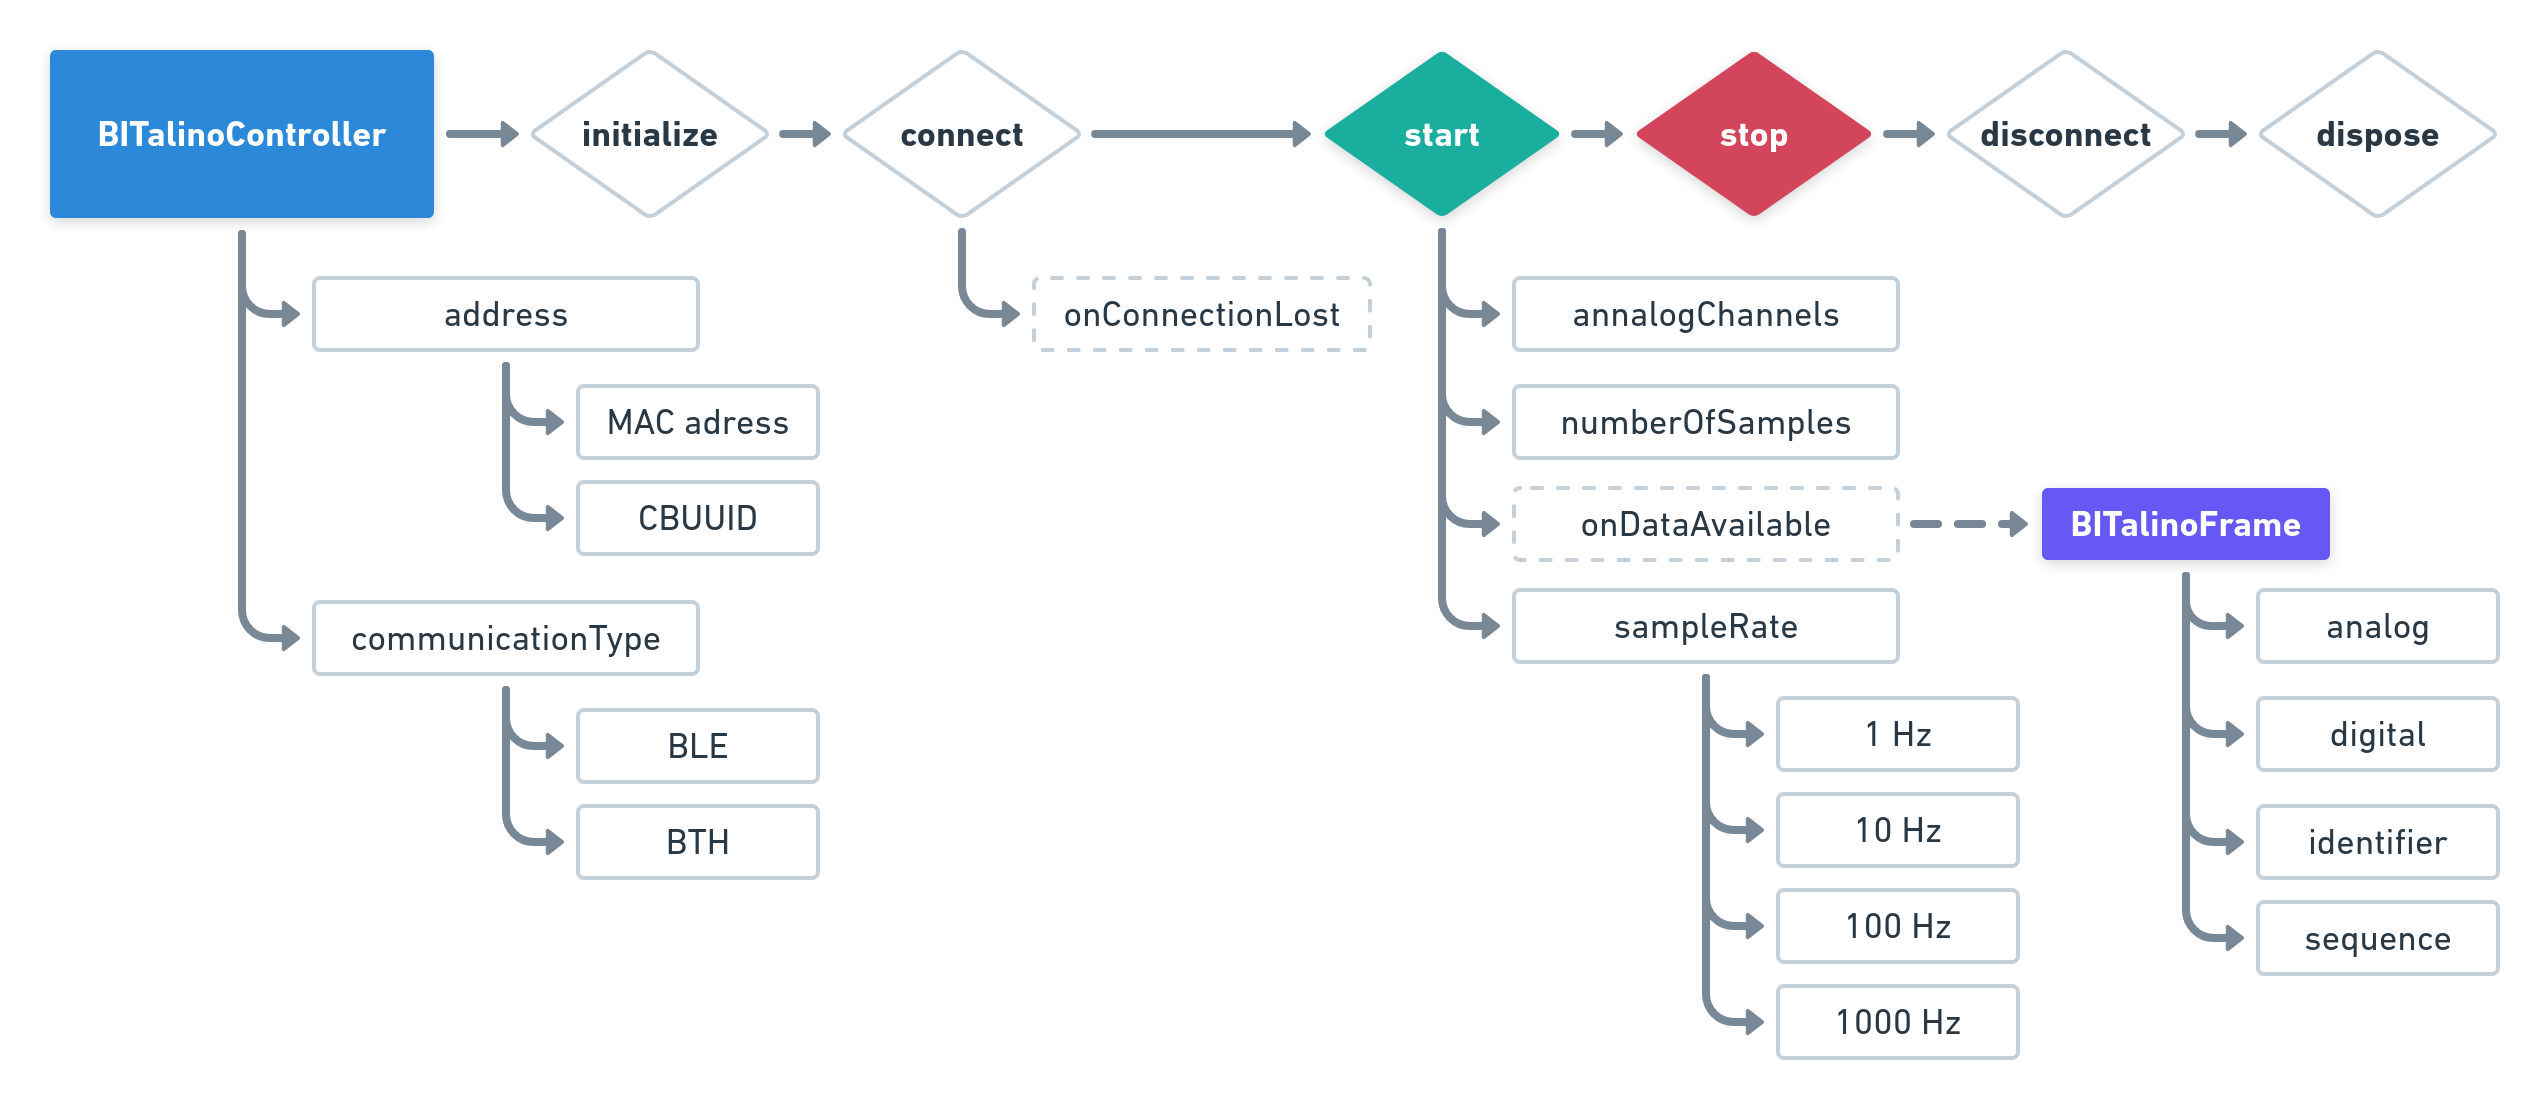
On Android, the user must provide the device MAC address and can choose between BTH or BLE for communication protocols. If available, BTH is advised.
BITalinoController bitalinoController = BITalinoController(
  "20:16:07:18:17:02",
  CommunicationType.BTH,
);

try {
  await bitalinoController.initialize();
} on PlatformException catch (Exception) {
  print("Initialization failed: ${Exception.message}");
}
IOS
On IOS, the user must provide the device UUID and can only use BLE regarding communication protocol.
The UUID can be found with this application: Bluetooth Smart Scanner .
On IOS, there is no frame identifier.
BITalinoController bitalinoController = BITalinoController(
  "03A1C0AB-018F-5B39-9567-471DDE5B0322",
  CommunicationType.BLE,
);

try {
  await bitalinoController.initialize(

  );
} on PlatformException catch (Exception) {
  print("Initialization failed: ${Exception.message}");
}
Connect to device
Connect to a device by providing its address.
await bitalinoController.connect(
  onConnectionLost: () {
    print("Connection lost");
  },
)
Start acquisition
Start acquiring analog channels: A0, A2, A4, and A5, with a Sampling Rate of 10Hz.
onDataAvailable is called everytime the application receives data during recording.
bool success = await bitalinoController.start(
  [0, 2, 4, 5],
  Frequency.HZ10,
  onDataAvailable: (BITalinoFrame frame) {
      print(frame.sequence);    // [int]
      print(frame.analog);      // [List<int>]
      print(frame.digital);     // [List<int>]
    },),
);
During acquisiton, the onDataAvailable callback is called.
Stop acquisition
bool success = await bitalinoController.stop();
Get the device state
Android
BITalinoState state = await bitalinoController.state();
print(state.identifier);        // [String]
print(state.battery);           // [int]
print(state.batteryThreshold);  // [int]
print(state.analog);            // [List<int>]
print(state.digital);           // [List<int>]
IOS
This method is not available for IOS.
Disconnect from device
bool success = await bitalinoController.disconnect();
Dispose controller
When you're done using the controller, dispose it.
bool success = await bitalinoController.dispose();
More
You can find all the information regarding this plugin on the API reference page.
Future
If you have any suggestion or problem, let me know and I'll try to improve or fix it. Also, feel free to contribute to this project! :)
License
GNU General Public License v3.0, see the LICENSE.md file for details.