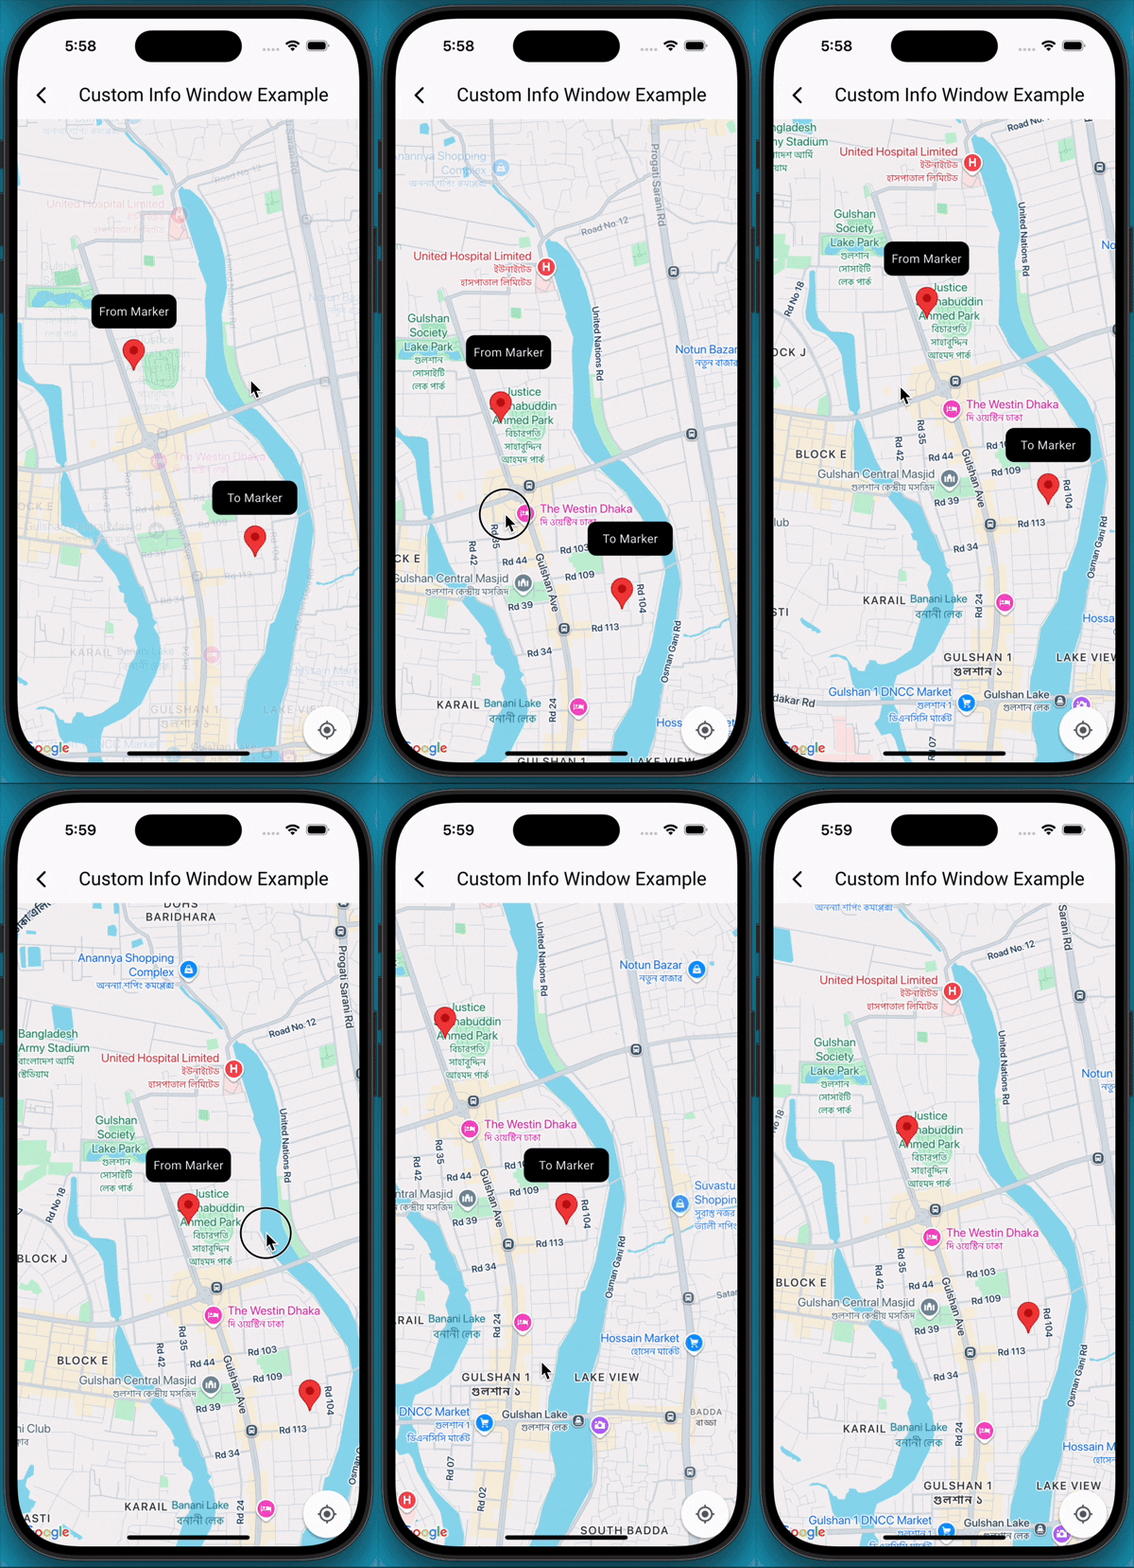
google map custom info window
A Flutter package that extends the capabilities of google_maps_flutter by allowing developers to display fully customizable info windows for markers, including the ability to show multiple info windows simultaneously on the map.
✨Features
- Customizable Info Windows: Design your info window using any Flutter widget.
- Multiple Info Windows: Display several info windows at once, ideal for showing details of nearby locations or clustered markers.
- Highly Flexible: Control the content, styling, and behavior of each info window independently.
- Easy Integration: Seamlessly integrates with your existing Maps_flutter implementation.
📸 Demo screen recording

🚀 Getting Started
-
Add Dependencies First, ensure you have
google_maps_flutterintegrated into your project. Then, addgoogle_map_custom_windowsto yourpubspec.yaml:dependencies: google_map_custom_windows: ^1.0.1Run
flutter pub getto fetch the new dependencies. -
Import
import 'package:google_map_custom_windows/google_map_custom_windows.dart'; -
Usage To use the custom info windows, you'll primarily interact with the
GoogleMapCustomWindowControllerand theCustomMapInfoWindowwidget.
- Initialize
GoogleMapCustomWindowController, Create an instance ofGoogleMapCustomWindowControllerin your StatefulWidget's initState.late GoogleMapCustomWindowController _googleMapCustomWindowController; @override void initState() { super.initState(); _googleMapCustomWindowController = GoogleMapCustomWindowController(); } - Need to create your custom
info windowwidget for view. You can create multiple window as your requirement.class MyCustomInfoWidget extends StatelessWidget { final String title; const MyCustomInfoWidget({super.key, required this.title}); @override Widget build(BuildContext context) { return Container( decoration: BoxDecoration( borderRadius: BorderRadius.circular(10), color: Colors.black, ), alignment: Alignment.center, child: Text( title, style: TextStyle(color: Colors.white, fontSize: 14), ), ); } } - Declare list of info window and same size of list LatLng.
List<Widget> infoWidgets = [ MyCustomInfoWidget(title: 'From Marker'), MyCustomInfoWidget(title: 'To Marker'), ]; List<LatLng> infoPositions = [ LatLng(23.798054, 90.413459), LatLng(23.789451, 90.419584), ]; - Use Stack widget for using custom info window.
@Stack(
     children: [
       GoogleMap(
         mapType: MapType.normal,
         markers: markers,
         initialCameraPosition: CameraPosition(target: initPosition, zoom: 15),
         onMapCreated: (GoogleMapController controller) {
           _setFromToMarker();
           _googleMapCustomWindowController.googleMapController = controller;
           _googleMapCustomWindowController.addInfoWindow!(infoWidgets, infoPositions);
         },
         onTap: (position) {
           _googleMapCustomWindowController.hideInfoWindow!();
         },
         onCameraMove: (CameraPosition cameraPosition) {
           _googleMapCustomWindowController.onCameraMove!();
         },
       ),

       CustomMapInfoWindow(
         controller: _googleMapCustomWindowController,
         offset: const Offset(0, 50),
         height: 40,
         width: 100,
       ),
     ],
   )
- Don't forget to dispose _
googleMapCustomWindowController@override void dispose() { _googleMapCustomWindowController.dispose(); super.dispose(); }
🤝 Contributing
Contributions are welcome! If you find a bug or have a feature request, please open an issue on GitHub. If you'd like to contribute code, please fork the repository and submit a pull request.