golden_screenshot
Easily generate screenshots for all app stores:

![]()
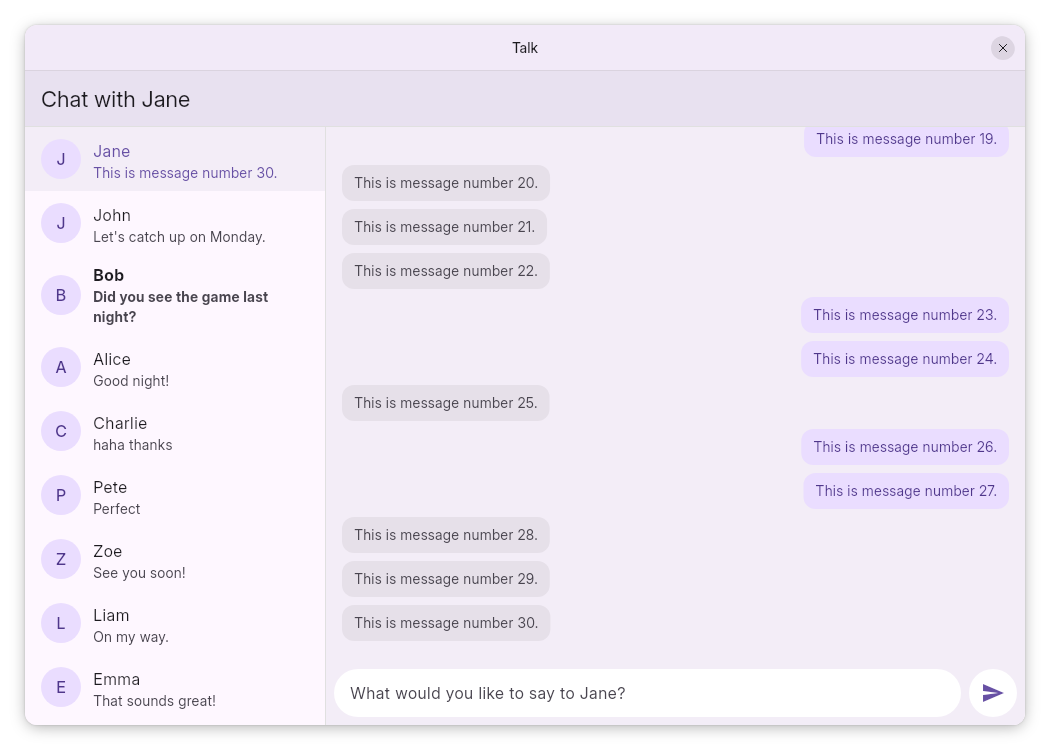
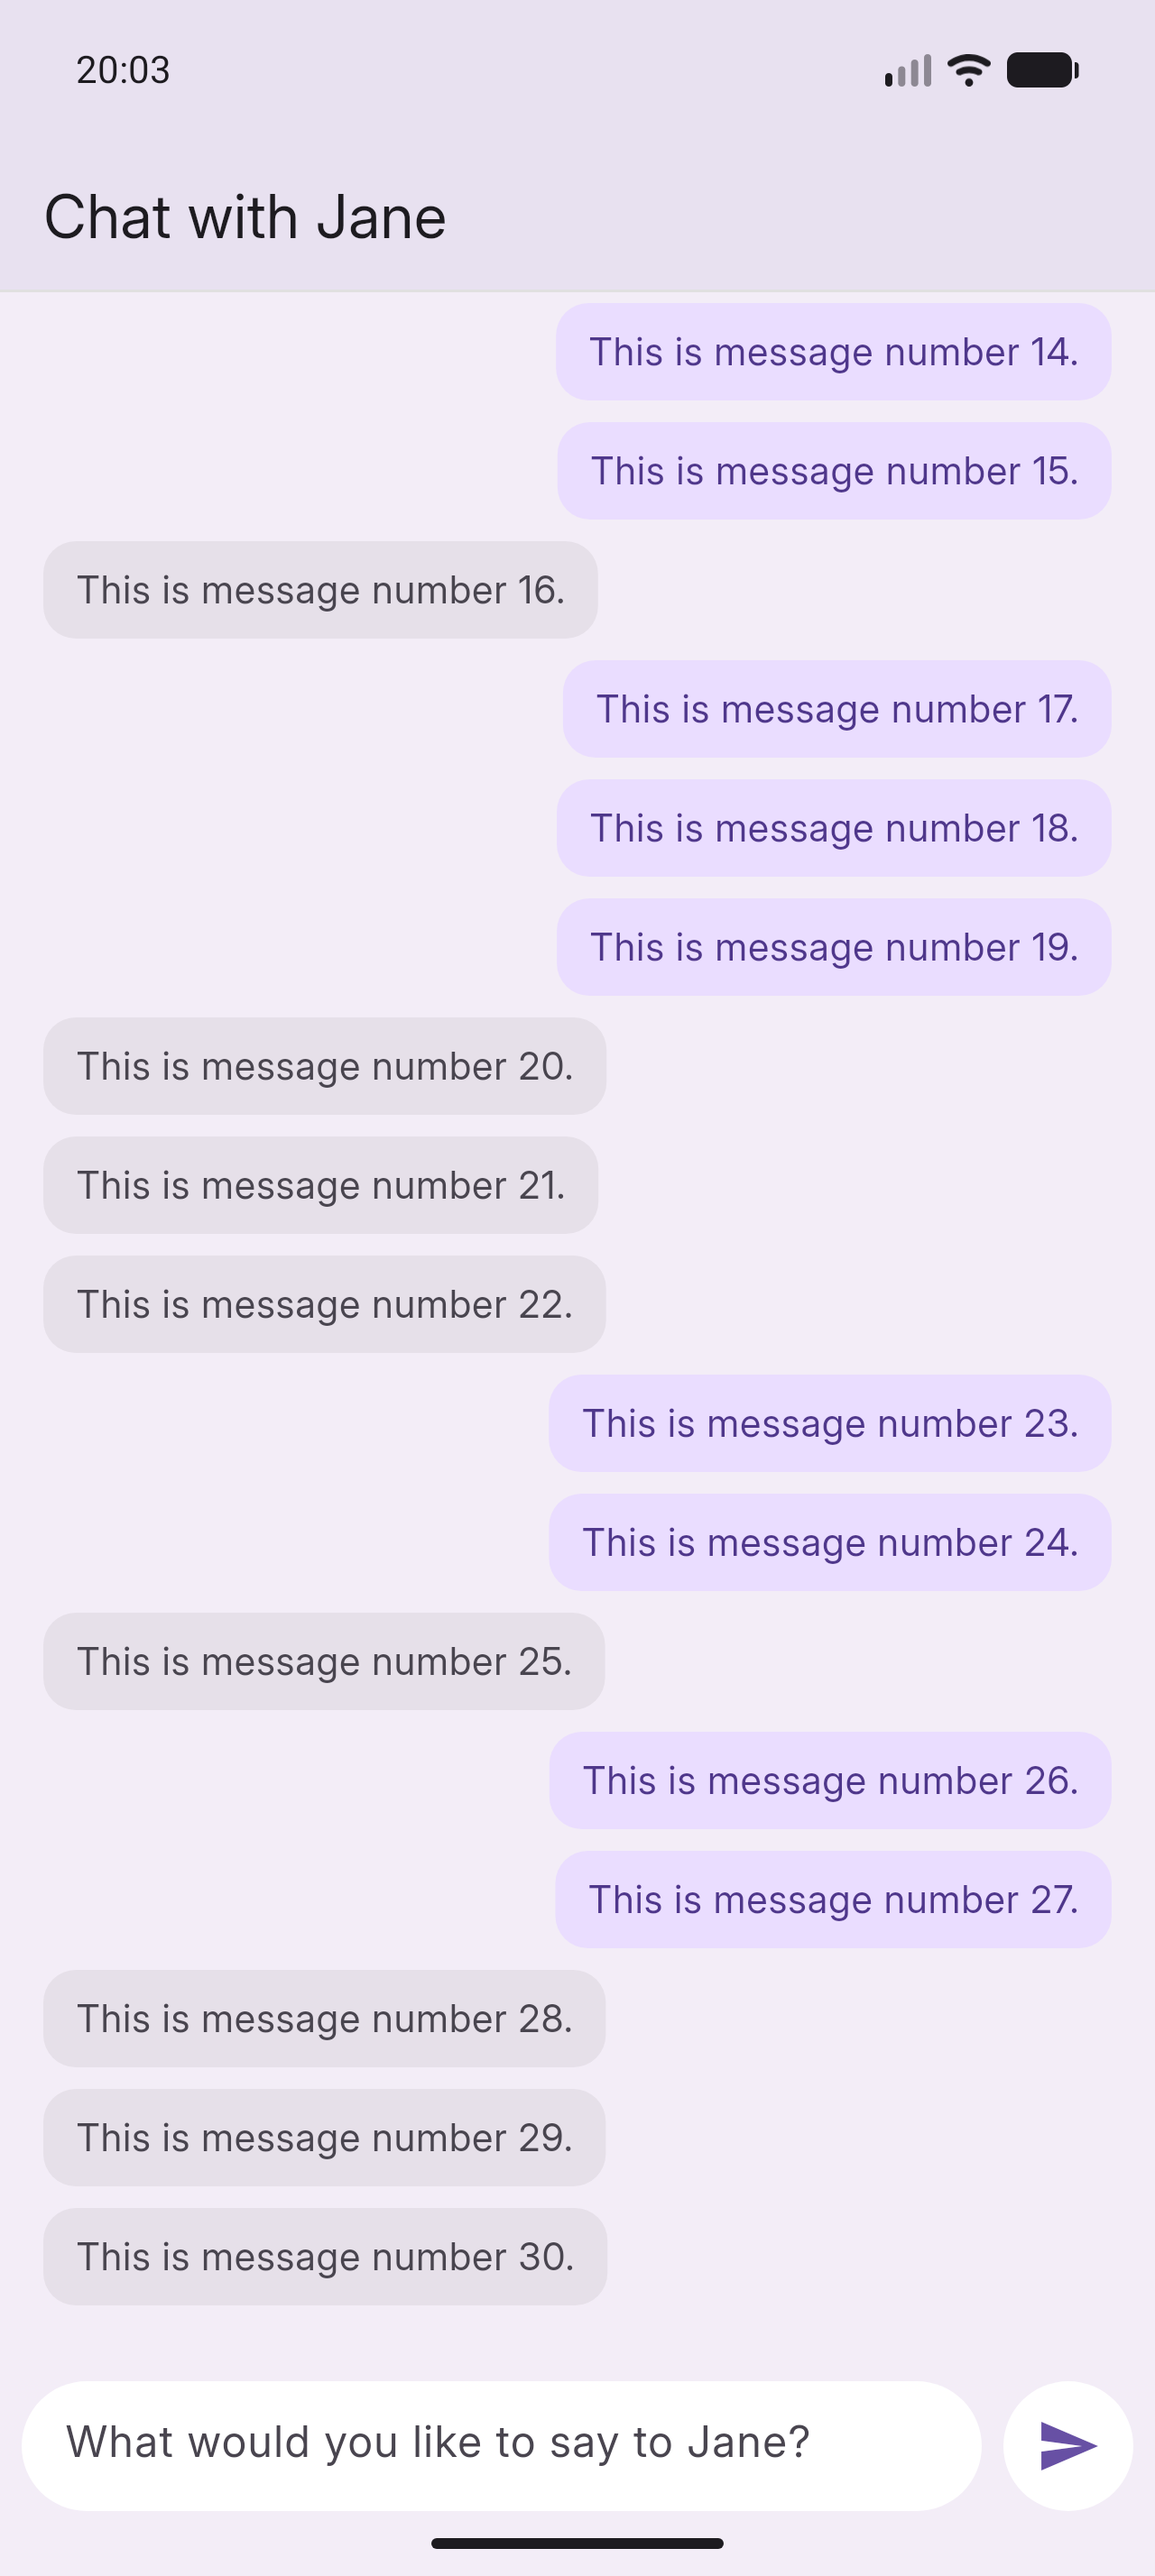
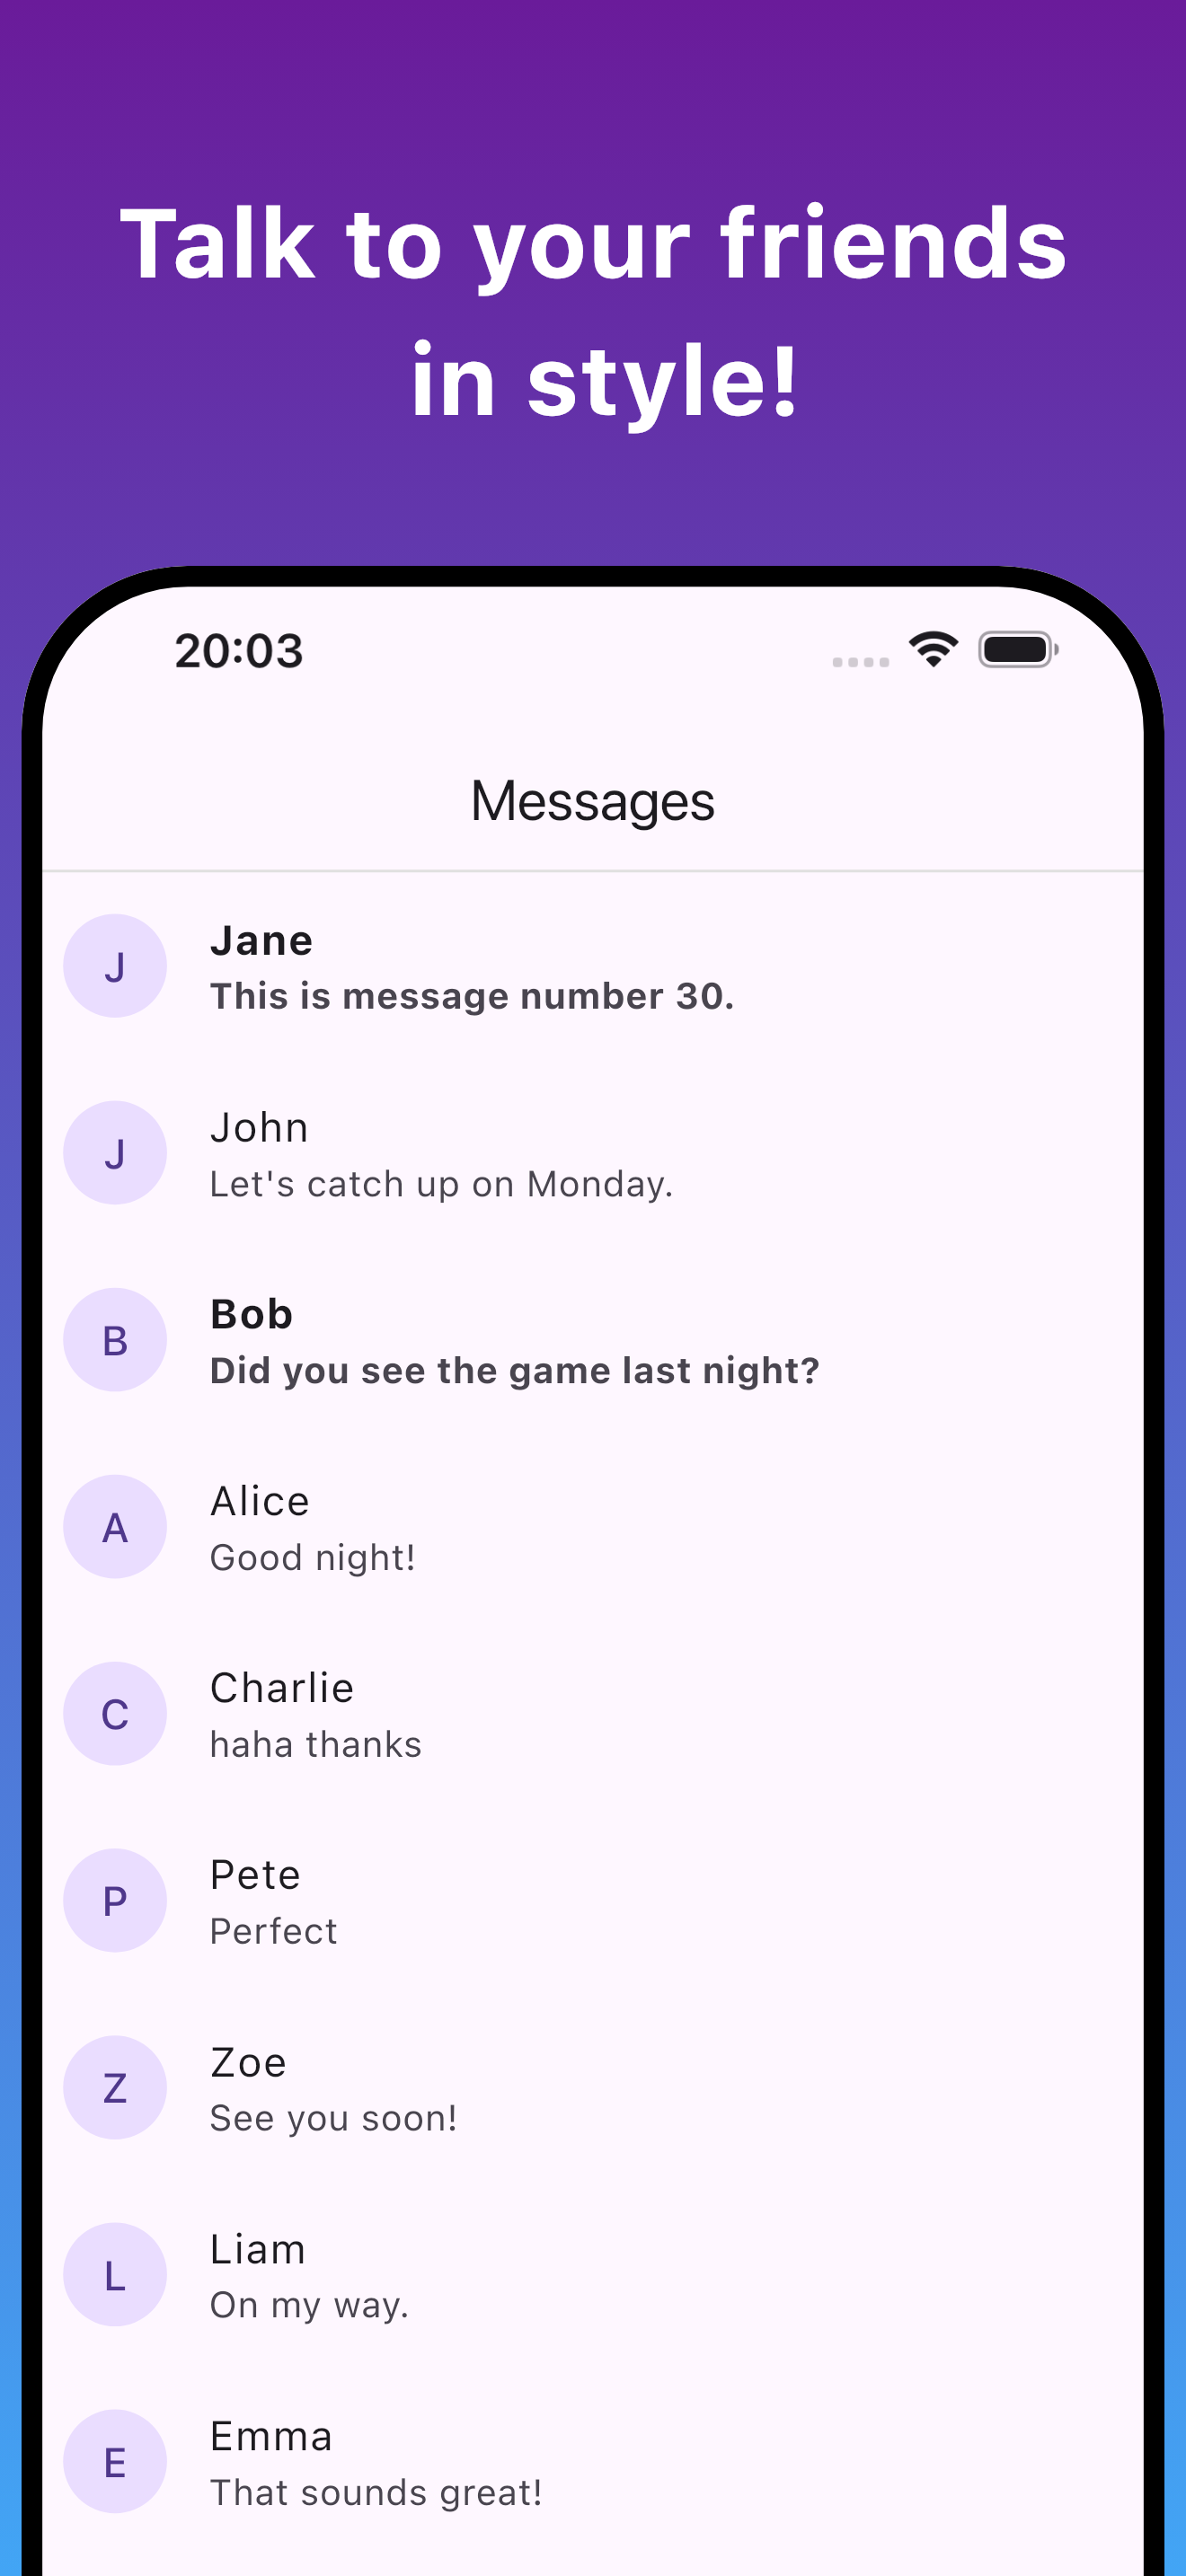
This package makes it easy to generate screenshots of your Flutter app for
the App Store, Play Store, F-Droid, Flathub (Linux), etc.
You can use the provided set of common devices (phones, tablets, desktops)
or create your own custom devices and frames.
This package is also great for regular golden tests, not just for app store screenshots. It provides lots of flexibility and functionality beyond what Flutter has built-in.
Getting started
Add golden_screenshot to your app as a dev dependency:
flutter pub add dev:golden_screenshot
Then create a file in your test directory (e.g. test/screenshot_test.dart).
In that file, you will create tests that load widgets and take screenshots of them.
Please use the example test file as a starting point.
If you're new to golden testing, watching a tutorial on Flutter golden testing will help you understand the basics.
Once you have your test file, you can run the tests to generate the screenshots:
flutter test --update-goldens
That's it! Your screenshots will be generated in the appropriate directories.
Differences from regular golden tests
If you're familiar with golden tests in Flutter, you'll notice 2 small differences...
We can replace expectLater with tester.expectScreenshot to automatically determine the golden file path from the device and language.
Additionally, we use testGoldens instead of testWidgets which gives us two benefits:
- It enables shadows inside golden tests. By default, Flutter renders them as solid black borders to avoid flakiness, but we handle this by using a fuzzy comparator.
- It enables a fuzzy comparator. Flutter's default behavior is to expect pixel-perfect matches in golden tests, but for our purposes, we can allow a small (0.1% configurable) mismatch without issue.
Here is how our code looks before and after using these convenience methods:
// Without convenience methods
testWidgets('My screenshot test', (tester) async {
  // ...
  debugDisableShadows = false;
  tester.useFuzzyComparator();
  await expectLater(find.byType(MaterialApp), matchesGoldenFile('metadata/en-US/images/phoneScreenshots/1_home.png'));
  debugDisableShadows = true;
});

// With convenience methods
testGoldens('My screenshot test', (tester) async {
  // ...
  await tester.expectScreenshot(device, '1_home');
});
Usage with regular golden tests
You can also use this package for regular golden tests, not just for app store screenshots. Just make a few adjustments to your existing golden tests:
- Use
testGoldensinstead oftestWidgets. - Use a
ScreenshotAppto get a realistic device frame:
Use thefinal app = ScreenshotApp( device: GoldenScreenshotDevices.iphone.device, child: MyApp(), ); await tester.pumpWidget(app);ScreenshotApp.withConditionalTitlebarconstructor instead to add a title bar on desktop platforms (like in the image above). - Before the
matchesGoldenFileline, load the app's assets (fonts and images):await tester.loadAssets(); await tester.pump(); await expectLater(find.byType(MaterialApp), matchesGoldenFile(...));
Other notes
- Always use
find.byType(MaterialApp)notfind.byType(MyWidget)for your golden comparison, so that the device frame is included in the golden image. You don't need to worry about this when usingtester.expectScreenshot. tester.loadAssets()will replace any missing fonts with Inter. If you wish to avoid this, ensure all font files you need are bundled with your app.- If your golden images don't need to be high-resolution, you can swap
GoldenScreenshotDeviceswithGoldenSmallDeviceswhich have smaller resolutions to speed up tests.
Customization
Custom devices
If you don't want to use the default set of devices (GoldenScreenshotDevices),
you can create your own set of devices by creating an enum containing
ScreenshotDevice instances.
See GoldenScreenshotDevices for what your enum should look like.
enum MyScreenshotDevices {
  phone(ScreenshotDevice(
    platform: TargetPlatform.android,
    resolution: Size(1440, 3120),
    pixelRatio: 10 / 3,
    goldenSubFolder: 'phoneScreenshots/',
    frameBuilder: ScreenshotFrame.android,
  )),
  tablet(ScreenshotDevice(
    platform: TargetPlatform.android,
    resolution: Size(2732, 2048),
    pixelRatio: 2,
    goldenSubFolder: 'tenInchScreenshots/',
    frameBuilder: MyTabletFrame.new,
  ));

  const GoldenScreenshotDevices(this.device);
  final ScreenshotDevice device;
}
Custom frames
You can create your own frames by creating a widget whose contructor
has the same signature as ScreenshotFrame's constructor,
i.e. has the type ScreenshotFrameBuilder.
You can then pass your frame's constructor to the ScreenshotDevice's frameBuilder parameter as above.
class MyTabletFrame extends StatelessWidget {
  const MyTabletFrame({
    super.key,
    required this.device,
    this.frameColors,
    required this.child,
  });

  final ScreenshotDevice device;
  final ScreenshotFrameColors? frameColors;
  final Widget child;

  @override
  Widget build(BuildContext context) {
    // Your frame implementation, e.g. add system UIs, borders, etc.
  }
}
Also, your frames can do more than just add system UIs. You can style your screenshot however you like, e.g. by adding text, backgrounds, etc. As a proof of concept, see custom_frame_test.dart for how to make this styled frame:
Custom screenshot directory
By default, the screenshots are saved in ../metadata/\$localeCode/images/.
The ../ is because this path is relative to your current test file.
You can change this by setting ScreenshotDevice.screenshotsFolder to something else. This path should end with a slash too.
void main() {
  ScreenshotDevice.screenshotsFolder = 'path/to/screenshots/';
  testGoldens('...', (tester) async {
Libraries
- golden_screenshot
- Utilities to automate screenshot generation using Flutter's golden tests.