See exactly what your users want by conducting A/B testing in your flutter app extremely easily. Setup time: 5 minutes.
Getting started
Add the following line to your pubspec:
flutter_ab_tester: ^0.0.4
Usage
Create your account on the analysis dashboard at: https://flutter-ab-tester-dashboard.herokuapp.com/
Create a map of the widgets that you wish to A/B test with. The keys need to be unique identifiers for your variants and the values are the widgets.
Map<String, Widget> _mapOfTestCases = {"VariantA": VariantA(text: "I'm Variant A"), "VariantB": VariantB(text: "I'm Variant B")};
Now, call FlutterABTester() wherever you want to conduct your AB test as follows:
FlutterABTester(test_name, your_email, your_password, map_of_testcases)
Example:
Container(
  child: ElevatedButton(
    onPressed: (){
      // here, instead of calling your widget, we call FlutterABTester() which takes care of everything for you
      Navigator.push(
        context,
        MaterialPageRoute(builder: (context) => FlutterABTester(testName: "first_test", email: "john@gmail.com", password: "johnpassword", mapOfTestCases: _mapOfTestCases,)),
      );
    },
    child: Text(
        'Click me to see variant'
    ),
  ),
)
The variants VariantA and VariantB will now be randomly displayed to your users.
Next, inorder to register the target clicks, add the following function call to every button press that you wish to track.
FlutterABTesterUtility().targetButtonPressed(testname, variant_that_this_button_is_in, button_id, your_email, your_password);
Example:
ElevatedButton(
    onPressed: (){

      FlutterABTesterUtility().targetButtonPressed("first_test", "VariantA", "signup", "john@gmail.com", "johnpassword");

      // rest of your code
    },
    child: Text("Click for A"),
)
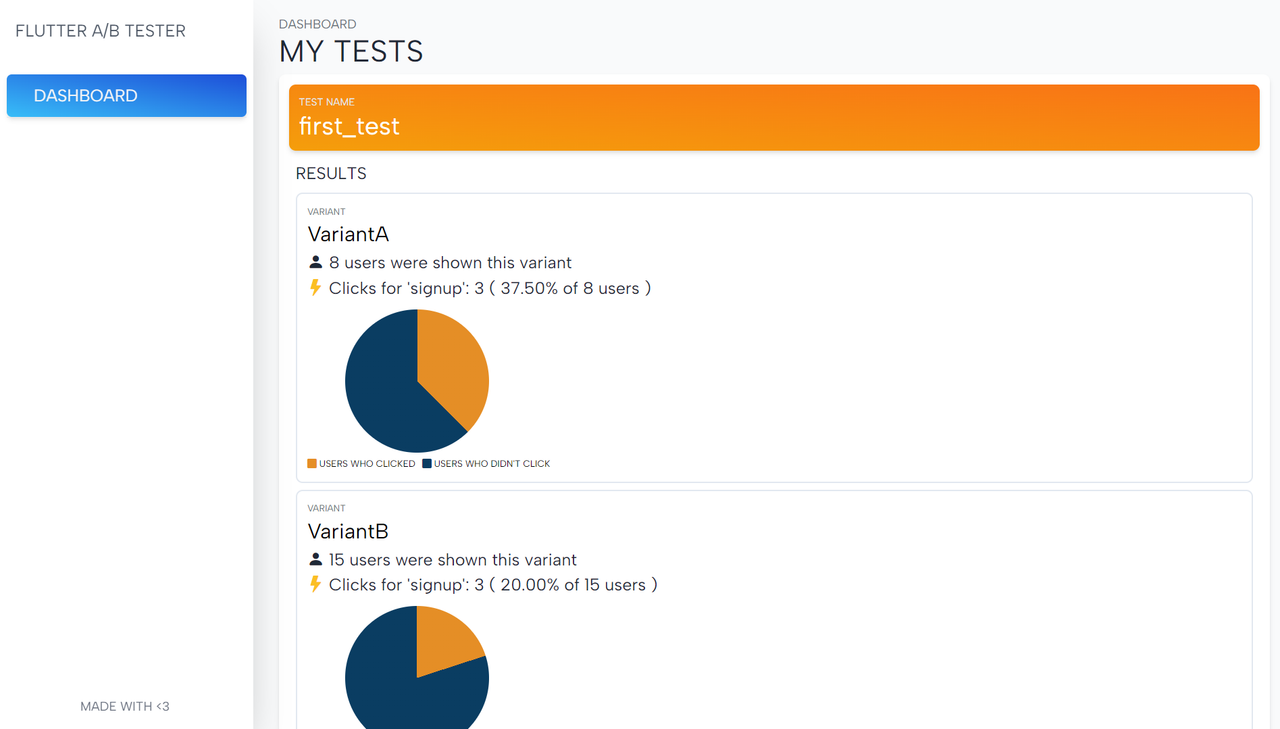
Now you can check your analysis results at: https://flutter-ab-tester-dashboard.herokuapp.com/dashboard
Your results will look something like this: