Floating window
![]()

A powerful, customizable Picture-in-Picture (PiP) mini player for Flutter apps with smooth animations and edge snapping.
📷 Screenshots
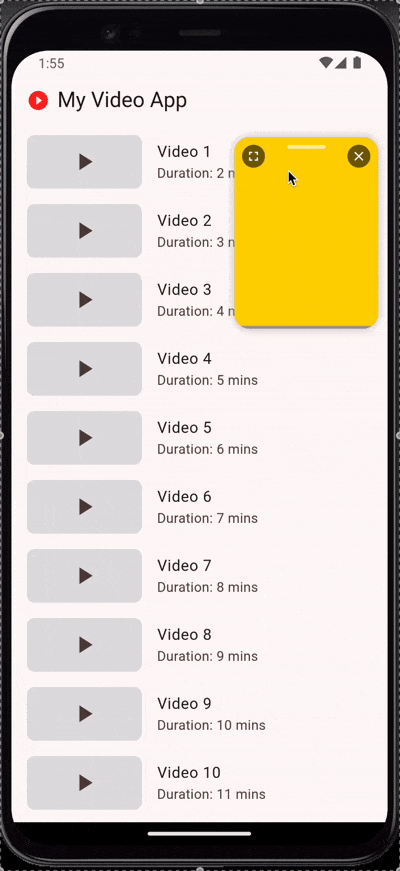 |
 |
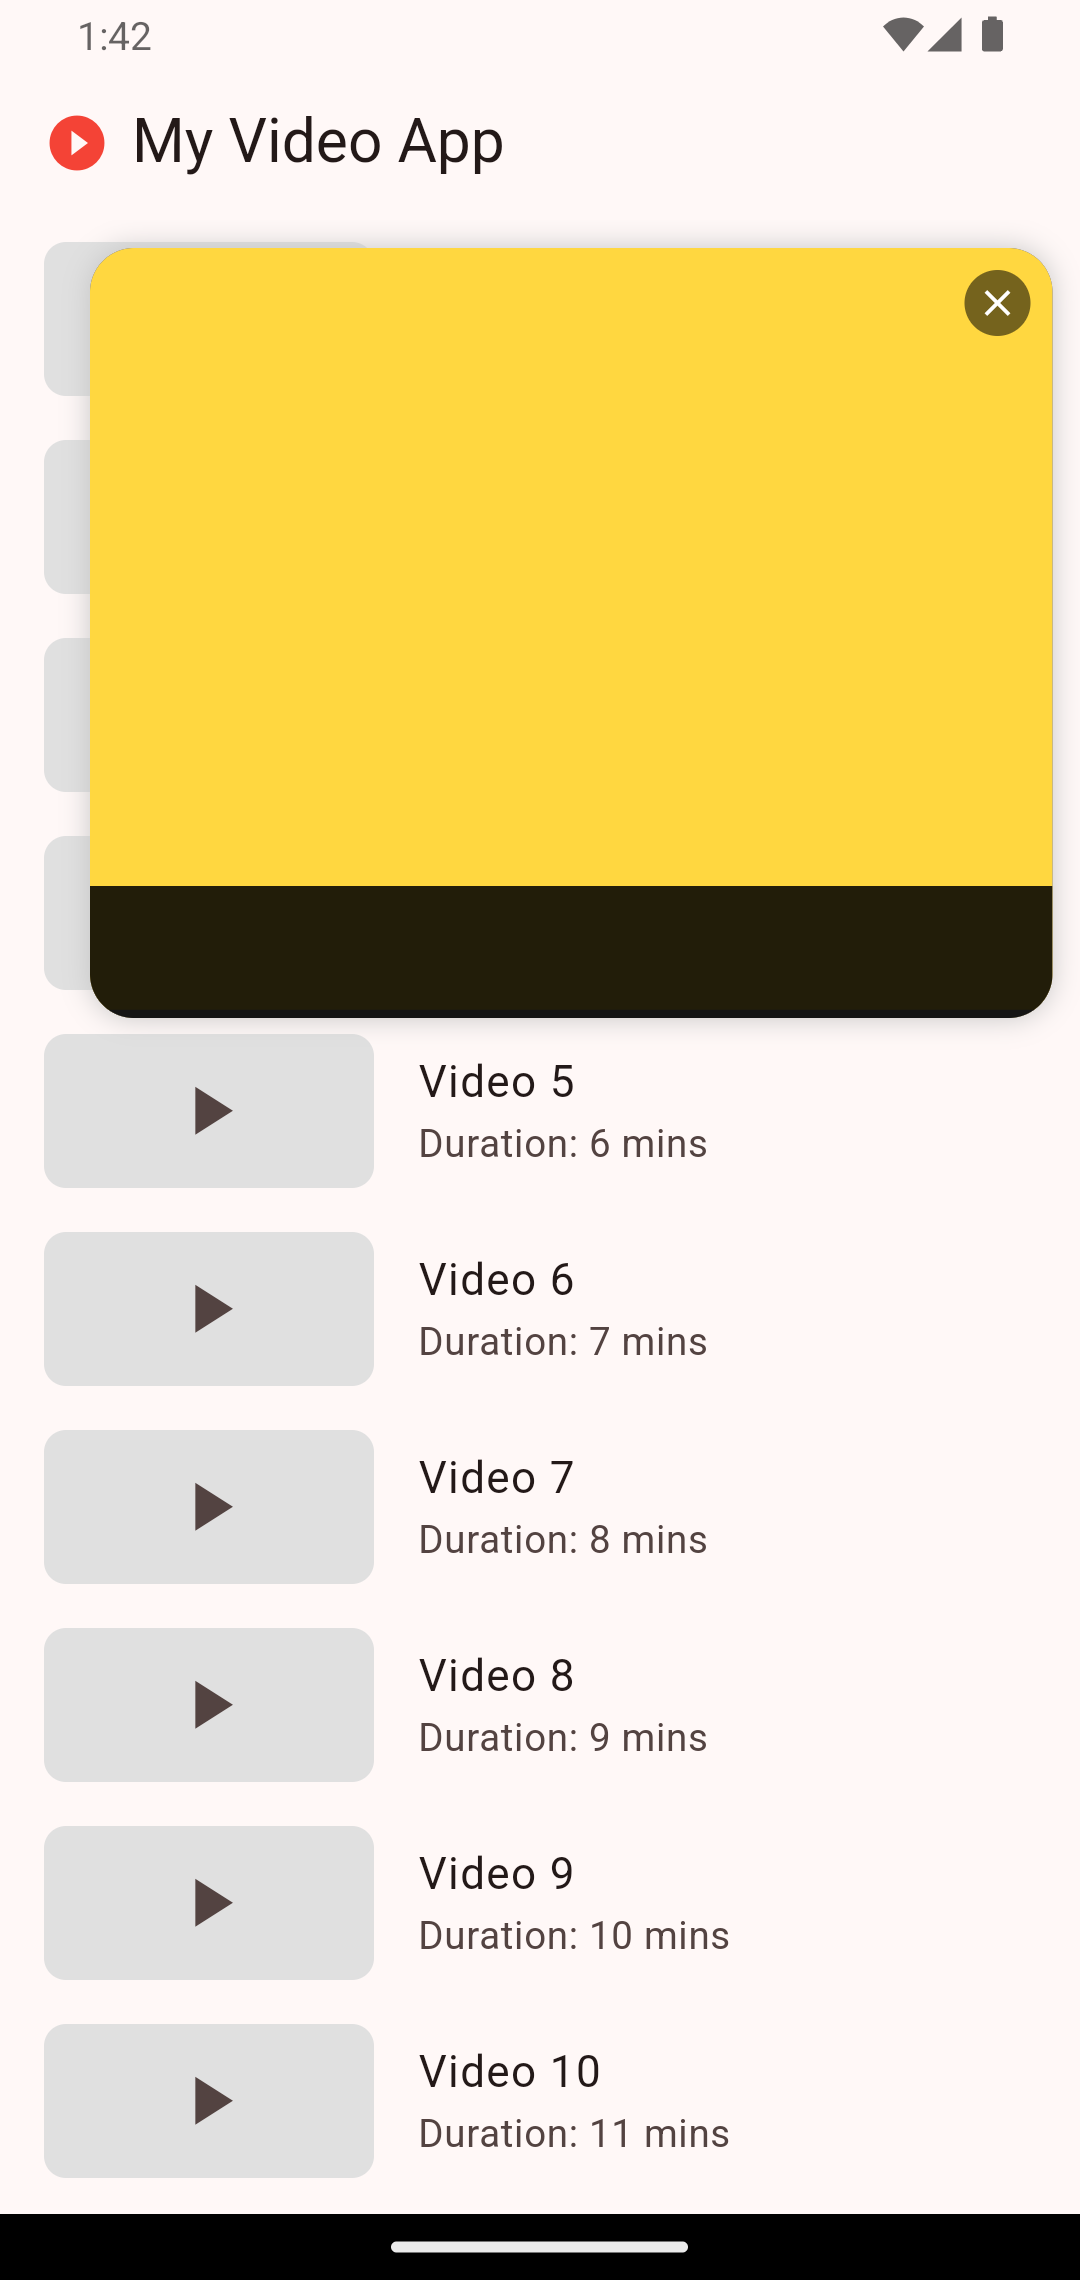 |
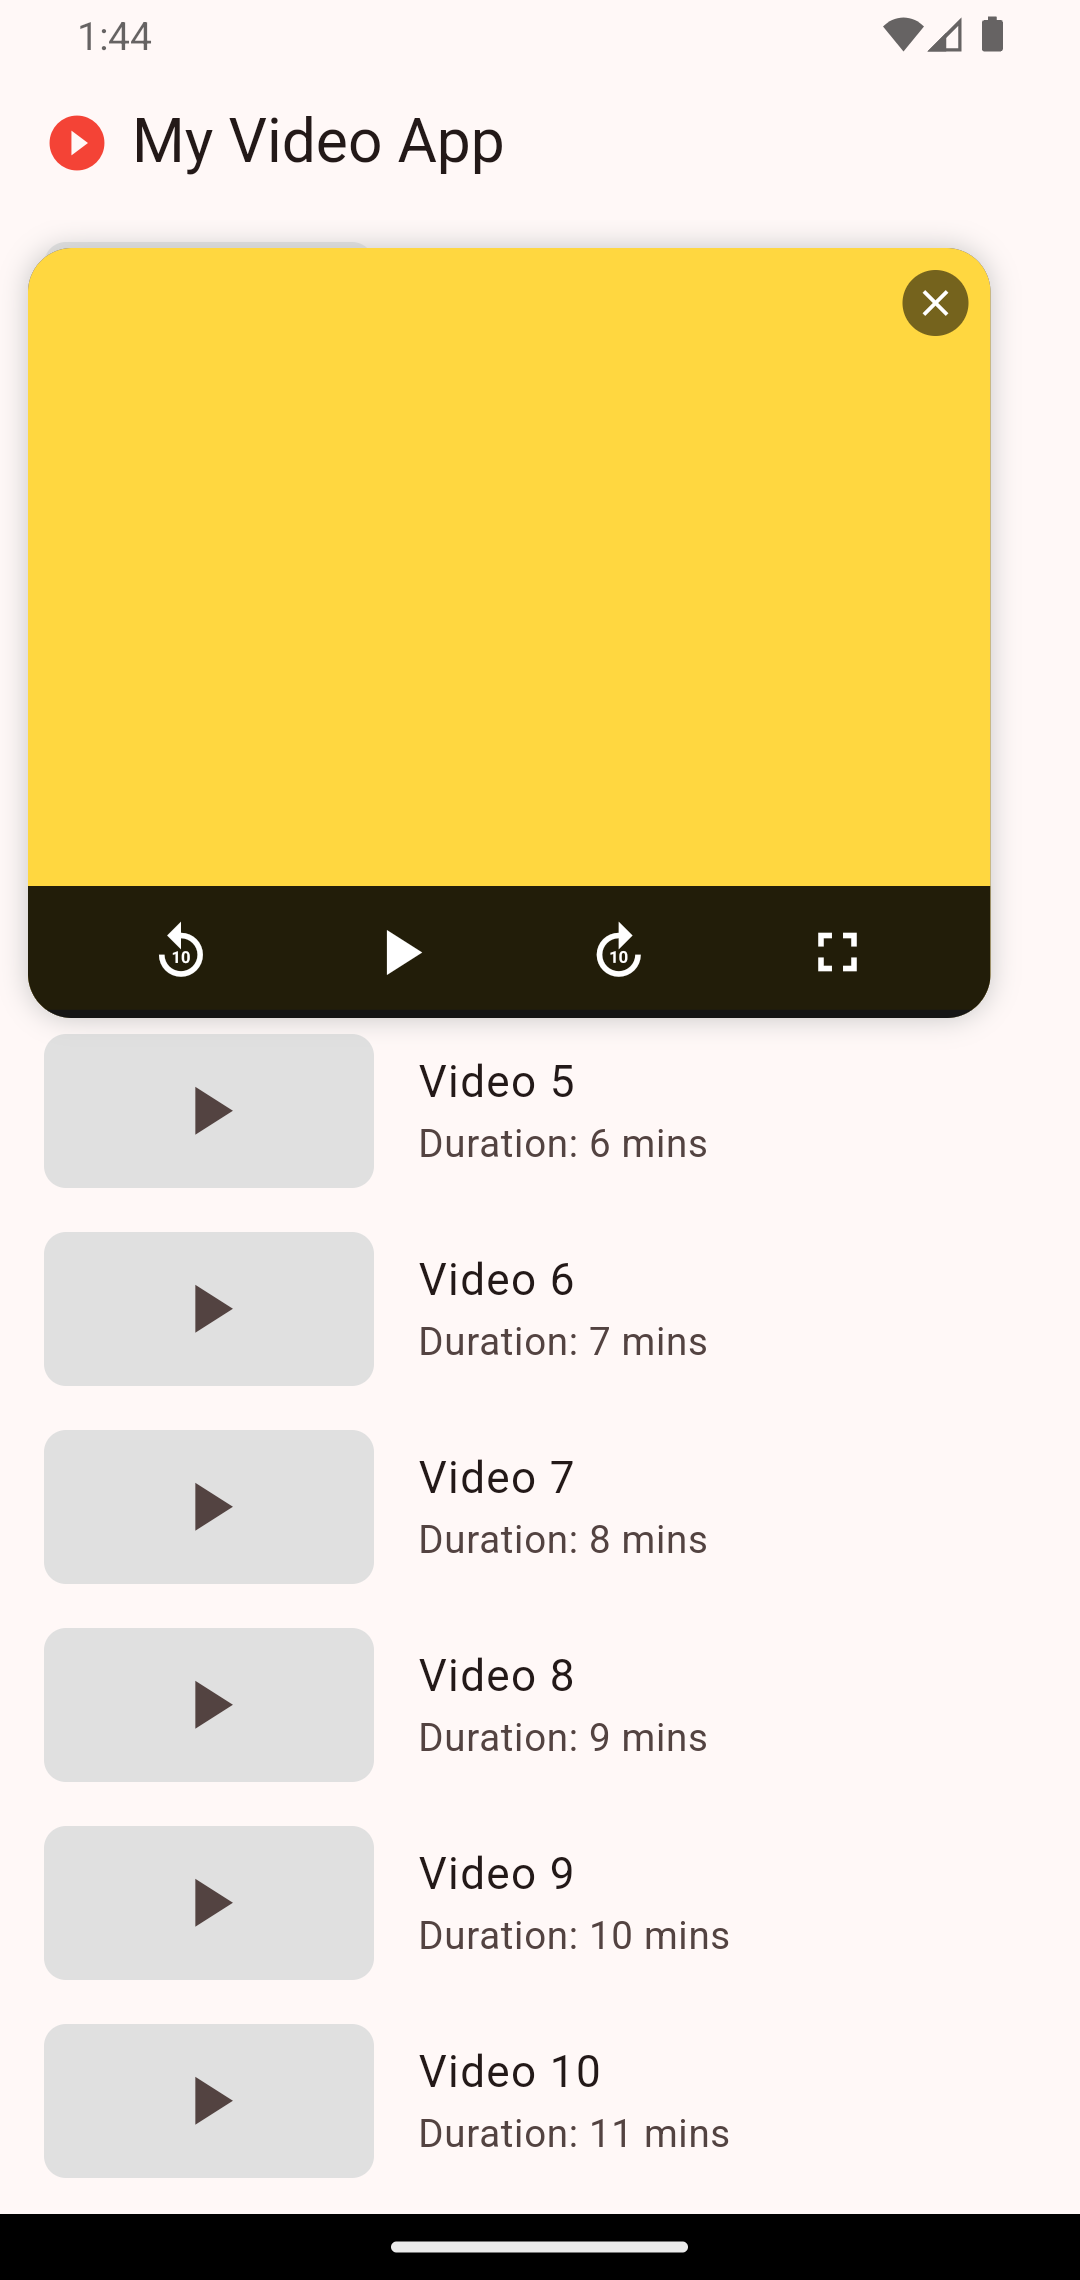 |
✨ Features
- 🎮 Fully Draggable Drag the mini player anywhere on the screen
- 📌 Smart Edge Snapping Automatically snaps to the nearest edge when released
- 🔄 Expandable View Tap to expand/collapse for more details and controls
- 🎨 Highly Customizable Customize colors, sizes, animations, and more
- 🧩 Universal Component Can display any content (videos, images, maps, etc.)
- 🎛️ Custom Controls Add your own playback controls
- 📱 Responsive Design Works on all screen sizes
- 🔄 Smooth Animations Beautiful transitions between states
- 🎯 Intuitive Gestures Natural interaction patterns
📦 Installation
Add the package to your pubspec.yaml:
dependencies:
  floating_window: ^latest_version
dependencies:
  flutter pub get
🚀 Usage
Import the package:
import 'package:floating_window_plus/floating_window_plus.dart';
class _MyWidgetState extends State<MyWidget> {

  /// Controller
  final PipController _pipController = PipController();
  /// ...
}
Add the PipPlayer to your widget tree, typically inside a Stack:
@override
Widget build(BuildContext context) {
  return Scaffold(
    body: Stack(
      children: [
        // Your main content here
        ListView(...),

        // PiP player
        PipPlayer(
          controller: _pipController,
          content: YourVideoWidget(),
          isPlaying: _isPlaying,
          onPlayPause: () => setState(() => _isPlaying = !_isPlaying),
        ),
      ],
    ),
    floatingActionButton: FloatingActionButton(
      onPressed: () => _pipController.toggleVisibility(),
      child: Icon(Icons.picture_in_picture_alt),
    ),
  );
}
Customization
- You can customize the appearance and behavior of the PiP player by passing a
PipSettingsobject to the controller:
final PipController _pipController = PipController(
  settings: PipSettings(
    collapsedWidth: 200,
    collapsedHeight: 120,
    expandedWidth: 350,
    expandedHeight: 280,
    borderRadius: BorderRadius.circular(16),
    backgroundColor: Colors.indigo,
    animationDuration: Duration(milliseconds: 400),
    animationCurve: Curves.easeOutQuart,
  ),
);
Advanced Usage
- For more control, you can provide custom controls and callbacks:
PipPlayer(
  controller: _pipController,
  content: CustomContent(),
  customControls: YourCustomControlsWidget(),
  onTap: () {
    // Custom tap behavior
  },
  onClose: () {
    // Custom close behavior
    _pipController.hide();
  },
);
Enable or Disable Snaps the PiP player to the nearest edge of screen of body
final PipController _pipController = PipController(isSnaping: true);
Using the Controller API
- The
PipControllerprovides several methods to control the PiP player programmatically:
// Show the PiP player
_pipController.show();

// Hide the PiP player
_pipController.hide();

// Toggle visibility
_pipController.toggleVisibility();

// Expand the PiP player
_pipController.expand();

// Collapse the PiP player
_pipController.collapse();

// Toggle between expanded and collapsed states
_pipController.toggleExpanded();

// Update settings
_pipController.updateSettings(newSettings);
Handling Player State
- You can listen to changes in the player's state by using a
ListenableBuilderor by manually adding a listener to the controller:
ListenableBuilder(
  listenable: _pipController,
  builder: (context, child) {
    return Text(_pipController.isVisible ? 'Visible' : 'Hidden');
  },
);

// Or manually:
@override
void initState() {
  super.initState();
  _pipController.addListener(_onPipStateChanged);
}

void _onPipStateChanged() {
  // React to changes in isVisible, isExpanded, etc.
}

@override
void dispose() {
  _pipController.removeListener(_onPipStateChanged);
  super.dispose();
}
Best Practices
- Always dispose of the controller when you're done with it to prevent memory leaks.
- Use the controller to manage the player's state instead of trying to manipulate it directly.
- Consider the user experience when deciding when to show/hide the PiP player.
- Test your implementation on various screen sizes to ensure responsive behavior.
By following this guide and referring to the README, you should be able to effectively integrate and use the Flutter PiP Player in your application. The package provides a flexible and powerful way to implement a YouTube-style floating mini player with custom content and controls.
Example
See the complete example in the example directory for a full implementation.
📄 License
This project is licensed under the MIT License. See the LICENSE file for details.
💬 Contributing
Feel free to submit issues or pull requests. Contributions are welcome!
🌐 Author
Made with ❤️ by Deepak.